Gluten-Free Lemon Meringue Pie

This week, I’m very happy  to welcome back my good friend, Emma, who shares with us a delicious gluten-free version of  the classic Lemon Meringue Pie. So can’t wait to dig into this one!
Enjoy,
Dom

LEMON MERINGUE PIE
By Emma Caperelli Loerky

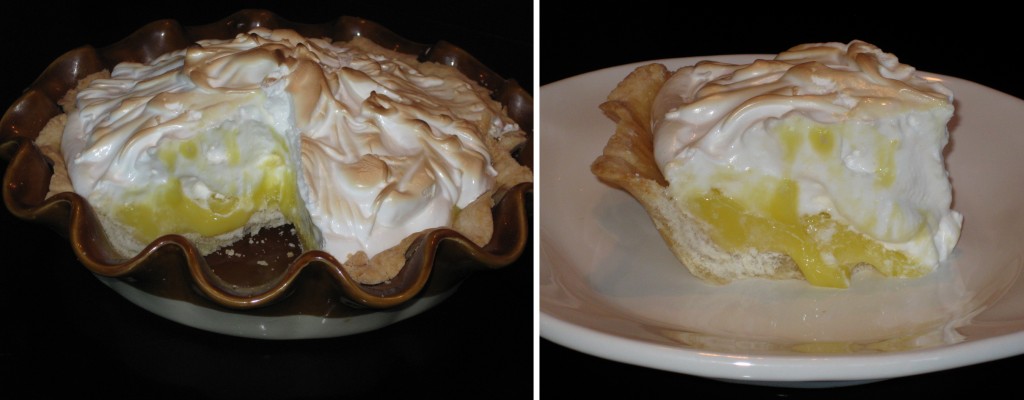
Since Labor Day weekend is almost here, I thought it would be a good time to share one of my family’s favorite gluten-free recipes – Lemon Meringue Pie. Whether you are making burgers, ribs, chicken, or even fish on the grill, the cool tartness of the lemon custard combined with the sweet, fluffy meringue and buttery crust makes this pie the perfect ending to your meal, especially on a late summer day.

This is something that I make throughout the year, not only because my family loves it so much, but also because lemons are always in season. I’m not sure how I’ve made this recipe so many times yet have managed to neglect using Meyer lemons (because how awesome would that be?!). However, I never think twice about making it with just plain old lemons simply because it is always delicious, and neither should you.

Gluten-Free Pie Crust
Adapted from King Arthur Flour

Ingredients:
1 1/4 cups King Arthur Flour Gluten-Free Multi-Purpose Flour
1 tbs sugar
1/2 tsp xanthan gum
1/2 tsp salt
6 tbs cold butter
1 large egg
2 tsp lemon juice or vinegar

Directions:
Preheat oven to 375 degrees.

Whisk together the flour, sugar, xanthan gum, and salt.

Cut the cold butter into pats, then work the pats into the flour mixture until it’s crumbly, with some larger, pea-sized chunks of butter remaining.

Whisk the egg and vinegar or lemon juice together until very foamy. Mix into the dry ingredients. Stir until the mixture holds together, adding 1 to 3 additional tablespoons of cold water if necessary.

Shape into a ball and chill for an hour, or up to overnight.

Allow the dough to rest at room temperature for 10 to 15 minutes before rolling.

Roll the dough out between two pieces of plastic wrap and invert into a pie pan.

Wrap loosely with plastic wrap and place the unbaked pie crust in the refrigerator for at least an hour before baking.

Cut a piece of parchment paper big enough to fit on the bottom of the pie crust. Allow the parchment to extend a little past the sides of the crust (for easy removal). Place pie weights (or uncooked dry beans) on top of the parchment paper, and bake for 25 minutes. Remove the parchment and the weights, and bake for an additional 10 to 15 minutes, or until the crust is a light golden brown. Remove crust from oven and let cool completely.

Lemon Custard
From the magazine, Delight Gluten-Free

Ingredients:
Zest of 4 lemons
3/4 cup lemon juice, strained
3/4 cup sugar
1/2 cup unsalted butter
8 egg yolks

Directions:
Combine lemon zest, lemon juice, sugar, and butter in a saucepan and bring to a boil over medium heat.

Whisk the egg yolks in a bowl until liquid.

Strain the lemon juice/sugar mixture to eliminate the zest, and beat one-quarter of the boiling liquid into the egg yolks.

Over low heat, return the remaining lemon juice liquid to a boil.

Whisk the egg yolk mixture into the boiling liquid and continue whisking until it thickens slightly, about 2 minutes. It may come to a slight simmer, but do not allow the custard to boil.

Pour the lemon into a bowl, press plastic wrap against the surface to prevent a skin from forming and chill for about an hour, or until completely cool.

Pour the chilled lemon custard into the crust.

Meringue
From the magazine, Delight Gluten-Free

Ingredients:
3/4 cup egg whites
Pinch of salt
1 1/2 cups sugar

Directions:
Combine egg whites, salt, and sugar in a medium sized bowl and place over simmering water.

Heat, beating with a whisk, until egg whites are hot (it should feel like hot tap water on your finger) and all of the sugar is dissolved.

Remove from heat to a mixer. Whisk on medium speed until cold and stiff.

Pipe meringue on top of lemon custard. Use a pastry torch to caramelize or put under the broiler for 2-3 minutes until lightly golden brown. Note: I do not have a pastry torch so I just used my oven which works fine. Just be sure to keep a close eye on the pie, as it will burn easily. Two minutes was just enough time in my oven.



Share

Chicken Meatballs

August 22, 2011 Appetizer, Entrees, Menu, Soup 1 Comment

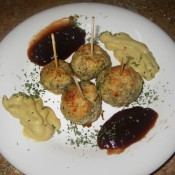
I know what you’re thinking. Has he lost his mind? Is he selling out? In short, no. There are no intentions, on my part at least, to feature chicken meatballs with Sunday Gravy and pasta. Today we’re thinking out of the box, or in this case, the ball. Stay with me on this…

I’ve heard a lot of people talking about chicken meatballs, and it’s always the same story. “They’re not bad, they tasted pretty good. But beef, pork and veal meatballs are much better with Sunday gravy.” Ground chicken, much like ground turkey, is lean and does not render fatty flavor like a traditional beef, pork and veal meatball mixture would. You can season up the turkey and chicken to taste well, but they’re not going to release any natural juices or flavors to enhance a Sunday gravy.

While thinking of how I could prepare and serve chicken meatballs, I immediately thought of our friends who made these incredible turkey burgers. They played up on the turkey concept, using traditional poultry seasoning for flavor, stuffing mixture instead of breadcrumbs for texture, and a slice of cranberry sauce instead of usual condiments like ketchup and mustard. Not only were these burgers off the hook, but you really got to appreciate and enjoy the whole turkey vibe. So that’s what I decided to do with my chicken meatballs – play up on the chicken!

The seasonings that I have listed below are what I traditionally use to season chicken. Penzey’s Bavarian spice mix is one of my favorites to use for seasoning poultry. You can use whatever seasoning that you prefer on your chicken.

How to server the chicken meatballs?

Of course, you can serve chicken meatballs with your Sunday gravy. For those who are looking to serve healthier dishes, chicken meatballs are a good alternative. But again, it’s not for me. Instead, I came up with a few ideas incorporating the flavors of traditional chicken dishes into the chicken meatballs.

I find that the best way to prepare chicken meatballs is to bake them. About 5-10 minutes before they are completely baked, try brushing the meatballs with a bit of barbecue sauce. This will add a nice, tangly glaze to the meatballs. You can also serve them with a side of honey mustard for dipping.

Chicken meatballs are the perfect addition to a chicken broth-based soup. Try adding them to a stracciatella soup with some grated parmesan!

And finally, there is no better dish that comes to mind that would work with chicken meatballs than Grandmom Dora’s Meatball Stew. What better compliment to chicken can you ask for than peas, carrots and potatoes!

I’m sure there are many more combinations that would work well with chicken meatballs. The ball is (literally) in your court….run with it and be sure to let us know what you come up with!

Chicken Meatballs

1lb ground chicken
1 egg, beaten
1 tspn poultry seasoning
1 tspn oregano
1 tspn garlic powder
1 tspn onion powder
1 tspn thyme
1 tspn parsley
1/2 cup stuffing mix
1/2 cup pamesan cheese

In a large bowl, mix all ingredients together. Shape into balls, place on a baking dish, spray with cooking spray, bake uncovered at 375º for 35-40 minutes until golden brown.

Share

Bow Tie Pasta with Spinach and Salmon in White Wine Sauce

August 16, 2011 Menu, Pasta No Comments

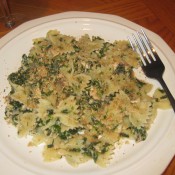
Heavy winds, nasty rain and a bit of Sunday laziness kept me from my usual summer grilling this past weekend. The trade-off was that I was able to spend some quality time in the kitchen preparing a couple of meals for the week. We were in the mood for fish, but I wanted to get a little pasta going as well. I decided to saute some spinach and salmon in white wine sauce, and mix it with bow tie pasta. The dish was quick and delicious…the perfect cure for a blah-zy Sunday afternoon!

Bow Tie Pasta with Salmon And Spinach in White Wine Sauce

1 lb bow tie pasta
1 box frozen chopped spinach, thawed and strained
2 6-oz salmon fillets
4 tablespoons butter
2 shallots, chopped
1/4 cup white wine
olive oil (to drizzle on salmon)
juice of 1 lemon
salt and pepper to taste
reserved pasta water (about a half cup or so)
breadcrumbs and parmesan cheese for topping

1. Season the salmon with some salt. pepper, lemon juice and olive oil. Place salmon in a foil-lined baking dish, bake at 375º for about 30-35 minutes, until flaky. Remove from oven, flake and set aside.

2. Bring a large pot of water to a boil. Just before you’re ready to add the pasta to the boiling water, melt the butter in a large pan over medium heat. Add the pasta to the boiling water.

3. Add the shallots to the butter, stir. Let simmer until translucent, for about a minute. Next, add the wine to the butter and shallots, stir. Let simmer for a few minutes, to allow the alcohol to burn off.

4. Add the chopped spinach and flaked salmon to the wine sauce, mix well. Most of the wine sauce will be absorbed. Season with salt and pepper to taste. Keep warm in pan until pasta is al dente.

5. Remove pasta from water, reserving about a half cup or so of pasta water. In a large bowl, toss the pasta with the salmon and spinach mixture. Slowly add a bit of the pasta water, one ladle at a time, to your liking.

6. Plate the pasta, top with some breadcrumbs and parmesan cheese.

Serve with crusty Italian bread and white wine!

Share

Grilled Bananas and Peaches with Caramel Sauce

August 10, 2011 Dessert, Menu No Comments

Grilling fruit is a fun and delicious way to prepare dessert in the summertime. It’s also a nice way to impress your guests without much effort! Bananas and peaches are my usual go-to grilling fruits, and my friend Jay also does grilled pineapple. Preparation is simple and grilling time only takes a few minutes.

First thing you want to do is clean your grill of all charred food remnants, so that you’re cooking on a clean surface. I suggest using a gas grill instead of a charcoal grill. I’ve had fruit grilled on both, and the charcoal grills tend to leave a smokey taste to the fruit.

Preparing the fruit is very simple. First you want to slice the fruit.
• For the bananas, you’ll want to slice the banana in half, length-wise. You can then cut the two pieces in half, to get 4 equal parts. Do not remove the banana from the peel.
• For peaches, slice in half and remove pit.
• For pineapple, remove the skin, then cut down to 1″ thick slices (you can serve the slices as whole or half).

Next, you’ll want to season the fruit. I like to sprinkle some brown sugar and cinnamon on the cut side of the fruit. You can also brush with melted butter or honey to sweeten it up a bit, but I prefer the brown sugar and cinnamon on their own. You’ll want to do this about 5 minutes before grilling, so that the seasoning settles into the fruit.

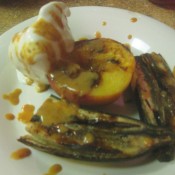
Now you’re ready for grilling. Preheat the grill and be sure to use some non-stick spray on the grates. Place the fruit cut-side down for about 4 minutes, until the fruit starts to get slightly charred. If doing pineapple, you can cook each side for 4 minutes. Remove the fruit, plate it grilled side up, serve with a scoop of vanilla ice cream. Magic!

If you REALLY want to wow and impress your guests, add a drizzle of home made caramel sauce to this already elegant dish. Yes, I said HOME-MADE CARAMEL SAUCE. Sounds intricate and impressive, but home made caramel sauce is incredibly easy to make. It also makes for a good parlor trick when you’re hosting. “Hey, you know what would go really good with this? Home made caramel sauce! Give me a few minutes, and I’ll be right back…” I’m telling you, your guests will be talking about this for years to come. The ingredients are very simple: sugar, heavy whipping cream and butter. And the best way to remember the measurements is by the 1:1:1 ratio. In other words, you’re using equal parts sugar, heavy whipping cream and butter, depending on how much you need to make.

Heat up the sugar in a pot over medium heat, until it dissolves, stirring occasionally (you can add a tablespoon of water to it to help it along). Be very careful while doing this. Hot sugar will not only burn you, it will also stick to your skin. Once it dissolves, it turns into a beautiful amber-colored syrup. Remove from the heat, carefully add the cream and whisk. The cream will start to boil at contact. Whisk until combined, add butter and continue to whisk. Once combined, let cool for a few minutes, the serve. The caramel will keep for about a month when covered tight and placed in the refrigerator.

DON’T FORGET TO ADD A LITTLE CAPTAIN TO YOUR CARAMEL!
Cooking with spirits is always a fun and easy way to add flavor and a little kick to your dish. Captain Morgan’s Spiced Rum is the perfect compliment to home made caramel sauce. For the adult crowd, whisk in a splash or two (to your liking) just as the caramel starts to cool. If you’re looking to cut back on the alcohol kick, heat up the spiced rum in a pan to cook off the alcohol. Not only will the addition of the spiced rum accentuate the taste of the grilled fruit, it also makes for the perfect topping for ice cream, pound cake, cheese cake, cinnamon buns, bread pudding…you name it!

Share

Recent Comments

Archives

powered by
Socialbar