Home » Guest Bloggers » Recent Articles:

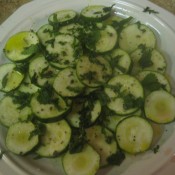
Zucchini Carpaccio

This week, health and wellness expert Joe Sammartino shares with us an incredibly simple recipe for zucchini squash. By using just a handful of everyday ingredients, the end result is a delicious and fresh-tasting zucchini salad that is packed with lots of healthy benefits. I have tried this dish and have to agree with Joe…it is unbelievably tasty! You can take it a few steps further than the recipe below by adding crushed red pepper for spice, or fresh shaved parmesan for a beautiful accent. You can also substitute lemon or lime juice for the red wine vinegar if you wish. Try it first as is, then adjust to your liking. If you like zucchini, you’ll love this dish!

ZUCCHINI CARPACCIO
Submitted by Joe Sammartino

Here is something you can do to spice up some summer squash First off it is high in vitamins and minerals. It’s high in vitamin A (for eye site), vitamin C (for tissue growth and repair), Riboflavin (for red blood cell production), and Manganese (for immune system). Just some nutrition info!!

Ingredients:
3 zucchini squash
2 tbspn olive oil
1 tbson red wine vinegar
salt and pepper to taste
2 tbspn chopped fresh mint

Directions:
Take a serrated knife to thinly slice 3 zucchini lengthwise. Arrange slices on a salad plate; drizzle on 2 tablespoons of olive oil and 1 tablespoon red-wine vinegar, and add salt and pepper to your taste. Sprinkle with 2 tablespoons chopped fresh mint. Let the slices marinate about 20 min at room temp before serving.

This will make 4 servings.

I have had Zucchini so many ways but, this was tasty.

Share

Gluten-Free Snickerdoodle Cookies

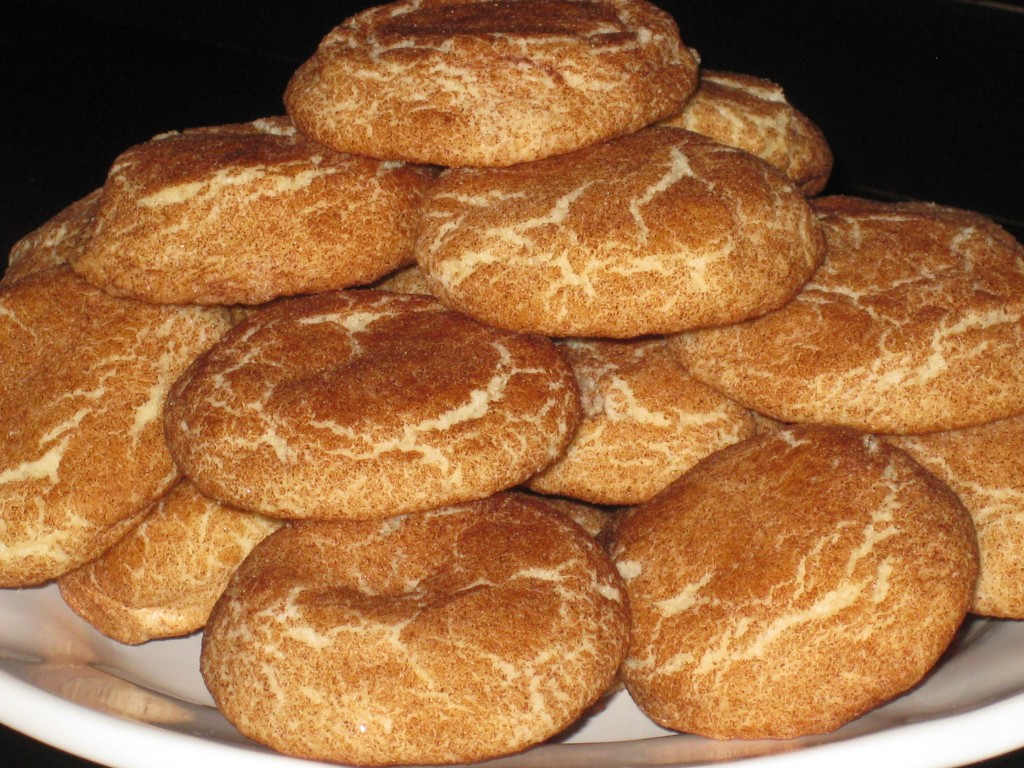
We’re heading into the home-stretch of the holiday madness. But there is still some time to get your cookie-baking on! And thanks to my fellow foodie, Emma Caperelli Loerky, we have a great recipe for Gluten-free Snickerdoodle Cookies! These look just like the snickerdoodle cookies that my Grandmother used to make, so I am sure that Emma’s recipe is sure to please!

GLUTEN-FREE SNICKERDOODLE COOKIES
By Emma Caperelli Loerky 

While deciding which recipe I should share with you all next, I realized that not only has it been about 3 months since my last post (how did that happen?!), but it has also been quite some time since I shared a gluten-free recipe with you. So, I suppose it is only fair that my next recipe be GF. Which, by the way, is very convenient since I just baked up a fresh batch of gluten-free Snickerdoodle cookies for my husband.

I adapted this recipe from here: http://www.bakerella.com/snickerdoodle-duo/. I have not tried making the cupcakes gluten-free…yet. I promise to report back if/when I get the chance. In the meantime, you will be happy to know that these cookies turned out great and are super easy to prepare – which is a good thing because I have a feeling my husband is going to be requesting them often.

Makes approximately 20 cookies

Ingredients
1 1/2 cups gluten-free flour mix 

1/2 teaspoon xanthan gum (Note: Check to see if your flour mix includes xanthan and/or guar gum. If so, omit the xanthan gum)

1 teaspoon cream of tartar

1/2 teaspoon baking soda

1/4 teaspoon salt

4 tablespoons unsalted butter, room temperature

1/4 cup shortening

3/4 cup sugar

1 egg, room temperature

1/4 cup sugar

2 tablespoons cinnamon

Directions
Preheat oven to 375 degrees.

Line baking sheet with parchment paper.

In a medium bowl, sift together gluten-free flour, xanthan gum (if using), cream of tartar, baking soda and salt. Or, if you’re like me, place all the dry ingredients in the bowl and whisk together well.

In a mixer fitted with a paddle attachment, cream butter, shortening, and sugar on medium speed for about 2 minutes.

Add the egg and mix until combined.

Add the flour mixture and beat until combined.

Mix sugar and cinnamon in a small bowl.

Use a small 1 1/4 inch ice-cream scoop to form balls and roll it in the cinnamon-sugar until it is coated. If you do not have a small ice-cream scoop, simply use a tablespoon to scoop the dough and gently roll it in the cinnamon-sugar until it is coated and formed in a ball. Place the balls at least 3 inches apart on the prepared sheet to allow room for the cookies to spread. These cookies spread A LOT during baking so be sure to leave ample room.

Bake for about 10 minutes or until the cookies begin to crack.

Remove and let cool on a wire rack.

Share

Amatriciana Sauce

This week I’m highlighting a fantastic post from my favorite fellow food blogger, Una Mamma Italiana. It’s been a while since I’ve had the pleasure to share one of Una Mamma’s recipes with you. What better way to welcome her back to my blog that with a delicious rustic sauce that incorporates pancetta! Check it out and enjoy! And be sure to visit the Una Mamma Italiana for many more amazing recipes!
– Dom

Since I started blogging at Una Mamma Italiana over 3 years ago, I’ve noticed that readers really love the sauce recipes. Whether its my family recipe for Sunday Gravy, Vodka Sauce or Arrabiatta Sauce – these sauces are classics that can usually be made with minimal effort and a big wow factor.

Here is another classic Italian sauce recipe that boasts the amazing flavor of Pancetta! It gets its name from the town of its origin, Amatrice (a super small town in Northern Lazio. We’re talking central Italy, here – the countryside that literally divides the North from the South.) It is a very rustic style sauce.

Pancetta is Italian bacon that is cured with all kinds of salt and yummy spices. It is most often used in recipes for the flavor you get from the fat (who doesn’t love cooking in a good fat!?) on the meat. Some “Med-E-Gones substitute regular bacon in recipes such as these. I guess you could do the same, but then you run the risk of breaking my heart (and the hearts of Italians everywhere).

AMATRICIANA SAUCE
3 TB e.v.o.o.
2 oz. pancetta, finely cubed
1 med onion, minced
1 TB minced garlic
pinch of dried oregano
1 can whole peeled tomatoes, chopped or hand crushed
1/2 tsp (to start) curshed red pepper flakes (adjust to your liking)
1 TB julienned fresh basil leaves
salt & pepper to taste

Start with only 2 TB of the olive oil. Use it to brown the pancetta. Once browned, add the onions and garlic, saute over medium heat until soft. Stir in the oregano, hot pepper flakes, and the tomatoes. Bring it to a boil. Simmer until sauce has thickened a bit (around 30 minutes)

At the end, stir in the basil leaves and add more hot pepper/salt/pepper as needed. Stir in the remaining TB of olive oil until emulsified.

Toss with your favorite pasta and top with lots of yummy grated pecorino romano cheese! (my fav) And MANGIA!!

Share

Honey Fig Gorgonzola & Prosciutto Crostata

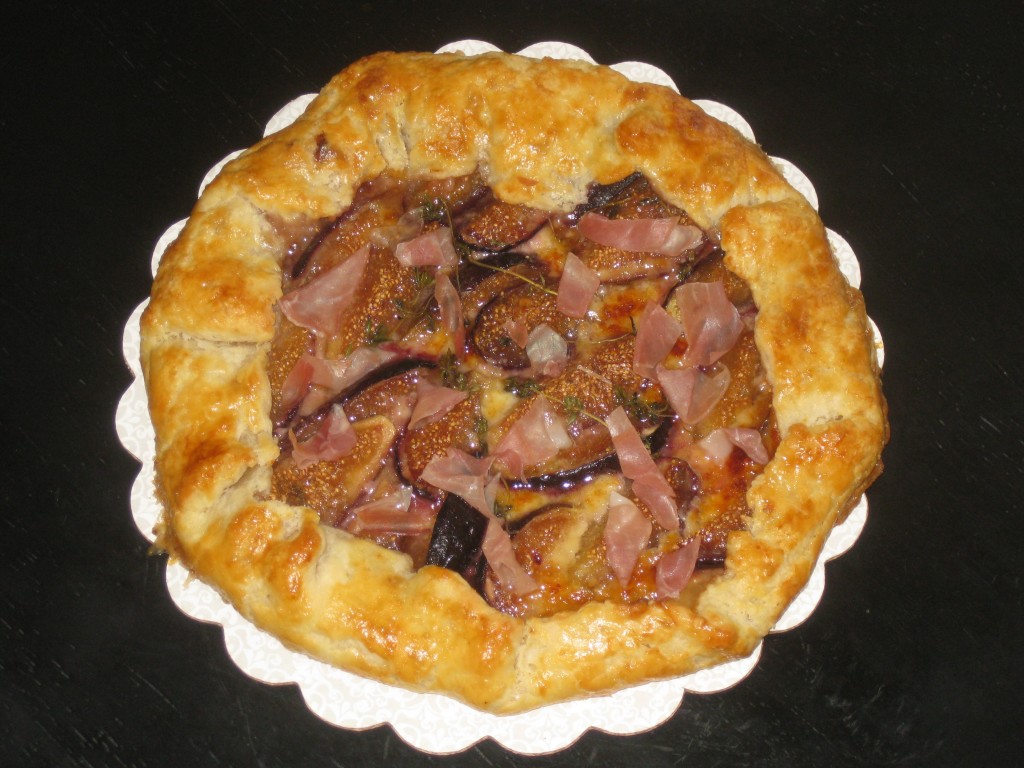
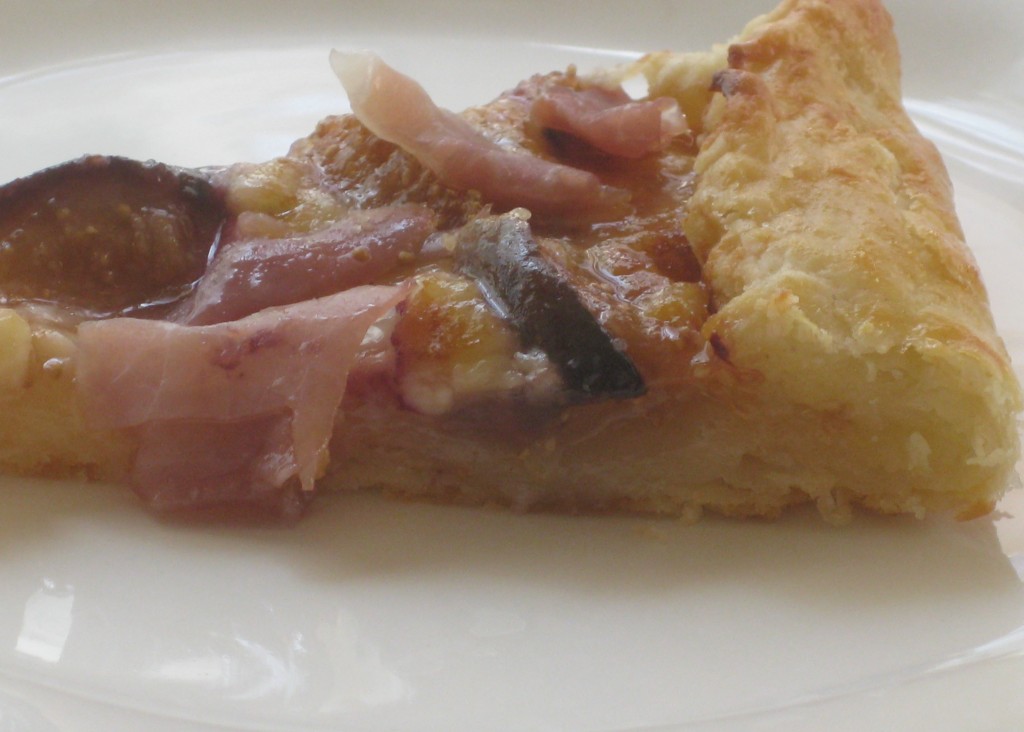
 This week on my blog I’m very excited to share Emma Caperelli Loerky’s recipe for Honey Fig Gorgonzola & Prosciutto Crostata. I’m a big believer that any dish is better when you add some prosciutto. Throw in some figs and gorgonzola too? Fuggetaboudit!!!!! I’m also a huge junkie for Easter Ham Pie, and this dish could be the perfect mid-year counterpart. So when I got Emma’s e-mail with this recipe and photos, I knew this one would be a big hit…and my teasers on Facebook proved just that. Thanks again, Emma, for sharing yet another one of your amazing recipes!

Enjoy!

Honey Fig Gorgonzola & Prosciutto Crostata
By Emma Caperelli Loerky

A few months ago, when fresh figs were just popping up in the markets out here in San Diego, I bought some not knowing what exactly I was going to make with them. After doing some internet research, I came across this recipe:  http://www.whatsforlunchhoney.net/2010/09/honey-figs-gorgonzola-and-prosciutto.html. Next thing you know, I’m making a crostata. I followed the recipe almost exactly for the filling, but, because I was worried about converting the measurements from grams to cups, I used a recipe from Smitten Kitchen for the pastry shell – which was so flaky and buttery that it reminded me of a puff pastry. I don’t know if it was the fancy pastry flour that i subbed for the all-purpose flour, freezing the butter and flour for 30 minutes before assembling the dough, or the addition of sour cream to the recipe (maybe it was a combination of all three?), but this crust was perfect in every way! 

Fast forward to the present. I’m in the market shopping for ingredients to make lunch for a friend who is visiting me with her new, beautiful baby girl and once again there are those figs. So, guess what is on the menu? You guessed it. And the nice thing about this recipe is that it can be eaten right out of the oven, warm or at room temperature. And it reheats well, too. I even assembled it the morning of, loosely wrapped it with plastic wrap and placed the unbaked crostata in the fridge for about 2 hours until just before I was ready to bake it.

If you aren’t a fan of bleu cheese, I’m sure goat cheese would work well or even ricotta. However, if you do use ricotta cheese, I would be sure to strain it through a cheesecloth for at least and hour, as the extra moisture in it could make this delicate crust soggy.

One last thing, it’s difficult to say exactly how many figs you’ll need for this recipe. The original recipe says 5 – 6 figs depending on their size, but you can add as many or as little as you like. I’ve made this recipe twice, both times I used different figs and it turned out well each time. The first time I used Brown Turkey figs, which are large so I only needed about 6 figs. This time I used Black Mission figs, which are smaller than the Brown Turkey variety, so I needed a few more than the last time. 

For the pastry (Recipe for Smitten Kitchen): 

1 1/4 cups all-purpose flour, chilled in the freezer for 30 minutes
(I used King Arthur Flour’s Unbleached Pastry Flour with terrific results)
1/4 teaspoon salt
8 tablespoons (1 stick) unsalted butter, cut into pieces and chilled in the freezer for 30 minutes
1/4 cup sour cream
2 teaspoons fresh lemon juice
1/4 cup ice water

Glaze:
1 egg yolk beaten with 1 teaspoon water

For the filling (Recipe from What’s For Lunch, Honey?):
About 1 to 1 1/2 cups Gorgonzola (or to taste)
5 – 6 figs (or more depending on your taste and the type/size fig you use), cut into quarters or eighths (one again, depending on their size)
2-3 tablespoons mild honey (I found 2 tablespoons to be plenty)
A few sprigs of fresh thyme, removed from the stem.
About 4 ounces Prosciutto (I didn’t want the Prosciutto to be too overwhelming, so I used about 2 slices, and I used scissors to cut it into slivers).


Directions:
Whisk together the flour and salt in a large bowl. Sprinkle bits of butter over dough. Using a pastry blender, cut it in until the mixture resembles coarse meal, with the biggest pieces of butter the size of tiny peas. In a small bowl, whisk together the sour cream, lemon juice and water and add this to the butter-flour mixture. With your fingertips or a wooden spoon, mix in the liquid until large lumps form. Pat the lumps into a ball; do not overwork the dough. Cover with plastic wrap and refrigerate for 1 hour, or you can refrigerate the dough overnight (as I did). If you do make the dough ahead of time, be sure to allow the dough to sit out at room temperature for a few minutes before you roll it out.

Preheat oven to 400 degrees. On a well-floured work surface, roll the dough out into a 12-inch round. Transfer to an ungreased baking sheet (or, as Smitten Kitchen recommends, use parchment paper. It makes it much easier to move the crostata from the baking sheet onto a plate after baking). Sprinkle the Gorgonzola evenly onto the bottom of the dough, leaving a 2 inch border. Place the figs on top of the cheese. Drizzle with the honey and sprinkle with the fresh thyme leaves. Fold the edges over the filling and pleat it as you go along to allow the dough to fit, and creating a crust for the crostata. Brush the crust with the egg yolk mixture.

Bake the crostata until it is golden brown, about 25 – 30 minutes. Please note:  The original recipe for the pastry says 30 – 40 minutes, but in my oven it was done after approximately 30 minutes. I recommend you watch the dough carefully after the first 20 minutes. When finished baking, sprinkle the crostata with the Prosciutto, and let it sit for 5 minutes before transferring to a plate. Serve hot, warm or at room temperature.
Share

Recent Comments

Archives

powered by
Socialbar