Home » Appetizer » Recent Articles:

Cheesesteak Egg Rolls
January 5, 2014 Appetizer, Entrees, Menu No Comments

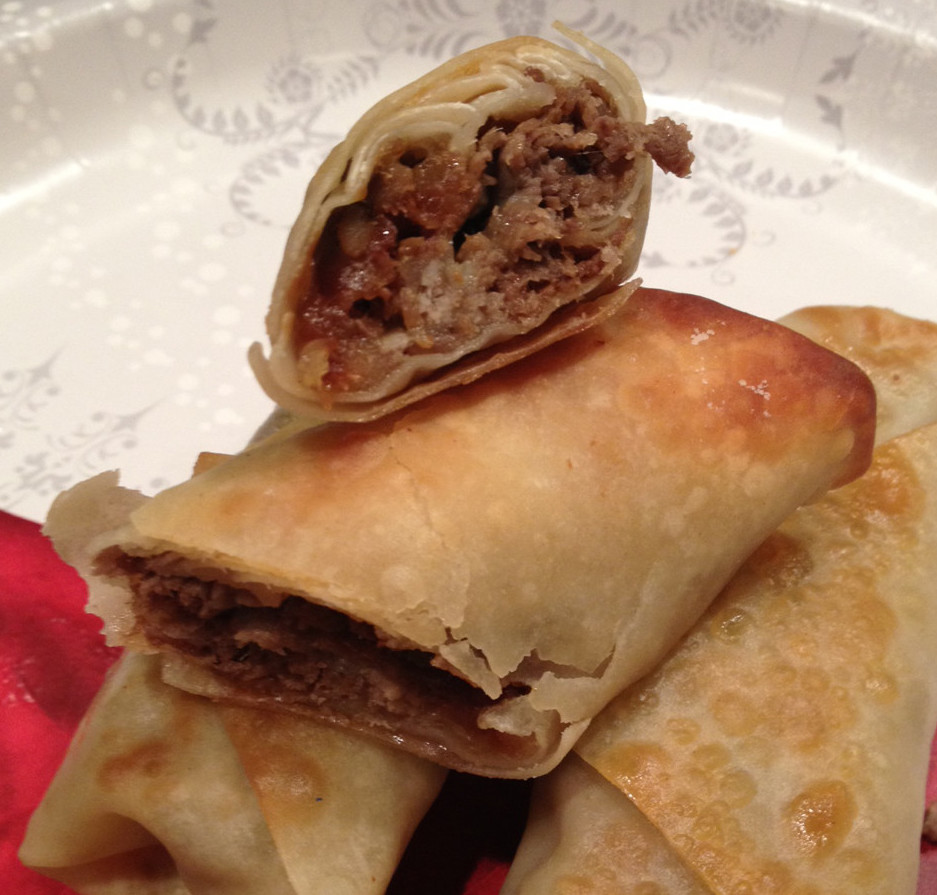
Being born and raised in South Philly, it was only a matter of time before I put together a dish inspired by our flagship sandwich, the coveted South Philly Cheesesteak. My in-law’s annual New Year’s Eve party was the perfect opportunity to do so. While there is never a shortage of good food at our family parties, I wanted to contribute something special and unique to help ring in the new year. I came up with a tasty South Philly-inspired appetizer …a cheesesteak egg roll.

Although the idea of a cheesesteak egg roll is not completely original (you can occasionally find them on restaurant menus), my recipe was totally off the cuff, inspired by the traditional tastes and ingredients of a true South Philly Cheesesteak. Just four basic ingredients – steak, provolone cheese, onions and egg roll wrappers – were the perfect combination. To help bring a sweeter, robust taste to the cheesesteak, I used caramelized onions in place of the traditional fried onions. You need a good 45 minutes to an hour to caramelize onions, so you’ll want to do this step a day or so in advance. I also used shredded provolone cheese in place of traditional sliced cheese (or, cheese whiz for some hard-core cheesesteak fans), and folded it along with the caramelized onions into the cooked steak, so that you get the full taste and flavor in every bite. I also baked the egg rolls instead of the traditional frying method. The steak, cheese and onion combination will create enough of their own oils within the egg roll, so there is no need to fry them in additional oil.

I’m very happy to say that the egg rolls were a big hit with everyone, and I’ve even gotten requests for a buffalo chicken cheesesteak version for my brother-in-law’s birthday. You can look for that follow-up post in another month or so. In the meantime, be sure to give my cheesesteak egg rolls a try. They’re an easy, delicious and filling snack food…perfect for your upcoming game day parties!

Ingredients:
(makes 20 egg rolls)
1.5 lbs thinly sliced rib eye or top round steak (if you cannot make it to your butcher shop, frozen steak sandwich meat such as Steak-umm will work)
4-5 onions, caramelized. You’ll want to do this a day or so ahead of time. Recipe below.
2 cups shredded provolone cheese
1 pack of egg roll wrappers (found in the produce section of your super market)
Salt and pepper
Olive oil

Directions:
Heat a skillet over medium heat. Add the steak to the pan, a few slices at a time. Add a little bit of water to the pan while cooking the steak. You want to make sure that the steak does not dry out while cooking. Just as the steak starts to brown, chop it in the pan and season with a bit of salt and pepper. Chop and flip the steak until fully browned, then remove and set aside. When the steak is cooled a bit, mix well with the onions and shredded cheese. You don’t want to add the steak mixture to the wrappers when the mixture is hot. It will soften up the wrappers and make it difficult to assemble.

*NOTE – full assembly instructions are included with the wrappers. You can also follow the step-by-step photos below.

Pre-heat oven to 400˚. Place an egg roll wrapper on a clean, flat surface, endpoints at the top and bottom (diamond shaped). Add one tablespoon of the steak mixture to the middle of the wrapper. Fold the bottom portion of the wrapper over the meat filing, then fold the left and right sides over, then gently roll it 3/4 of the way. Moisten the top corner of the wrapper with a bit of water (as if you were sealing an envelope), then fold it and seal it. Repeat steps with remaining wrappers.

Spray a baking sheet with non-stick cooking spray. Place the egg rolls seam-side down onto the sheet. Lightly brush the top of the egg rolls with olive oil. Bake for 10-12 minutes.

Serve immediately and enjoy.

You can also bake these ahead of time, and warm them up again for about 5-7  minutes.

eggroll_steps

The basic steps on how to fold an egg roll wrapper.


CARAMELIZED ONIONS
(courtesy of SimplyRecipes.com)

Ingredients:
Several medium or large onions, yellow, white, or red
Olive oil
Butter (optional)
Salt
Sugar (optional)
Balsamic vinegar (optional)

Slice off the stem ends of the onions and place them cut side down on the cutting board. Cut them in half through the root end. Peel the onions. Lay them cut side down and make angled cuts into each onion, aimed at the center, cutting almost all the way, but not completely through the root end.  Make the cuts to your desired level of thickness. The root end will help hold the onion together as you cut it, making it easier to cut. Then cut a V in the root end to cut out the tough root holding the slices together.

Use a wide, thick-bottomed sauté pan for maximum pan contact with the onions. Coat the bottom of the pan with olive oil, or a mixture of olive oil and butter (about 1 teaspoon per onion). Heat the pan on medium high heat until the oil is shimmering. Add the onion slices and stir to coat the onions with the oil. Spread the onions out evenly over the pan and let cook, stirring occasionally. Depending on how strong your stovetop burner is you may need to reduce the heat to medium or medium low to prevent the onions from burning or drying out. After 10 minutes, sprinkle some salt over the onions, and if you want, you can add some sugar to help with the caramelization process. (I add only about a teaspoon of sugar for 5 onions, you can add more.) One trick, by the way, to keeping the onions from drying out as they cook is to add a little water to the pan.

Let cook for 30 minutes to an hour more, stirring every few minutes. As soon as the onions start sticking to the pan, let them stick a little and brown, but then stir them before they burn. The trick is to let them alone enough to brown (if you stir them too often, they won’t brown), but not so long so that they burn. After the first 20 to 30 minutes you may want to lower the stove temperature a little, and add a little more oil, if you find the onions are verging on burning. A metal spatula will help you scrape up the browned bits from the bottom of the pan as the caramelization proceeds. As the onions cook down, you may find you need to scrape the pan every minute, instead of every few minutes. Continue to cook and scrape, cook and scrape, until the onions are a rich, browned color. At the end of the cooking process you might want to add a little balsamic vinegar or wine to help deglaze the pan and bring some additional flavor to the onions.

Store refrigerated for several days in an air-tight container.

Share

Crostini: The Perfect Party Appetizer

December 29, 2013 Appetizer, Menu No Comments

If you’re looking for a simple and impressive appetizer for your New Year’s Eve house party, or if you want to look like a gourmet, rock-star guest at someone else’s house party, crostini is the perfect dish to serve. With just a few basic ingredients, many of which you probably already have in your kitchen, you can prepare and serve a variety of crostini in under 20 minutes. If you’re planning to make crostini for another person’s house party, you’ll want to bring all ingredients with you and prepare it while you’re there. Check with your host ahead of time to see if they have olive oil, grated parmesan cheese and salt and pepper on hand for you to use (you’ll only need a bit of each). If they don’t, be sure to let them know that you’ll supply it…and then leave whatever is unused at your host’s house as a token of appreciation for them allowing you to use their kitchen.


Ingredients:
1 long, thin loaf of crusty bread, preferably a baguette
1 ball fresh mozzarella (do not use the bagged shredded cheese)
6-8 pieces of thin-sliced prosciutto (the pre-packaged variety will work for this in a pinch)
1 small jar bruschetta topping
olive oil
grated parmesan cheese
salt
pepper

Directions:
Preheat oven to 350º. Slice the baguette into 1/2″ slices. Place the slices on a baking sheet. Lightly drizzle the slices with olive oil, then sprinkle with a light amount of salt and pepper (do not add salt to the pieces that you will be topping with prosciutto, there is enough salt in the meat). Use any combination of thin slices of the mozzarella, pieces of the prosciutto (about 1/4 of a slice of prosciutto for each piece of bread will be plenty), a spoonful of the bruschetta topping and the parmesan cheese to assemble a variety of crostini. I like to top some with the prosciutto and mozzarella, some with the bruschetta and parmesan, and some with just the parmesan and an additional drizzle of olive oil. You can also add some garlic powder for additional taste. Bake the crostini for about 8-10 minutes, until the bread is toasted and the toppings are heated but not burned.

Serve immediately and enjoy!

Share

Kale Salad with Cannellini Beans, Gorgonzola and Balsamic Bacon Vinaigrette

November 7, 2013 Appetizer, Entrees, Menu, Salads No Comments

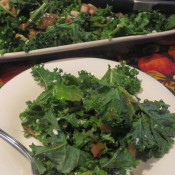
If you’re a follower of healthy food trends, I’m sure you’ve come across quite a few recipes that use kale. If you are not familiar with kale, it is one of the latest and greatest super foods, loaded with vitamins, minerals and nutrients. Because it has risk-lowering benefits for various forms of cancer, and also has cholesterol-lowering, anti-inflammatory, antioxidant and cardiovascular benefits, kale is being enjoyed not only as an edible green, but also as an ingredient in protein shakes and body-cleansing juices. I’ve only recently been introduced to kale, served by my brother and his wife as a salad mixed with quinoa, and have since been inspired to try out my own version of a mixed kale salad.

Because kale has a very thick and firm texture, it is often recommended to cook it before serving, to help soften it a bit for easier digestion. Many health food sites recommend steaming it for 5 minutes, for maximum nutrition and flavor. You can also sauté it as you would spinach or other greens. You can, of course, serve it raw, as I do in the recipe that follows. To help soften the leaves and make them easier to digest as a raw salad, you want to thoroughly wash the leaves in warm to hot water for at least 5 minutes, making sure to rub away any grit or dirt. You then want to rinse the leaves again in cold water. This method is called massaging. Remove any thick pieces from the kale, then shred or chop the remaining leaves. You can then add your additional ingredients, then toss with a salad dressing.

My mixed kale salad included the following ingredients. You can add whatever amount you prefer:

• white cannellini beans;
• grape tomatoes;
• crumbled gorgonzola cheese;
• fresh bacon bits; and
• home made balsamic bacon vinaigrette dressing (recipe below).

Obviously, the bacon vinaigrette may not be the first choice for a healthy salad, but I was looking to make it a bit more hearty and flavorful. You can substitute it with a lighter dressing, such as a fresh citrus vinaigrette, if you wish.

For more ideas on how to prepare and serve kale, check out the following links:
whfoods.com
cookinglight.com

Balsamic Bacon Vinaigrette Dressing
(Courtesy of finecooking.com)

2 slices bacon, cut into 1/4-inch dice
1 small shallot, minced
1-1/2 Tbs. balsamic vinegar
1 Tbs. fresh lemon juice
1/4 tsp. Dijon mustard
3 Tbs. extra-virgin olive oil
Kosher salt and freshly ground black pepper

In a small (1-quart) saucepan over medium heat, cook the bacon, stirring occasionally, until crisp and golden, about 5 minutes. With a slotted spoon, transfer the bacon to a dish lined with paper towels, leaving the bacon fat in the pan. Add the shallot to the bacon fat and cook, stirring occasionally, until softened, 1 to 2 minutes. Add 1 Tbs. of the vinegar and scrape the bottom of the pan with a spoon to dissolve the browned bits stuck to the pan bottom. Off the heat, stir in the remaining 1/2 Tbs. vinegar, the lemon juice, and the mustard. Gradually whisk in the olive oil (don’t worry if the sauce doesn’t emulsify). Season with 1/4 tsp. salt and 1/8 tsp. pepper, or to taste.

Share

Grilled Cinnamon Sweet Potato Chips

August 1, 2013 Appetizer, Entrees, Menu No Comments

There is nothing more rewarding about summer cook-outs than to be able to prepare your entire meal, start to finish, on the grill. One of my favorite side dishes that I like to make on the grill – whether I’m serving chicken, meat or fish – is a good, old-fashioned sweet potato. Now, if you’ve cooked sweet potatoes on the grill, you know that a little extra time and patience is needed. Just as if you were baking them in the oven, you are sure to be looking at a good 30-45 minutes before the potatoes are perfectly cooked and are ready to eat.

To cut back on some of cooking time, I came up with a little trick that I now use whenever we are planning to grill sweet potatoes. By slicing the potatoes first, then tossing the slices with some olive oil and spices, you end up with delicious, crispy sweet potato chips. They are easy to prepare, cook within 15 minutes, and they are a fun dish that even your kids will enjoy. I prefer using spices and flavors that really enhance the natural taste of a sweet potato – cinnamon, brown sugar and a little maple syrup are what I like best. You can serve them along side a main course, or enjoy them on their own as a crispy grilled snack!

Grilled Cinnamon Sweet Potato Chips
Makes approx. 2-3 servings

2 nice-sized sweet potatoes, scrubbed (peeled or unpeeled, your preference)
Extra virgin olive oil
1 tbspn brown sugar
1 tspn cinnamon
1/2 tspn salt
2 tbspn maple syrup

You will also need a lightly sprayed grilling basket or a grill pan, just as I suggested using in my Grilled Tomato Basil Salad recipe.

Preheat your grill to medium-high heat.

Using a sharp knife, carefully slice the sweet potatoes into thin slices, about 1/8″-1/4″ thick (you do not want them to be paper-thin). Place the sliced potatoes into a large bowl. Drizzle the slices with olive oil, enough to lightly coat each of the slices. Add the brown sugar, cinnamon and salt; stir well. Drizzle the mixture with the maple syrup; stir well again.

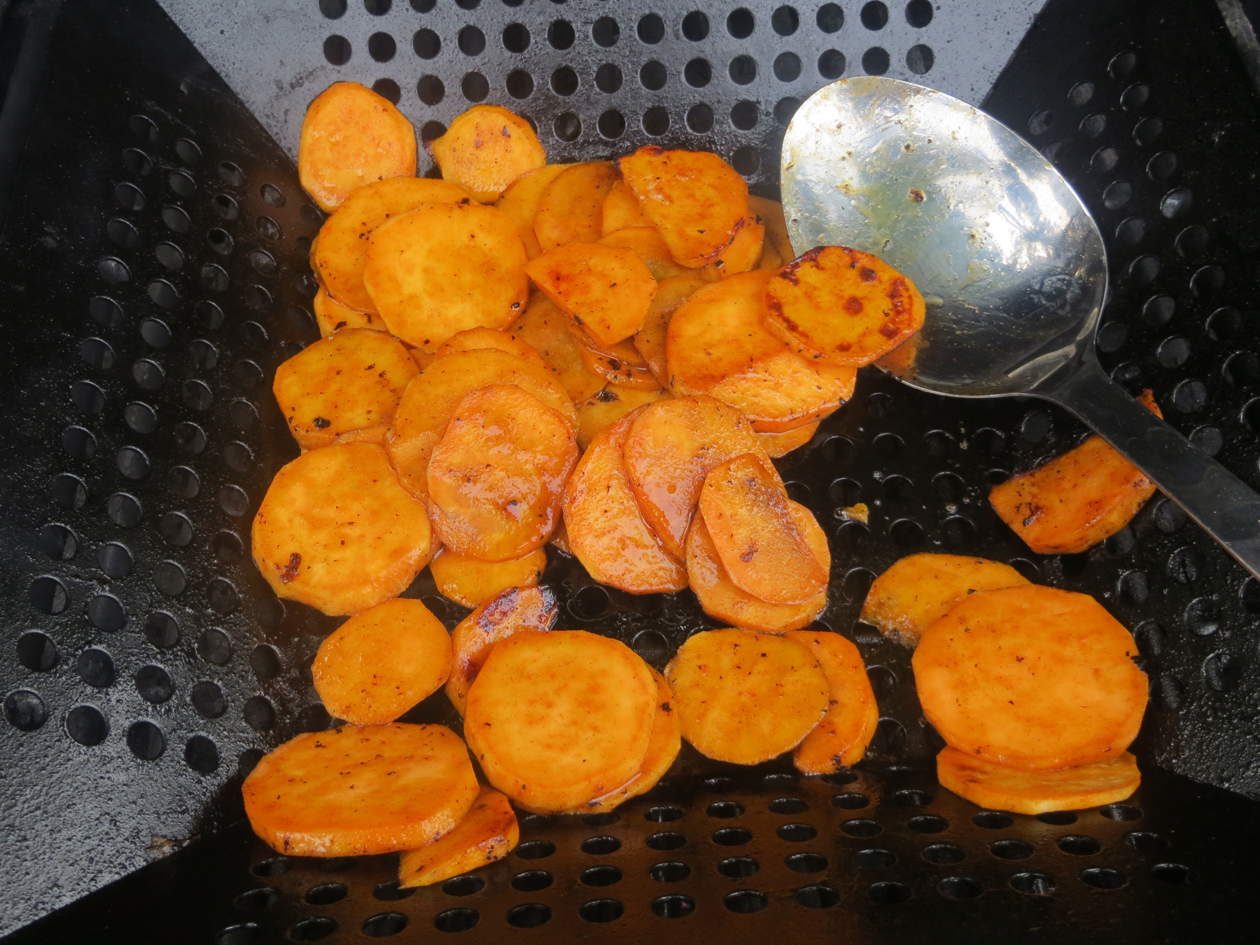
Place the grilling basket or pan onto the grill over direct heat. Carefully pour the chips into the basket, stir well using a wood or metal spoon or spatula. Close the grill lid, but check and stir frequently to avoid the chips from burning. Once the chips start to brown and blister, carefully move the basket to an indirect heated area of the grill. Continue to cook and stir until the chips are evenly cooked and slightly crispy, (approximately 10-15 minutes total cooking time). Carefully remove the chips from the basket with a spoon. Plate and serve.

Be sure to use a grilling basket to help evenly cook the potatoes.

Be sure to use a grilling basket to help evenly cook the potatoes.

Share

Recent Comments

Archives

powered by
Socialbar