Home » Appetizer » Recent Articles:

The Mamma Meets the Cucina: COOKING WITH SPIRITS!

So the holidays have come and gone and our liquor cabinets are pretty much cleaned out. But don’t write off those nearly empty bottles yet! With less than a cup of some of the most common spirits, you can have an awesome meal on the table with a huge wow factor. And the Mamma & the Cucina are battling again to show you just how to do it!

Be sure to let us know which spirit YOU prefer to cook with by using our voting poll below. MANGIA!!

FROM THE MAMMA

Sambuca is one of the liquors I remember from my childhood. After dinner my parents and grandparents would have a small glass over ice, or even put some in their coffee. I, personally, never liked the stuff, but I find that the naturally sweet flavor really enhances savory dishes for a sweet & salty effect! Sambuca is often used in cooking with prawns or lamb, but I went with shrimp. So myfood-blogging brain did a little talking with my Italian stomach and I invented the following recipe:

SAMBUCA SHRIMP

INGREDIENTS:
12 shrimp, trimmed & deveined
1 TB olive oil
4 TB butter
3 TB minced shallots
juice of one small lemon
1/4 cup Sambuca
salt, pepper, crushed red pepper to taste

PREPARATION:
Saute the shallots in 1 Tablespoon olive oil and 1 Tablespoon butter until transparent. (You want to sweat the shallots, meaning you cook them without any color or browning). Add in the shrimp and sprinkle with salt, pepper, and plenty of crushed red pepper. Cook for about 1 minute on each side. Remove the shrimp. Add the sambuca and cook for 5 minutes on medium-high heat.

Then add the lemon juice and the remaining TB of butter and simmer lightly until you get kind of a thin glaze. Then, throw the shrimp back in and toss it all together. Turn the heat off (you do not want to overcook the shrimp,a s the heat alone will finish the cooking process). Serve immediately over rice pilaf, or alongside roasted veggies. I served mine with brown rice since we are trying to keep that New Year’s resolution of eating healthy!

FROM THE CUCINA

Of all the liquors that I keep stored in my house (and aside from a variety of rums, there aren’t many others), tequila seems to be the least used. Just a nice margarita on Cinco de Mayo and maybe a grill-out or two is all the time that I usually have for tequila. Yes…my Cuervo ‘shot’ days are way behind me. So when I started to plan for our Cooking with Spirits post, I figured it would be a good time to dust off the tequila bottle and put it to some good use!

This recipe is very simple and only uses a handful of ingredients. The the tequila lime marinade leaves a refreshing, zesty flavor that, although screams for a summer grill-out, can be enjoyed all year round and makes for a terrific party appetizer.

TEQUILA LIME CHICKEN BITES

INGREDIENTS:
6 uncooked skinless chicken tenders, cut into 2″ pieces
1/3 cup silver/white tequila
juice of 4 limes, plus zest of 1 lime
1 tspn honey
1/4 cup chopped cilantro
4 ounces prosciutto, thinly sliced
2 tblspn butter

PREPARATION:
Whisk together the tequila, lime juice, lime zest, honey and cilantro. Place the cut chicken pieces into tequila mixture, let sit in fridge for at least two hours (a plastic baggie works well for this).

Remove chicken from marinade, discard marinade. Quarter each piece of the prosciutto (adjust size accordingly to fit around each chicken strip). Wrap each chicken strip with one piece of the prosciutto and secure with a toothpick.

Melt butter in a pan over medium-high heat. Place the prosciutto wrapped chicken in pan, cooking the chicken evenly on each side, until chicken is fully browned and prosciutto is slightly crisp.

Share

Hot Pepper Salad

December 18, 2011 Appetizer, Menu, Salads 1 Comment

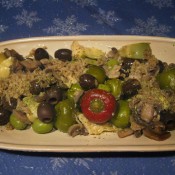
Like the star that led the Wise Men to the stable, it’s the hot pepper salad that leads my family to the table! Hot pepper salad, which is a staple Condo family recipe, has been served at many graduation, confirmation and communion parties, and at every major holiday dinner for as long as I could remember. However, Christmas Eve is the biggest meal that features the hot pepper salad. To this day, I still think back with a warm smile to when I was a child, helping my Grandparents mix up the salad, days before my family all gathered together to celebrate our biggest meal of the year – the Feast of the Seven Fishes. It was also for this meal that we would add one additional ingredient – anchovies (filette di alici) – which would then allow the salad to count as one of the Seven Fishes.


THE INGREDIENTS
Because we would serve the hot pepper salad at the  beginning of our holiday meals, I would classify it as an antipasto. The recipe is very simple, consisting of just six basic ingredients.
Equal parts of the following:
• cherry peppers, stems removed
• jumbo pitted black olives
• jumbo pitted green olives
• marinated artichoke hearts
• marinated eggplant
• marinated button mushrooms
Again, you can also add anchovies to the salad for extra taste and to count it as one of your Seven Fish dishes. Shrimp would also work very well!

You can adjust the amount of each ingredient to your liking. For example, if you’re not a big mushroom fan, but if you love black olives, double up on the olives! Or you could do what many in my family do…just pick out what you like, and trade up with someone else for their favorite ingredients. Whatever preference you have will work well here.

All of the above ingredients are available in most major supermarkets, jarred and marinated. You can also buy the fresh ingredients at any Italian specialty shop, if that is what you prefer.  One jar of each ingredient combined will make enough salad to serve 6-8.

THE PREPARATION
The preparation of this dish is very basic and easy. Simply drain and mix all ingredients in a bowl, maybe add a little Italian seasoning and red pepper flake for some extra flavor and heat if you prefer, stir and refrigerate for at least 24 hours to allow all of the flavors to marry together. Be sure to remove from the refrigerator at least an hour before serving. Stir well to mix up the oils (don’t worry if any of the oils solidified while chilled, it will all liquify when brought back to room temperature). You can add a quick drizzle of olive oil too, if needed.

TO CHOP OR NOT TO CHOP?
My family has served the pepper salad both chopped and whole, depending on the meal. For Christmas Eve we would keep the pieces whole, which allows it to work well as an antipasto. Rough chopping it allows it to work better as a topping, especially on sandwiches or pasta. If you have a food processor, you can give the mixture a few quick pulses. Be sure to keep the pulses quick and short, because the oils that are incorporated will cause the salad to become a pasty puree if chopped too fine.

Whichever method and ingredients you prefer,  I hope that you find this special dish to be as tasty and enjoyable as my family and I do for every holiday meal.

Buon Natale!

Share

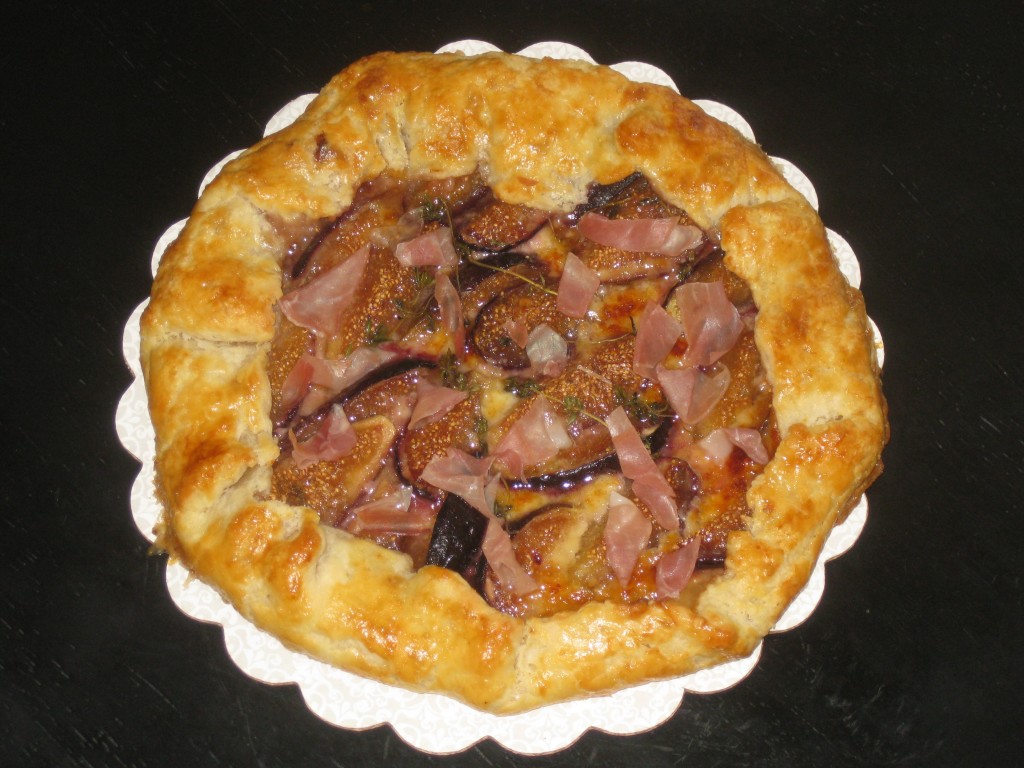
Honey Fig Gorgonzola & Prosciutto Crostata

 This week on my blog I’m very excited to share Emma Caperelli Loerky’s recipe for Honey Fig Gorgonzola & Prosciutto Crostata. I’m a big believer that any dish is better when you add some prosciutto. Throw in some figs and gorgonzola too? Fuggetaboudit!!!!! I’m also a huge junkie for Easter Ham Pie, and this dish could be the perfect mid-year counterpart. So when I got Emma’s e-mail with this recipe and photos, I knew this one would be a big hit…and my teasers on Facebook proved just that. Thanks again, Emma, for sharing yet another one of your amazing recipes!

Enjoy!

Honey Fig Gorgonzola & Prosciutto Crostata
By Emma Caperelli Loerky

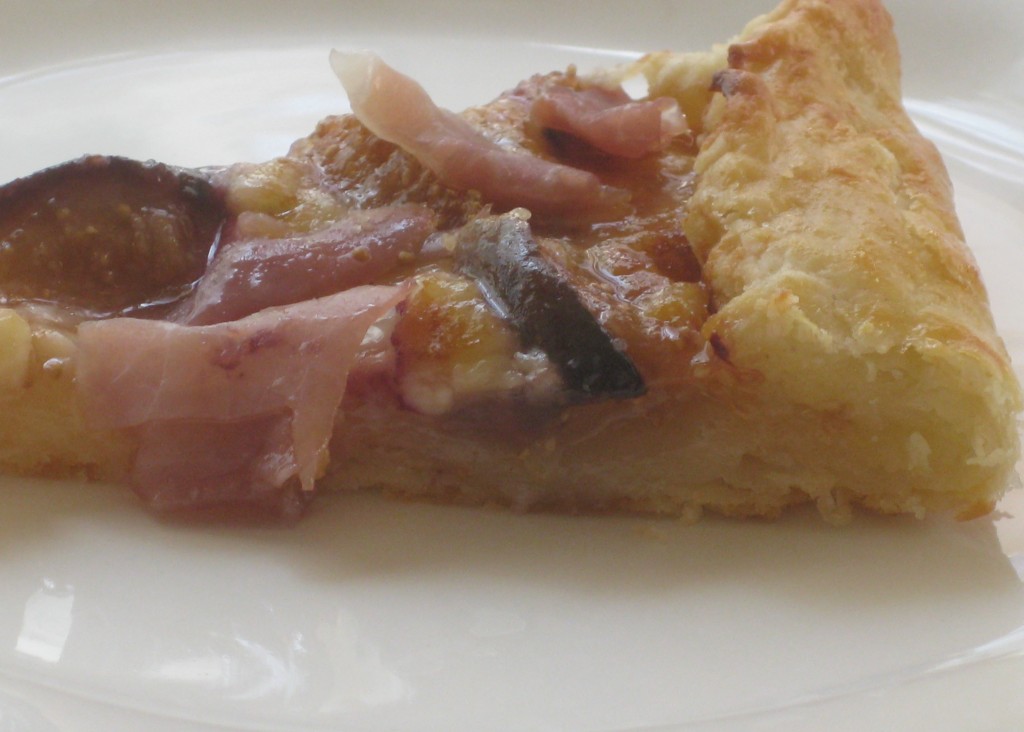
A few months ago, when fresh figs were just popping up in the markets out here in San Diego, I bought some not knowing what exactly I was going to make with them. After doing some internet research, I came across this recipe:  http://www.whatsforlunchhoney.net/2010/09/honey-figs-gorgonzola-and-prosciutto.html. Next thing you know, I’m making a crostata. I followed the recipe almost exactly for the filling, but, because I was worried about converting the measurements from grams to cups, I used a recipe from Smitten Kitchen for the pastry shell – which was so flaky and buttery that it reminded me of a puff pastry. I don’t know if it was the fancy pastry flour that i subbed for the all-purpose flour, freezing the butter and flour for 30 minutes before assembling the dough, or the addition of sour cream to the recipe (maybe it was a combination of all three?), but this crust was perfect in every way! 

Fast forward to the present. I’m in the market shopping for ingredients to make lunch for a friend who is visiting me with her new, beautiful baby girl and once again there are those figs. So, guess what is on the menu? You guessed it. And the nice thing about this recipe is that it can be eaten right out of the oven, warm or at room temperature. And it reheats well, too. I even assembled it the morning of, loosely wrapped it with plastic wrap and placed the unbaked crostata in the fridge for about 2 hours until just before I was ready to bake it.

If you aren’t a fan of bleu cheese, I’m sure goat cheese would work well or even ricotta. However, if you do use ricotta cheese, I would be sure to strain it through a cheesecloth for at least and hour, as the extra moisture in it could make this delicate crust soggy.

One last thing, it’s difficult to say exactly how many figs you’ll need for this recipe. The original recipe says 5 – 6 figs depending on their size, but you can add as many or as little as you like. I’ve made this recipe twice, both times I used different figs and it turned out well each time. The first time I used Brown Turkey figs, which are large so I only needed about 6 figs. This time I used Black Mission figs, which are smaller than the Brown Turkey variety, so I needed a few more than the last time. 

For the pastry (Recipe for Smitten Kitchen): 

1 1/4 cups all-purpose flour, chilled in the freezer for 30 minutes
(I used King Arthur Flour’s Unbleached Pastry Flour with terrific results)
1/4 teaspoon salt
8 tablespoons (1 stick) unsalted butter, cut into pieces and chilled in the freezer for 30 minutes
1/4 cup sour cream
2 teaspoons fresh lemon juice
1/4 cup ice water

Glaze:
1 egg yolk beaten with 1 teaspoon water

For the filling (Recipe from What’s For Lunch, Honey?):
About 1 to 1 1/2 cups Gorgonzola (or to taste)
5 – 6 figs (or more depending on your taste and the type/size fig you use), cut into quarters or eighths (one again, depending on their size)
2-3 tablespoons mild honey (I found 2 tablespoons to be plenty)
A few sprigs of fresh thyme, removed from the stem.
About 4 ounces Prosciutto (I didn’t want the Prosciutto to be too overwhelming, so I used about 2 slices, and I used scissors to cut it into slivers).


Directions:
Whisk together the flour and salt in a large bowl. Sprinkle bits of butter over dough. Using a pastry blender, cut it in until the mixture resembles coarse meal, with the biggest pieces of butter the size of tiny peas. In a small bowl, whisk together the sour cream, lemon juice and water and add this to the butter-flour mixture. With your fingertips or a wooden spoon, mix in the liquid until large lumps form. Pat the lumps into a ball; do not overwork the dough. Cover with plastic wrap and refrigerate for 1 hour, or you can refrigerate the dough overnight (as I did). If you do make the dough ahead of time, be sure to allow the dough to sit out at room temperature for a few minutes before you roll it out.

Preheat oven to 400 degrees. On a well-floured work surface, roll the dough out into a 12-inch round. Transfer to an ungreased baking sheet (or, as Smitten Kitchen recommends, use parchment paper. It makes it much easier to move the crostata from the baking sheet onto a plate after baking). Sprinkle the Gorgonzola evenly onto the bottom of the dough, leaving a 2 inch border. Place the figs on top of the cheese. Drizzle with the honey and sprinkle with the fresh thyme leaves. Fold the edges over the filling and pleat it as you go along to allow the dough to fit, and creating a crust for the crostata. Brush the crust with the egg yolk mixture.

Bake the crostata until it is golden brown, about 25 – 30 minutes. Please note:  The original recipe for the pastry says 30 – 40 minutes, but in my oven it was done after approximately 30 minutes. I recommend you watch the dough carefully after the first 20 minutes. When finished baking, sprinkle the crostata with the Prosciutto, and let it sit for 5 minutes before transferring to a plate. Serve hot, warm or at room temperature.

Share

The Mamma Meets The Cucina: The Veggie Challenge!


VEGGIE CHALLENGE!!!!!

Well, another Mamma Meets the Cucina battle was long overdue. This time they’re dueling with veggies.

Cast your vote at the bottom of the page for your favorite side dish! You can also cast your votes on the Una Mamma blog. And be sure to ‘like’ the Cucina Domenico group page on Face Book! Salud!

FROM THE MAMMA…

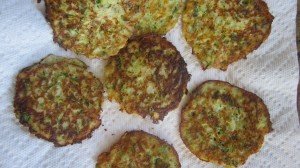
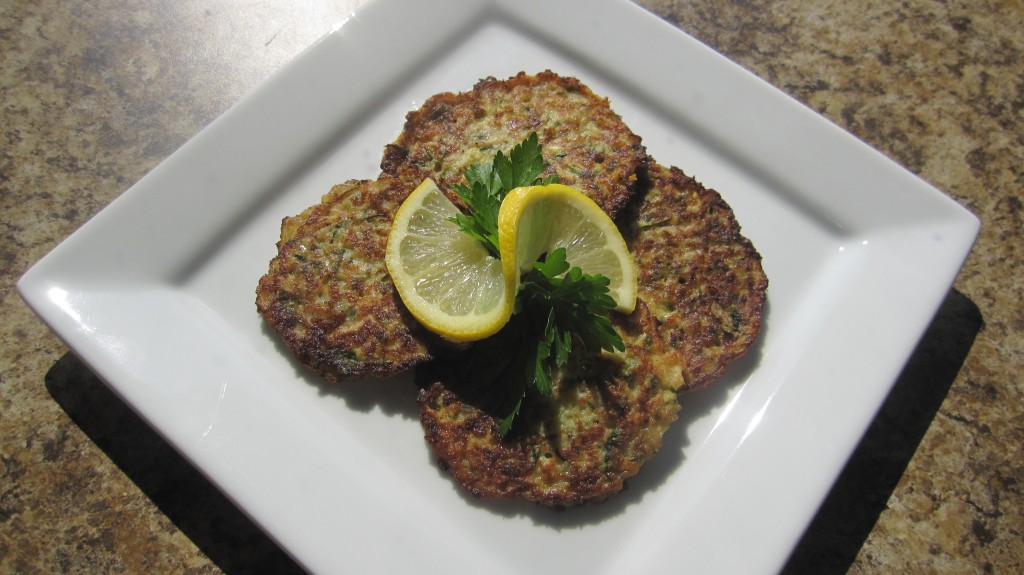
Zucchini is one of my favorite veggies – especially this time of year.  I can remember my Grandma Rose picking the zucchini from her backyard garden, stuffing the flowers with ricotta and baking them. It was such a special treat that I loved when I was a kid. I figured that in an attempt to mimic my Grandma’s recipe I could risk shaming the family, so I opted for fritters instead!

Fritters are a fun and easy way to incorporate veggies into a diet – especially for picky little ones.  It’s fun for kids to mix up a batter and watch them fry up.  I made my daughter part of the whole process and she loved the final result twice as much because of it!  Presented with a small slice of fresh lemon and parsley, these become a simple yet elegant side dish.  They’re like a good pair of jeans – you can dress ’em up or dress ’em down and they always look great.

ZUCCHINI FRITTERS

2 medium zucchini, trimmed & grated
1/2 small onion, trimmed & grated
1/2 cup grated Romano cheese
1/3 cup flour
1/2 cup chopped fresh parsley
2 eggs, beaten
e.v.o.o. for frying

Before combining all the ingredients, pat the grated onion and zucchini dry with a paper towel.  This will remove any excess moisture that might make the batter too wet.  Then combine all the remaining ingredients (except for the e.v.o.o.) with a spoon. Season with salt and pepper.

Drop spoonfuls of the batter into a skillet coated with a couple TBSP of e.v.o.o.  Flatten them slightly and cook until golden brown on each side. (about 2-3 minutes per side over medium heat)

Drain on a paper towel lined plate and serve hot or warm.

(The great thing about these fritters is they are great party appetizers since you can easily make up a whole batch and reheat them in a warm oven on a cookie sheet.)


FROM THE CUCINA…

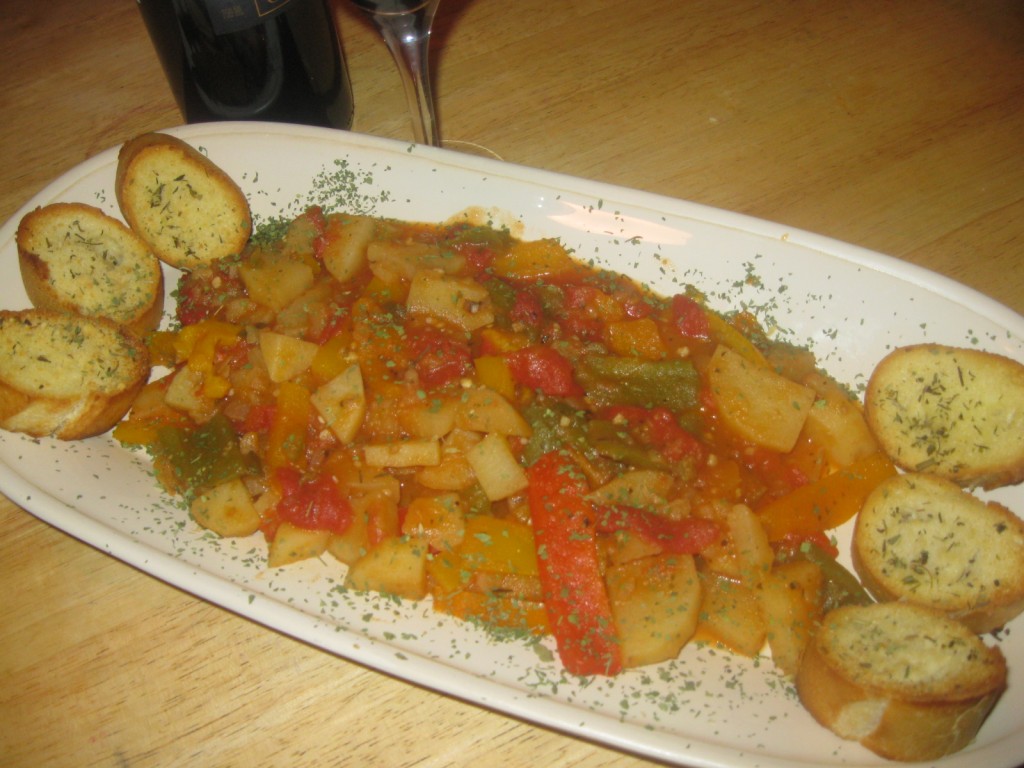
Peperonata, in my opinion, is the perfect Italian vegetable dish. The classic combination of onions, garlic and peppers sautéed in olive oil makes for the beautiful fragrance. The potatoes and tomatoes help give a nice, hearty texture to the dish. And the splash of white balsamic adds the delicious, slightly sweet, slightly tart finish. Whether you’re serving it as a side dish, as an appetizer or as a meal itself, the hearty and rustic peperonata is a stick-to-your-ribs kind of meal that you will enjoy time and time again.

Many of the recipes that I have found use either fresh tomatoes or canned crushed tomatoes, with the addition of some water or broth to keep the peperonata from drying out. I actually prefer to use canned stewed tomatoes and their juices. The stewed tomatoes are already seasoned, they are soft enough where they will meld nicely with the softened peppers and the remaining ingredients, and the juice is plenty to keep this dish thick but moist (you don’t want a soupy consistency). Be sure to use a variety of bell peppers. The variety of pepper colors make for a very appealing presentation. And don’t forget the crusty bread for dipping and scooping!

PEPERONATA

1/4 cup EVOO
 1 small onion, chopped
4 cloves garlic, minced
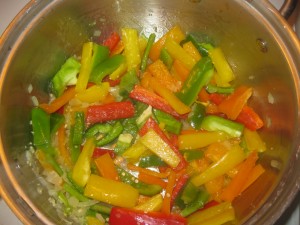
8 bell peppers (two green, two red, two orange and two yellow), seeded and sliced into strips
2 14.5 oz. cans of stewed tomatoes and their juices
4-5 medium russet potatoes, peeled and sliced
1 tblspn Italian seasoning
Salt and Pepper to taste
2 tblspn white balsamic vinegar

In a large pot saute the onions in olive oil on medium-high heat, and when it is completely softened, and before it starts browning, add the garlic. Saute for an additional couple of minutes, then add the peppers, lower the heat to medium-low and stir well. Partially cover with a lid and let them soften up, about 10 minutes.

When the peppers have settled into the pan, add the stewed tomatoes and the potatoes. Season the mixture with salt and pepper to taste and the Italian seasoning, stir well over medium-low heat. Add the white balsamic, stir again, cover, cook on medium-low for about 1-1/2 hours or until potatoes are cooked to preference, stirring occasionally. Serve on a platter with crusty or toasted Italian bread.


Share

Recent Comments

Archives

powered by
Socialbar