Home » Appetizer » Recent Articles:

Meatball Competition: The Meatball Ring & Meatball Stromboli

Any self-respecting Italian has seen the movie, “Big Night,” in which an Italian family tries to succeed at the restaurant business in America. Well, there is one particular scene in which the chef accuses a dining customer of being a ‘criminal’ for wrongly assuming that spaghetti just comes with meatballs. Astonished at the fact that spaghetti is served on its own, she asks why on earth this is. The waiter kindly responds, with a confused disposition,

“Sometimes spaghetti just likes to be alone!”
(click here to watch the hilarious video footage of the scene)

It is a classic scene that depicts the epitome of Italian pride in cooking! But upon pondering the humor in this ordeal, Una Mamma and I got to thinking,

“What about the meatball? Does the meatball ever like to be alone?”

And thus, this meatball challenge was born. We decided to explore unique ways to serve the meatball on its own – without its commonly paired up partner – spaghetti – or any pasta, for that matter.


And so, here you have two dishes that involve meatballs in two similar, yet very different ways. Which one looks better? YOU decide. Don’t forget to vote in the poll on the sidebar of this or the Una Mamma Italiana blog!


THE MEATBALL RING

By Una Mamma Italiana


Here, (out West, that is) we have more than just sunshine and the Pacific – we have a fabulous restaurant chain, “The California Pizza Kitchen!” Now, I’m sure many of you Easterners have tried this place, but have you ever ordered their pizza salad? I grew up eating at this place. While my brother & I ordered greasy pepperoni, or barbeque chicken pizza, my mom (the constant dieter) would order this pizza salad. This, my friends, is the dish that inspired The Meatball Ring.

CPK would often serve a specialty salad atop a blindy baked (cooked with no toppings) pizza crust. It was like getting some bread on the side of your salad, but it made for a very unique presentation. I thought, why not incorporate meatballs into this.

My mind whirled around stuffed crust pizzas – why not stuff the crust with meatballs? But that looked a bit ridiculous in my head. Then I thought about wrapping the meatballs, instead of hiding them in the crust. (Think pigs in a blanket). Eureka. That – with a little bit of help from my best friend (google), brought the meatball ring to life. And there are SO many directions you can go with this.

I used croissant dough, but I am pretty sure that pizza dough, rolled out thin enough, would work just fine (maybe even better).

I laid out the dough on a circular pizza pan, leaving the triangular tips around the edge in the shape of a ring. I rolled a meatball under each point of dough until I had a star-like pizza crust. I baked it according to package directions.

Then, I let it cool, and topped it with a fresh salad. it was such a fun way of serving up a big salad to a crown. Then with every scoop of salad, each person can pull apart one of the triangles holding meatball. Not a bad idea, right?

But then my mind went a-whirling again. Why not use this meatball ring as a way to serve up ANYTHING at all. My next thought was antipasto. PERFECT. The gorgeous layout of Italian meats, cheeses, olives, artichokes,and whatever else you like on your antipasto platter would look beautiful served atop this meatball ring. And once it’s cooled, it holds together like a gem!

Needless to say, this was my Superbowl party recipe! I will surely post a picture of the antipasto version a.s.a.p. – but use your imagination. What would you top this meatball ring with?


MEATBALL STROMBOLI

By Dominic Condo


To me, there is no other dish as traditional and tasty as a plate of pasta topped with two or three meatballs. Even when Sunday dinners are presented family style, the full serving plate of meatballs almost serves as the centerpiece of the table. Classic. Comforting.

But I also love me a good meatball sandwich! Served up in a nice roll, topped with Parmesan and maybe a little mozzarella, toasted up in the oven grinder-style…it’s crispy hot goodness in every bite! If you’ve read my previous posts, you know that one of our go-to foods when getting together with friends is homemade Stromboli. Using meatball as Stromboli filling is always high on our request list. The consistency of a meatball sandwich combined with the taste of delicious homemade pizza dough. How could you go wrong?

The recipe itself is fairly simple – roll out your dough, top with meatballs, add some cheese, roll up, bake and serve. It’s during the actual assembly when the love and craftsmanship comes into play.

Let’s break it down….

A. you want to make sure that you roll out your dough thin enough to fold, but not too thin where it will break. There’s a lot more texture in this filling as opposed to a pepperoni or ham Stromboli, so you need enough dough to keep everything contained.

B. you want to squash up your meatballs so they fill up more space and are not to lumpy. You’ll want to let the meatballs cool before doing this step for two reasons:
1 – it’s easier to work with the meatballs when slightly cooled
2 – if the meat is still hot, it will start to warm up the dough and make it harder to work with.

C. do not go overboard when adding your gravy/sauce.The key to a meatball Stromboli is the gravy….you don’t want it to be dry. A nice little drizzle of sauce on top of the crushed meatball is plenty. Too much sauce will make the dough soggy and hard to work with. And just as I mentioned about working with the meatballs cooled, you don’t want the gravy to be too hot. Otherwise it will make the dough difficult to work with, You can always serve up a bowl of gravy/sauce on the side for dipping.

D. try using a combination of provolone and mozzarella cheese. Both melt well, and the combination gives you an equal balance of mozzarella creaminess and provolone sharpness. This is one of the many cooking tricks that my cousin Michael taught me many years ago!

You can follow my example photo on how to roll a Stromboli (although the example photo is of a pepperoni stromboli, the same rolling method applies to the meatball stromboli). Add a few slits on the top of the dough to avoid air bubbles. Give it a quick hit with cooking spray, top with a bit of Italian seasoning. Bake uncovered at 375º for about 20-25 minutes or until crust is golden brown. Remove from oven and let it sit for 5 minutes to cool. Otherwise the insides will run out if you slice it too soon.

Slice, Serve and Enjoy!


Share

NEW – Itali-Asian Fusion: Sausage, Pepper and Broccoli Rabe Dumplings

November 27, 2010 Appetizer, Menu 2 Comments

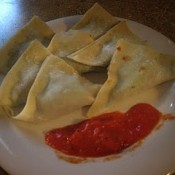
This week I’m throwing my hat into the trendy Asian-Fusion kitchen, with a bit of Italian flare. I’m calling it Itali-Asian Fusion. What I’m doing is taking sausage filling that you would use in a ravioli or a stromboli (aka sausage bread), and I’m using it to fill wonton wrappers. I came up with the idea when planning to make sausage and peppers stromboli for a family birthday party. The combination of the sausage, peppers and broccoli rabe mixed with some parmesan cheese was a natural, go-to favorite Italian taste, and the wonton wrappers made for easy single servings along with puréed red peppers for dipping. The wonton wrappers can be prepared in a number of ways when stuffed (fried, steamed in steamer baskets, or baked – I chose to bake mine for quick and easy serving time).

The easiest method that I use to prepare sausage and peppers as a meat filling is to combine the raw ground sausage with chopped peppers in a baking dish and to bake it until the meat is browned and slightly crispy (a mixture of sweet and hot sausage is my preference). This eliminates the extra oils from frying and frees up some time as well. While you let the cooked sausage and peppers cool, you can prepare your broccoli rabe. When the broccoli rabe is done cooking, combine it with the sausage and peppers and either chop it with a knife or with a few quick pulses in a food processor. This helps mix the filling and allows for easy assembly, regardless of what your using the filling for.

As I mentioned above, you can prepare the stuffed wontons a number of ways. Frying is the traditional way, which will give you the crispy texture. Baking will also give you a slightly crisp coating, if sprayed with a cooking spray. And steaming will give you a soft, ravioli-like texture.

SAUSAGE, PEPPERS & BROCCOLI RABE DUMPLINGS
Makes 40-48 Dumplings

1lb ground sausage (hot, sweet or a mixture of both)
Two 7-oz jars roasted red peppers (one for mixture, one for dipping sauce)*
1 bunch broccoli rabe (bitter broccoli)
2 tblspn olive oil
2 cloves garlic, minced
Salt and pepper to taste
1/4 cup parmesan cheese
One 12-oz package wonton wrappers (found in the produce section of your grocery store)
*you can use one bell pepper, red pepper or any other pepper of choice in place of the roasted red pepper for the mixure

Mix the ground sausage (remove casing if needed) with one jar of chopped roasted red peppers. Place in a baking dish and bake at 350º for 40-45 minutes, or until sausage is browned, up to slightly crisp. Remove from oven, set aside to let cool.

In a large pot, bring 2 quarts water to a boil. Add the broccoli rabe and let cook for 5 minutes, until crisp-tender. Remove from pot and drain excess water. In a large pan, heat 2 tblspn olive oil, add garlic. Add broccoli rabe to pot, mix with garlic for and saute for 10-15 minutes until desired doneness. Remove from pan, season with salt and pepper, let cool slightly, mix with sausage and peppers.

Using either a knife and fork or a food processor, mix and chop the sausage mixture, broccoli rabe and 1/4 cup parmesan cheese just a bit to make for easy filling.

Taking one wonton wrapper at a time, place a full teaspoon of the sausage mixture in the middle of the wrapper. Using either your finger or a brush, wet all 4 of the edges of the wonton, fold in half diagonally, press and set aside. When all 48 wontons are stuffed, you can either fry, steam or bake the stuffed wontons.

To fry: Heat a wok or nonstick skillet on medium-high heat and add 1 tablespoon oil. Add 10 – 12 dumplings, and cook for 2 to 3 minutes, until the bottom is browned. Add 1/3 cup water, cover, and steam the dumplings until the liquid is absorbed (about 5 minutes). Remove and cook the remainder of the dumplings.

To steam: Using a steaming apparatus of your choice, bring 1/4 to 1/2-inch of water to a simmer over medium heat. Spray the steamer’s surface lightly with the non-stick vegetable spray to prevent sticking. Place as many dumplings as will fit into a steamer, without touching each other. Cover and steam for 10 to 12 minutes over medium heat. Remove the dumplings from the steamer to a heatproof platter and place in oven to keep warm. Repeat until all dumplings are cooked.

To bake: Place dumplings on a sprayed baking sheet without touching each other. Bake at 350º until crisp.

Place the second 7-0z jar of roasted red peppers in a blender, purée, heat and serve as a dipping sauce.

HOW TO MAKE A LOW-FAT, LOW-CALORIE, LOW-CHOLESTEROL VEGETARIAN VERSION
If you’re looking to serve these to a crowd of family and friends, and knowing that some may not like sausage, or may be watching their calorie/cholesterol intake, you can substitute the sausage with Gimme Lean (rhymes with Jimmy Dean….get it?!), the vegetarian sausage substitute that is found in the produce section of your grocery store. Now, let me say this up front – I am not a real big fan of this sausage substitute product on it’s own. I’ve tried it a few times. It looks like sausage and smells like sausage…but believe me, it ain’t sausage! I’m a firm believer of moderation and calling food what it is. If a cow climbed into a tree, you wouldn’t call it a bird, right? However, if you flavor Gimme Lean with extra sausage seasonings (garlic powder, fennel seeds and rosemary to taste), mix it with the peppers and bake it all together, the flavors actually do come together to make for a decent sausage filling…once you also add the broccoli rabe and parmesan cheese. Again, I personally prefer using real sausage for the best taste. But if you are looking for a healthier alternative to keep everyone happy, or if you enjoy using vegetarian substitutes, this little trick will work well for a dish like this…and I can almost guarantee you that nobody will know the difference!
Share

Balsamic-Honey Marinated Carrots

August 17, 2010 Appetizer, Menu No Comments

Here’s an easy, tasty and healthy dish that serves well as either a side or as a rustic-style appetizer. If you have ever dined at Pesto in South Philadelphia (one of my favorite restaurants), you may have had their similar, rustic family style dish served at your table. I like to keep things simple by using either frozen baby carrots or frozen crinkle-cut carrots. If you prefer to use fresh cut or fresh baby carrots, have at it! Also, I prepare this dish to be served chilled. If will also serve well warm if you prefer.

BALSAMIC-HONEY MARINATED CARROTS

2 tablespoons balsamic vinegar
1/2 tablespoon honey
1 teaspoon olive oil
1 garlic clove, minced
Fresh ground black pepper to taste
1/2 bag of frozen baby or crinkle-cut carrots (or 1 medium carrot, sliced into rounds)

Steam cook the carrots until soft. Mix all other ingredients in a bowl. Toss the steamed carrots well in the marinade. Place in a bowl, cover and refrigerate. Serve chilled.

Share

NEW – Top This: Olive Salad

June 4, 2010 Appetizer, Menu 3 Comments

Marinated toppings and salads/spreads are a big thing in my house. When it comes to sandwiches, burgers, scrambled eggs or any other dish that would go well with a condiment, my wife and I are usually reaching for a jar of roasted red peppers, hot cherry peppers or bruschetta topping instead of ketchup, mustard and relish. There’s something about the combination of fresh vegetables mixed with olive oil, herbs and the tang of vinegar to really add a nice punch to a dish.

Roasted red peppers are, of course, the standby. They’re fairly easy to make, and nothing beats the taste and texture of home made. Whether you’re roasting your own or buying them jarred, they work well with just about anything, from pasta salad to a topping on a veal chop. For as good and versatile as they are, the most recent go-to jarred pepper in our house is Mancini’s Fried Peppers with Sweet Onion. Unlike roasted reds, they’re a little less on the tang and just a bit more on the heat. We’ve been buying these two jars at a time as of late!

One of my big late summer/early fall traditions as of late is marinating and jarring eggplant. It’s my way of keeping some old world traditions alive for my kids to enjoy and appreciate. Based on the response that I received from my post last year, it’s got me thinking that maybe I should make a few more jars this year…just in time for holiday gifts! To read more about my jarring process and serving suggestions, click here for the link to my marinated eggplant article.


Another great topping that we often use is bruschetta topping (made with chopped plum tomatoes, onions, fresh herbs, garlic and olive oil – think of it as Italian salsa). The traditional way to serve it is as a topping on a piece of toasted French or Italian bread rubbed with fresh garlic. However, the flavors and ingredients work so well together that I’ll often use it as a topping on white pizza, chicken or mixed with pasta.

Olives are, of course, a great appetizer side. They work well in salads, antipasto, as ingredients to main dishes, or on their own. They’re also an endless source of entertainment for my kids. Seriously, who hasn’t put olives on their fingers when they were young?!?! Although they only come in two colors – black (fully ripe) and green (unripe) – there’s a wide variety of pepared olives to choose from: traditional black and green (in small, medium or large), manzanilla (Spanish green olives, often stuffed with pimientos), kalamata (Greek black olives, brine cured), and gaeta (Italian black olives, salt cured and soaked in oil) just to name a few. My daughter, Julianna, has been eating green olives stuffed with gorgonzola cheese since she was 1-1/2, and her younger sister Ava is following suit right behind her!

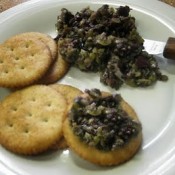
This week, I’m going to combine the best of both worlds and make an olive salad/spread. I’m using three types of olives (medium black, medium green and kalamata), mixing it with some fresh garlic, oregano and basil (fresh or dried will work), crushed red pepper, vinegar, extra virgin olive oil and a little bit of grated parmesan cheese for an extra kick. Serves well as a bruschetta-style topping, mixed with pasta, or on your favorite pizza or sandwich.

Now, if you’re not a big fan of olives to begin with, this dish probably won’t change your mind on them. But if you are an olive lover, give this dish a try. I’m sure you’ll like it. And have fun with it…add your own favorite variety of olive, or try spicing it up by adding some peppers!

Ciao!


OLIVE SALAD

1 cup medium black olives, pitted
1 cup medium green olives, pitted (with or without pimientos)
1 cup kalamata olives, pitted
3 tspns red wine vinegar
2 cloves garlic, smashed*
1 tspn fresh oregano, chopped (or 2 tspns dried oregano)
1 tspn fresh basil, chopped (or 2 tspns dried basil)
1/4 tspn red pepper flakes
1 tblspn grated parmesan cheese
1/4 cup extra virgin olive oil (you can add more olive oil to desired amount)

Place all ingredients in a food processor, adding olive oil last. Pulse to chop until desired texture (I recommend chopped instead of smooth texture).
Place in a jar or bowl, cover and let refrigerate for at least an hour prior to serving.

*To smash garlic, place clove(s) on a chopping board, lay the flat side of a chef’s knife on the clove (sharp side facing away from you) then strike the knife with the heel of your palm, crushing the clove beneath the knife. The papery skin will slip right off the crushed cloves which can then be minced very fine or used in the recipe as it is. Not only does smashing garlic simplify the peeling and chopping process, it also releases the flavors of the garlic.

Share

Recent Comments

Archives

powered by
Socialbar