Home » Entrees » Recent Articles:

Root Vegetable Ratatouille

November 14, 2014 Appetizer, Entrees, Menu No Comments

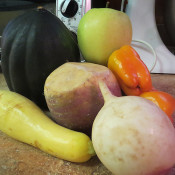
I always enjoy cooking with vegetables, and ratatouille is one of my favorite dishes. With Thanksgiving just around the corner, I came up with a dish that replaces most of the traditional ratatouille veggies (eggplant, tomatoes, summer squash and seasonings) with some of my favorite root vegetables (rutabaga, turnips, acorn squash, along with traditional yellow squash and bell pepper), autumn spices and a Golden Delicious apple for a bit of sweetness. I guess you can even call this dish “rootatouille!” All kidding aside, this is a great recipe to prepare along with your Thanksgiving dinner.

You will need to put in a little bit of effort ahead of time to peel and chop the vegetables. A few minutes in the microwave will help soften the acorn squash for easy cutting, and you’ll want to peel and slice the apple last minute to avoid it from browning. Once the prep work is done, all you’re looking at is 10-15 minutes of sautéing the veggies, and then the dish is ready to serve!


Root Vegetable Ratatouille

1 rutabaga, peeled and diced
1 turnip, peeled and diced
1 yellow squash, diced (you can use green zucchini squash if you prefer)
1 red bell pepper, diced
1 acorn squash (prep directions below)
1 Golden Delicious apple, peeled and diced (prep the apple just before you are ready to add to remaining ingredients to avoid browning)
2 tbspn olive oil
2 tbspn brown sugar
1/2 tspn cinnamon
1/4 tsp ginger
2 tbspn maple syrup (regular pancake syrup will also work)
salt and pepper to taste

Start by cooking the acorn squash whole in the microwave on high for 5 minutes. Carefully remove (it will be hot), let sit until cooled. Once cooled, cut in half, remove pulp and seeds. Remove skin, cut the squash into small chunks, set aside.

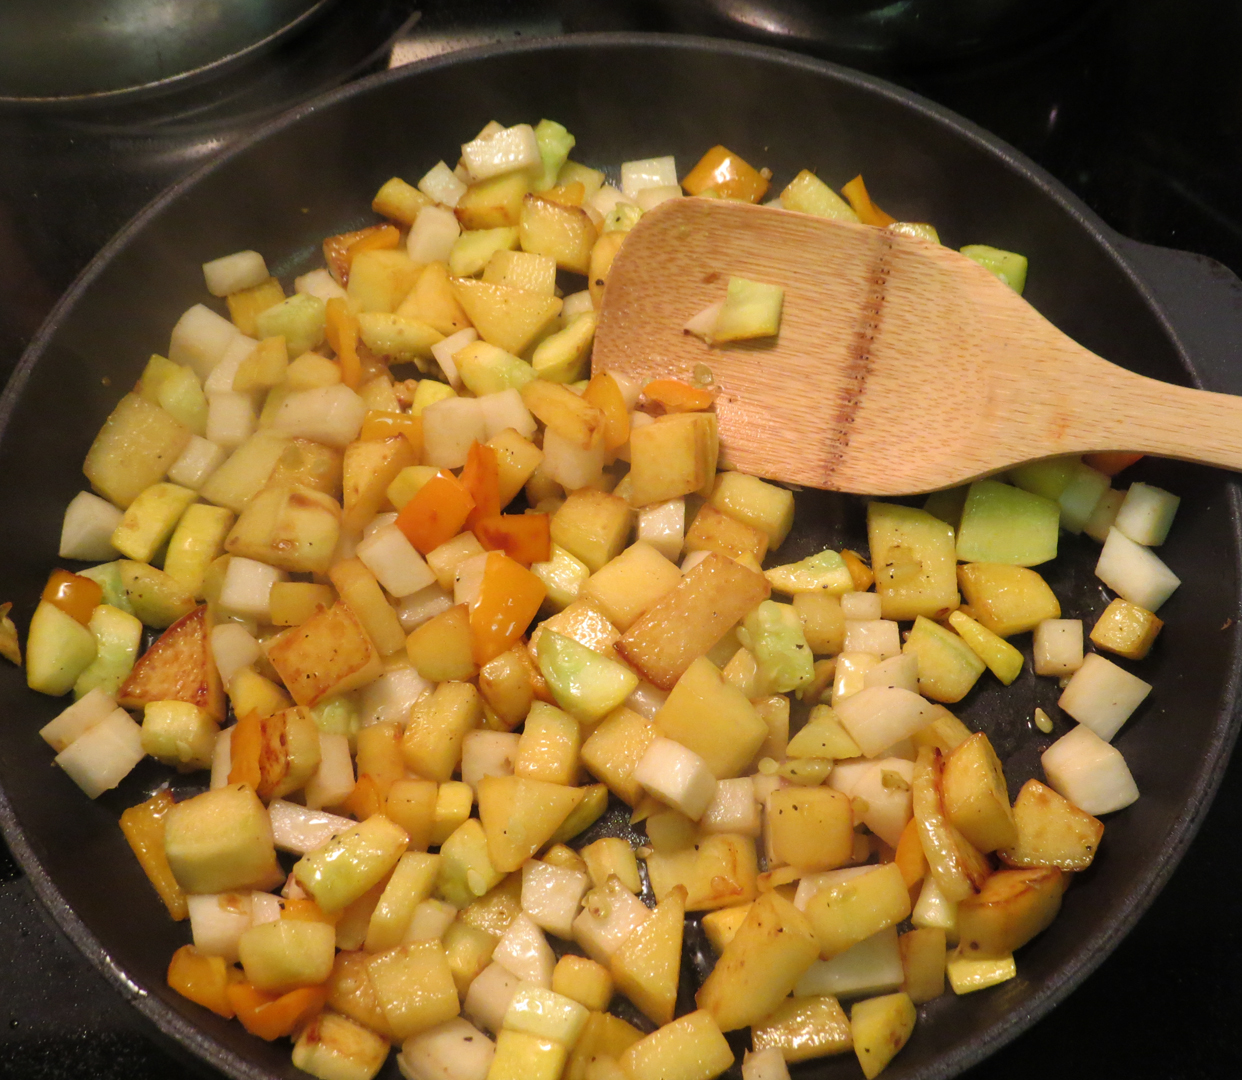
In a large skillet, heat olive oil over medium heat. Add the rutabaga, stir until evenly coated, cook for about 5 minutes, until it starts to soften and the pale color starts to turn into a golden brown. Next, add the turnip, pepper and yellow (or zucchini) squash. Stir together and cook for another 5 minutes, until all veggies start to soften. At this point, you’ll want to peel and dice the apple.

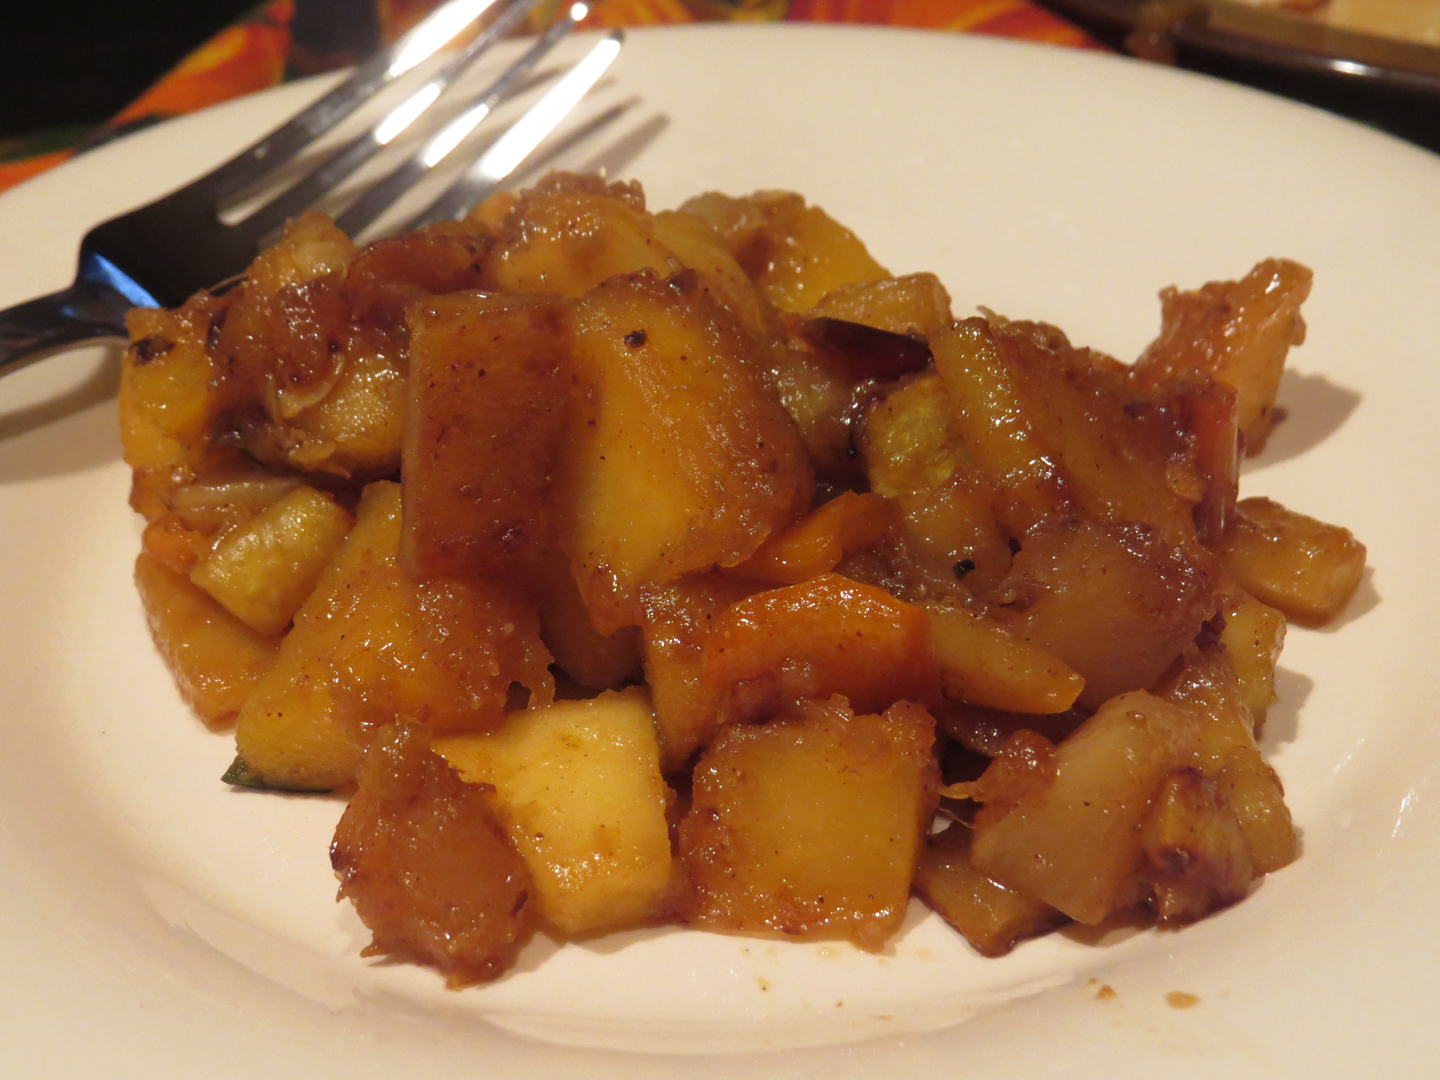
Next, add the apple and acorn squash to the mix, stir together. Add the brown sugar, cinnamon, ginger and syrup, mix together. Lower the heat, let simmer, stirring occasionally until all veggies are softened to your liking. If the mixture looks like it’s starting to dry up, you can add a bit of water or broth to loosen it up. Season to taste with salt and pepper.

Serve and enjoy!

veggies2

veggies3

Share

Baked Tomato Zucchini Casserole

September 26, 2014 Appetizer, Entrees, Menu No Comments

Here’s an easy, quick and healthy recipe that you can serve as either a side dish or a main course. With just a handful of fresh ingredients, you’ll have this meal assembled and cooked in less than an hour. My original plan for this dish was to bread the individual slices of zucchini and tomatoes, and then stack the slices in a baking dish. To save time and ingredients (and to make it a bit more interesting), I instead decided to make a basic breadcrumb topping (breadcrumbs sautéed in melted butter and mixed with parmesan cheese), and use the topping as a layer within the casserole. I also used a 50/50 mixture of regular breadcrumbs and panko breadcrumbs for an extra crunchy texture. Regular breadcrumbs will of course work fine on their own.

Ingredients:
3 green zucchini, sliced thin length-wise
8 plum tomatoes, sliced thin
1/2 large yellow onion, sliced thin, separated into individual rings
1/3 cup basil, finely chopped
garlic powder
salt and pepper
olive oil
2 tbspn butter
1 cup breadcrumbs (I used 1/2 regular and 1/2 panko breadcrumbs)
1/2 cup parmesan cheese

Step 1: Making the breadcrumb topping
Melt butter in a small skillet; add breadcrumbs and sauté until lightly browned. Remove from heat, and stir in parmesan cheese. Set aside.

Step 2: Assembling the casserole
Preheat oven to 375˚. Lightly spray an 8×8 baking dish. Cover the bottom of the dish with a single layer of zucchini. Next place a single layer of onion rings (you can spread out the individual rings so that the onions do not  over-power the dish), then add a single layer of tomatoes. Season with garlic powder, salt and pepper (to your liking). Sprinkle some of the basil on top. Drizzle with olive oil. Top with a light coating of breadcrumbs. Repeat the layered steps (zucchini, onion, tomatoes, seasoning, basil, breadcrumbs) until all ingredients are used up. Bake uncovered for 45 minutes. Remove from oven, let cool slightly. Slice, serve and enjoy!

The assembled casserole.

The assembled casserole.

Sliced and ready to enjoy!

Sliced and ready to enjoy!


Share

Coconut Lime Chicken

September 13, 2014 Entrees, Menu No Comments

This past weekend, we had our annual end-of-summer neighborhood grill fest. Since chicken is always a crowd pleaser, and coconut and lime are two of my favorite summer flavors, I did some research and put together my own variation of grilled coconut lime chicken. Although I did not win the coveted Friendship Road ‘Golden Spatula’ for favorite dish, my entry seemed to be a big hit with everyone…so I’ll take that as a win any day! This is definitely a tasty dish that could be served up any time of the year, so I’ve also included baking instructions for those who do not like to venture out into the cooler weather to fire up their grill.


6 chicken breasts, cut in half length-wise (makes a total of 12 pieces)
1 13.5 oz can coconut milk
1/4 cup olive oil
3 cloves minced garlic
juice of 4 limes, plus zest of two limes
1/4 tspn ground ginger
1/2 tspn light brown sugar
2 tspn salt
1/4 tspn black pepper
1/4 cup shredded coconut

In a large mixing bowl, combine the coconut milk, olive oil, garlic, lime juice and zest, ginger, brown sugar, salt and pepper. Whisk until well combined. If grilling, reserve 1/3 cup of the marinade for later use.

Cut about 4 to 5 small slits into each chicken breast. Place the chicken breasts into a plastic baggie, then pour the remaining marinade mixture over the chicken. Squeeze all air out of the baggie, then tightly tie the bag closed. Let the chicken marinate in the refrigerator for 2-6 hours.

Grilling

Heat your grill to medium-high, evenly coating your grill grates with cooking spray. Remove the chicken breasts from the marinade and place on the grill. Discard the old marinade. Pour a small portion of the reserved marinade into a bowl. Grill for approximately 15-20 minutes, flipping occasionally, until the chicken is browned and evenly cooked. Baste the chicken occasionally with the small portion of the marinade, discarding what is left of the small portion of marinade when grilling is done.

When the chicken is done, remove it from the grill and place it in a baking dish. Pour the remaining marinade evenly over the chicken, and place the baking dish into your oven set to warm for 10 minutes. This will allow the remaining marinade to slightly thicken into a sauce.

While the chicken is in the oven, place the shredded coconut into a large pan. Toast over medium heat for 5-7 minutes, or until the coconut starts to brown.  Remove chicken from the oven, sprinkle with toasted coconut. You can also sprinkle with chives for extra color and flavor!

Baking

Preheat oven to 375˚. Remove marinated chicken from refrigerator, place in a baking dish. Pour marinade over chicken, making sure that all pieces are well covered (there is no need to reserve any marinade when baking). Bake for 40-45 minutes, or until chicken is completely cooked, flipping once half-way through. Remove from oven, top with toasted coconut (see instructions above for toasting coconut).

limechicken2

Share

Italian-style Shrimp Po’Boy Sandwiches

July 11, 2014 Entrees, Menu No Comments

I was inspired to put this dish together a few weeks back when I saw Rick Moonen’s Catfish Sloppy Joe sandwich featured on The Food Network. I put a different spin on it by using my own Sloppy Joe recipe (found here), replacing the ground meat with shrimp. I also added zucchini and Old Bay to the mix for additional taste. I like to think of this sandwich as a cross between a Sloppy Joe and a Shrimp Po’Boy…a Sloppy Po’Boy, if you will. Unlike a true Po’Boy, these shrimp are not battered and fried. I also used a crusty Italian roll instead of a baguette…as long as the bread is good, there’s no need to be picky as far as I’m concerned. Whatever you prefer to call it, this is definitely a hearty and tasty sandwich, easy to make, and perfect for the summer season.


Italian-style Shrimp Po’Boy Sandwiches

Makes four sandwiches

2 tablespoons olive oil
1 garlic clove, minced
1 small red or green bell pepper, coarsely chopped
½ cup chopped onion
1 zucchini, cut into 1″ cubes
1/2 lb medium raw shrimp, peeled and deveined, each piece cut into thirds
1 8-oz can tomato sauce
salt & pepper
Old Bay seasoning

Heat oil in large skillet over medium-high heat until hot. Add bell pepper, onion and garlic; cook and stir 2-3 minutes or until crisp-tender. Add the zucchini, stir together and cook for another 2-3 minutes.

Add the shrimp, stir together. Cook until all shrimp are pink.

Add the can of tomato sauce, season with salt, pepper and Old Bay seasoning  to taste.

Stir together, lower the heat to medium-low, and simmer for 10-15 minutes until sauce thickens up.

Serve in a crusty roll.

Share

Recent Comments

Archives

powered by
Socialbar