Home » Entrees » Recent Articles:

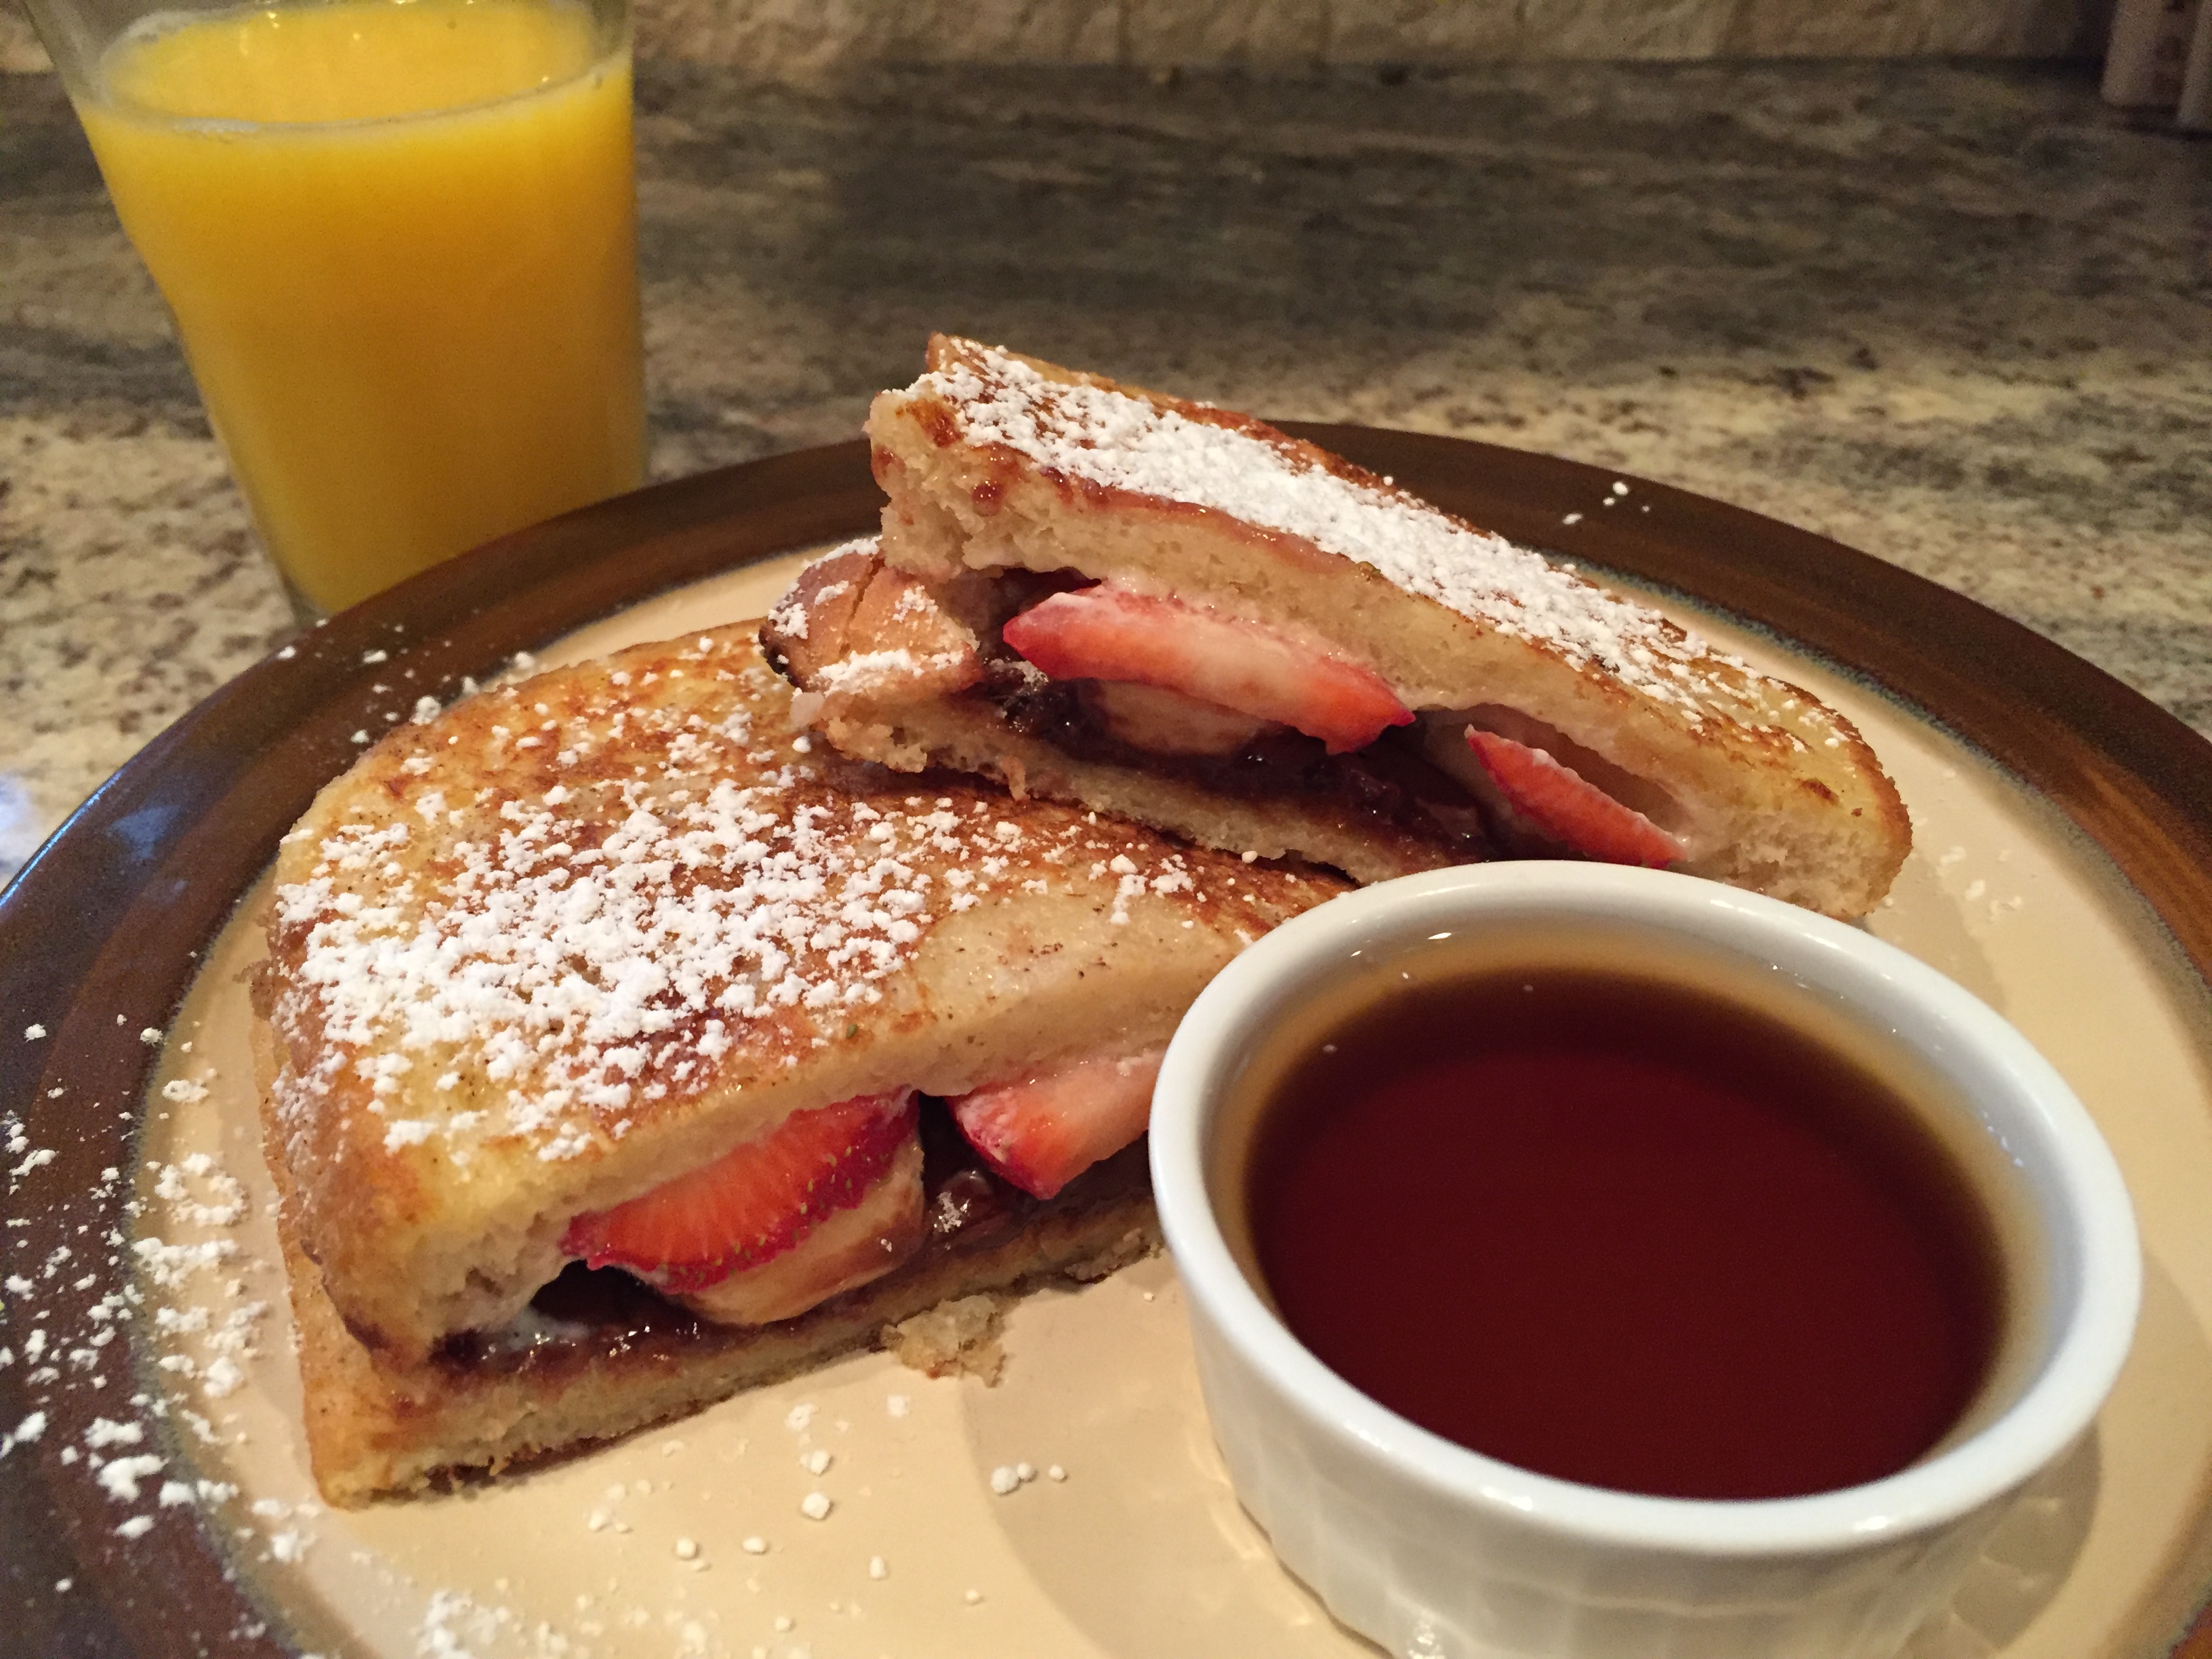
Nutella and Mascarpone Stuffed French Toast

March 7, 2018 Entrees No Comments

Another Nor’easter in the Philadelphia area…another day spent indoors, figuring out what to eat next. If you’re stocked up on the snowstorm essentials (bread, eggs and milk), try giving this decadent recipe a shot. With just a few additional ingredients (sliced fruit of your choice, and my two favorite Italian spreads, Nutella and Mascarpone), this breakfast beauty will be sure to add a little sunshine to yet another dreary winter’s day!


Nutella and Mascarpone Stuffed French Toast

Makes 3 stuffed sandwiches
6 slices of bread (white or wheat are preferable)
sliced fruit (my personal choices are banana and strawberries)
Nutella (any other brand of hazelnut spread will work)
Mascarpone cheese (you can also use cream cheese)
1 egg
1 teaspoon vanilla extract
1/2 teaspoon ground cinnamon
1/4 cup milk

Start by lightly toasting the bread (it helps hold the sandwich together). Spread one piece of the toast with Nutella, spread another piece with Mascarpone cheese. Add the fresh sliced fruit to the two pieces of bread to make a sandwich. Repeat with the other four slices of bread and remaining fruit.

Mix together the egg, vanilla extract, cinnamon and milk. Dip the sandwiches into the egg batter.

Cook the sandwiches on a lightly greased medium hot skillet or griddle until golden brown on both sides. Top with powdered sugar and serve with syrup on the side.

Share

Game Day Taquitos

January 19, 2018 Appetizer, Entrees, Menu No Comments

Game time is here, and football fever is running rampant! Even if your beloved team didn’t make it to the playoffs, chances are that you will still be joining family and friends for fun food at a game day party.

As I’ve discussed in previous game day posts, the key to a successful party dish is to make it a quick hitter that is fun, tasty and easy to eat. The recipe that I’m sharing with you today tackles all of those requirements!

Taquitos are a Mexican dish that consists of rolled-up flour tortillas stuffed with a filling, and is crisp-fried. Think of it as a rolled-up taco. During one of our recent holiday gatherings, I decided to make my own version of taquitos, coming up with a few different filling options and choosing to bake the taquitos instead of frying them. Not only were they a big hit, they were also enjoyed by both adults and kids. Prep time (for the most part) was minimal, and the ingredients were tasty. Although the taquitos were served as a picky appetizer, they were filling enough and tasty enough to keep everyone satisfied and coming back for more. Hence, the perfect game day food!

The best part about taquitos is that you can get as creative as you wish with the fillings. While traditional fried taquitos use a flour tortilla, I found that the baked version works just as well with both flour and wheat tortilla shells. I’ve used both types of tortilla shells for my taquitos and and was happy with both versions. Listed below are a few of the fillings that I prepared, along with a few other filling suggestions that I think would work well. As always, I encourage you to get as creative as you wish.


STEP 1: THE FILLING

The key to a good taquito is the filling. So far, I have made two different types of taquito fillings: sautéed vegetables and chicken, cheddar and bacon. Both were able to be prepared ahead of time, and both worked well and were enjoyed by everyone.

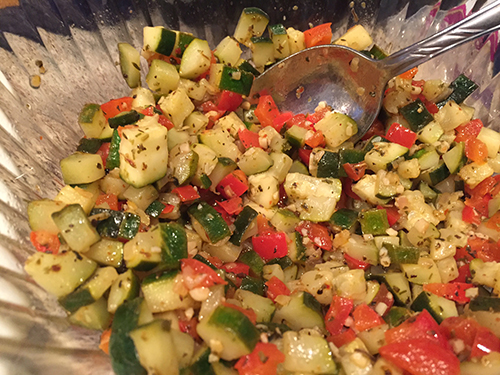
For the sautéed vegetable filling, you will need the following:

2 tablespoons olive oil
1/2 cup chopped onion
1 clove garlic, minced
1 zucchini, finely chopped
1 yellow squash, finely chopped
1 red pepper, finely chopped
1 tablespoon chopped Italian parsley
1 teaspoon oregano
1 teaspoon dill weed
salt and pepper to taste
shredded mozzarella or cheddar cheese

Heat oil in medium skillet or wok over medium-high heat until hot. Add bell pepper, onion and garlic; cook and stir 2-3 minutes or until crisp-tender.

Stir in zucchini and squash; cook and stir 5-7 minutes or until tender.

Stir in herbs, cook until thoroughly heated. Season with salt and pepper to taste. Set aside to cool slightly. You will top the vegetables with the shredded cheese when you assemble the taquitos.
 

For the chicken, cheddar and bacon filling, you will need the following:

1/2 lb cooked and seasoned chicken breast, chopped (Perdue Short Cuts works well for this)

8-ounce package of shredded cheddar cheese

4-6 slices of cooked bacon, cut into small pieces


Other filling suggestions:

• steak, peppers and provolone

• meatballs and mozzarella

• seasoned chicken with blue cheese

• pulled pork, roasted red peppers and broccoli rabe

• marinated shrimp and scallops

….honestly, you can go any number of directions!

Regardless of what filling you prefer to try, one suggestion that I would make is to not make your fillings too wet. If you think that your fillings would go well with a sauce (say a marinara or a barbecue sauce), I would suggest that you serve those sauces as a side for dipping. Incorporating the sauces into the filling may make the tortilla shells soft and mushy, and they may not bake properly.


STEP 2: THE ASSEMBLY

Preheat your oven to 400˚.

As I mentioned earlier, I have used both flour and whole wheat tortilla shells and was very happy with the results of both.

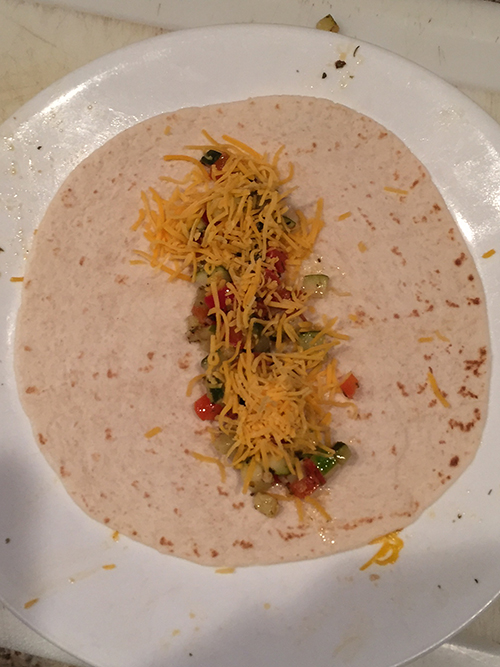
To assemble your taquitos, lay a tortilla shell out flat, and place a 1″ strip of your filling down the middle. Tightly roll up the tortilla shell, as if you were rolling up a cigar.
Place the rolled tortilla shells seam side down into a lightly sprayed 9″ x 12″ baking dish. Medium-sized tortilla shells will work the best with a 9″ x 12″ baking dish. If you have larger sized tortilla shells, you can trim the rolled shells to fit into the pan. You will fit about 8 rolled shells into the pan.
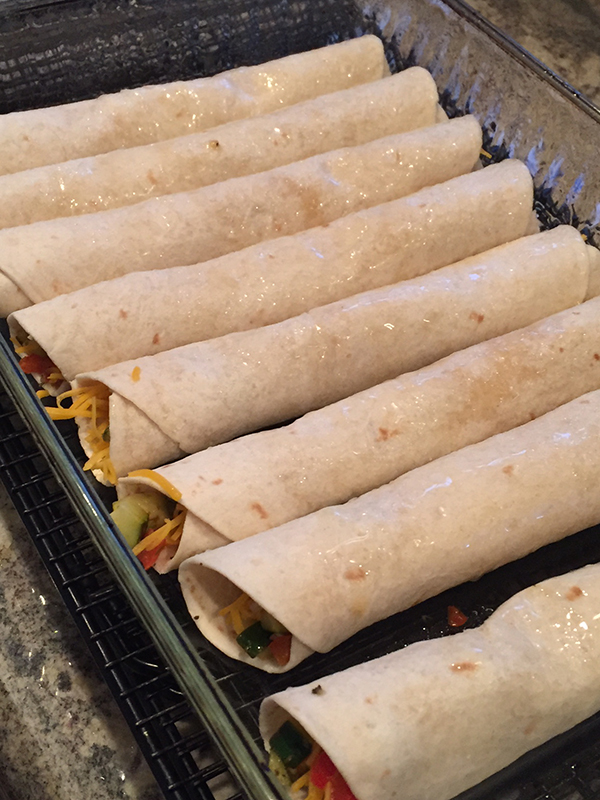
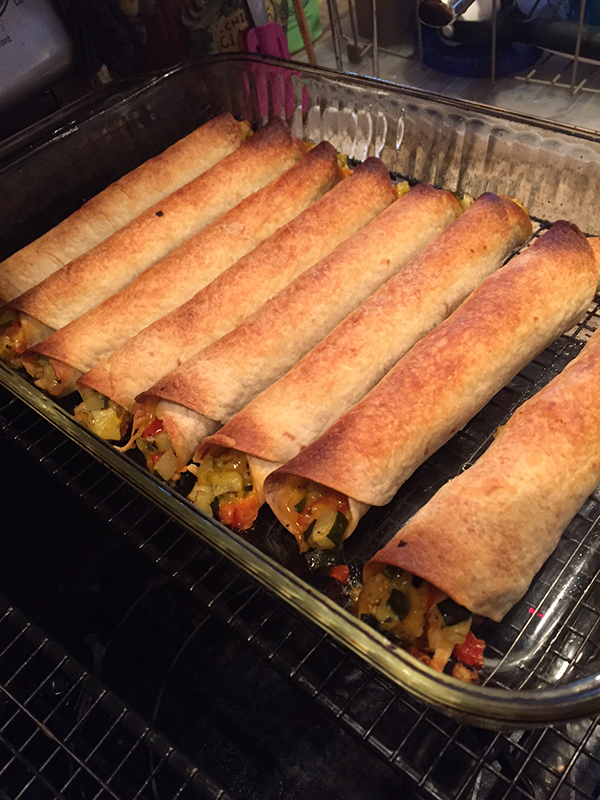
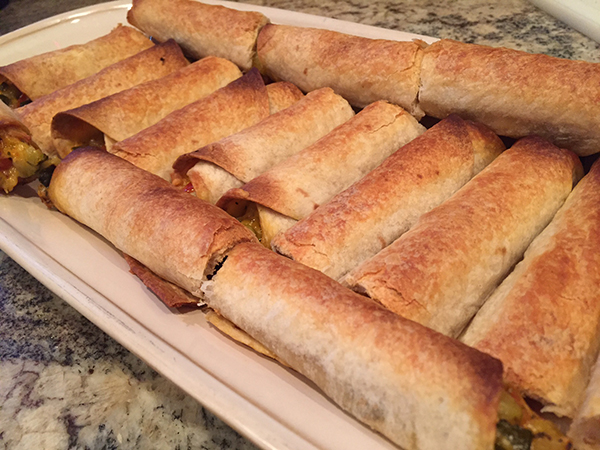
Lightly spray the top of the shells. Place the dish, uncovered, into the oven. Bake for 20-25 minutes, or until the shells start to brown and crisp. Remove from oven, let cool for a few minutes. Remove from baking dish and cut the baked taquitos in half. Serve and enjoy!
Share

Chicken Cutlet Roll-Ups

September 15, 2017 Entrees, Menu No Comments

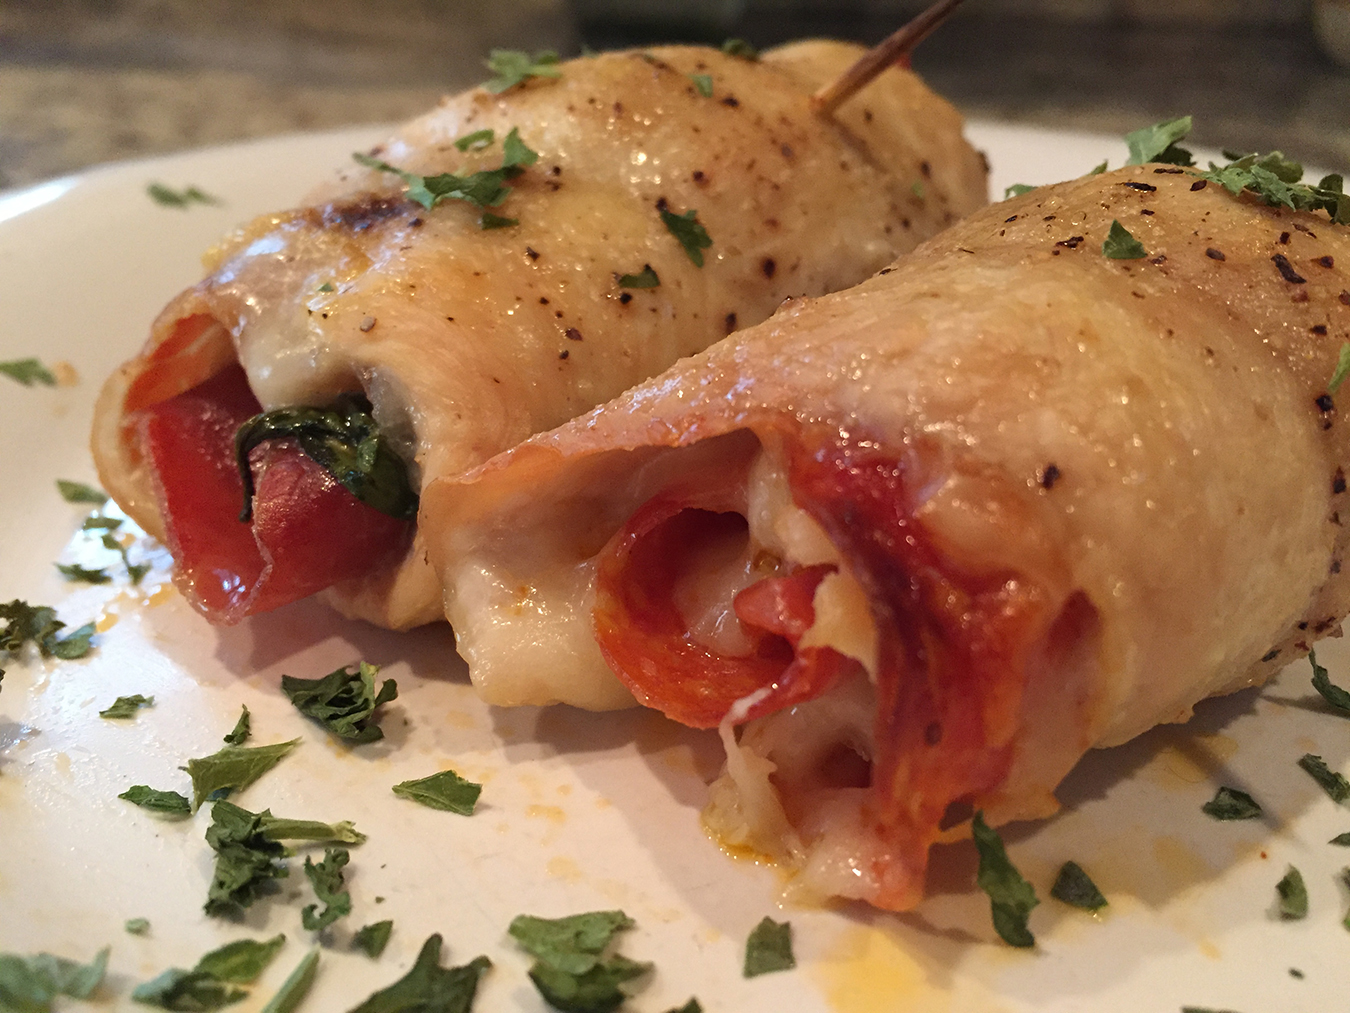
Chicken cutlets are a staple in just about every household. By adding just a bit of seasoning and a few everyday ingredients, this recipe takes chicken cutlets to a whole new level. The key to this recipe is to use thin sliced chicken cutlets. You want the cutlets to be easy to roll and fold. Instead of giving specific measurements, I am just going to share with you the basic steps that I take to make four to six roll-ups. You can adjust the filling ingredients to your liking!


Step 1

Lightly brush both sides of the cutlets with olive oil. Season both sides with a little salt, pepper and garlic powder.


Step 2

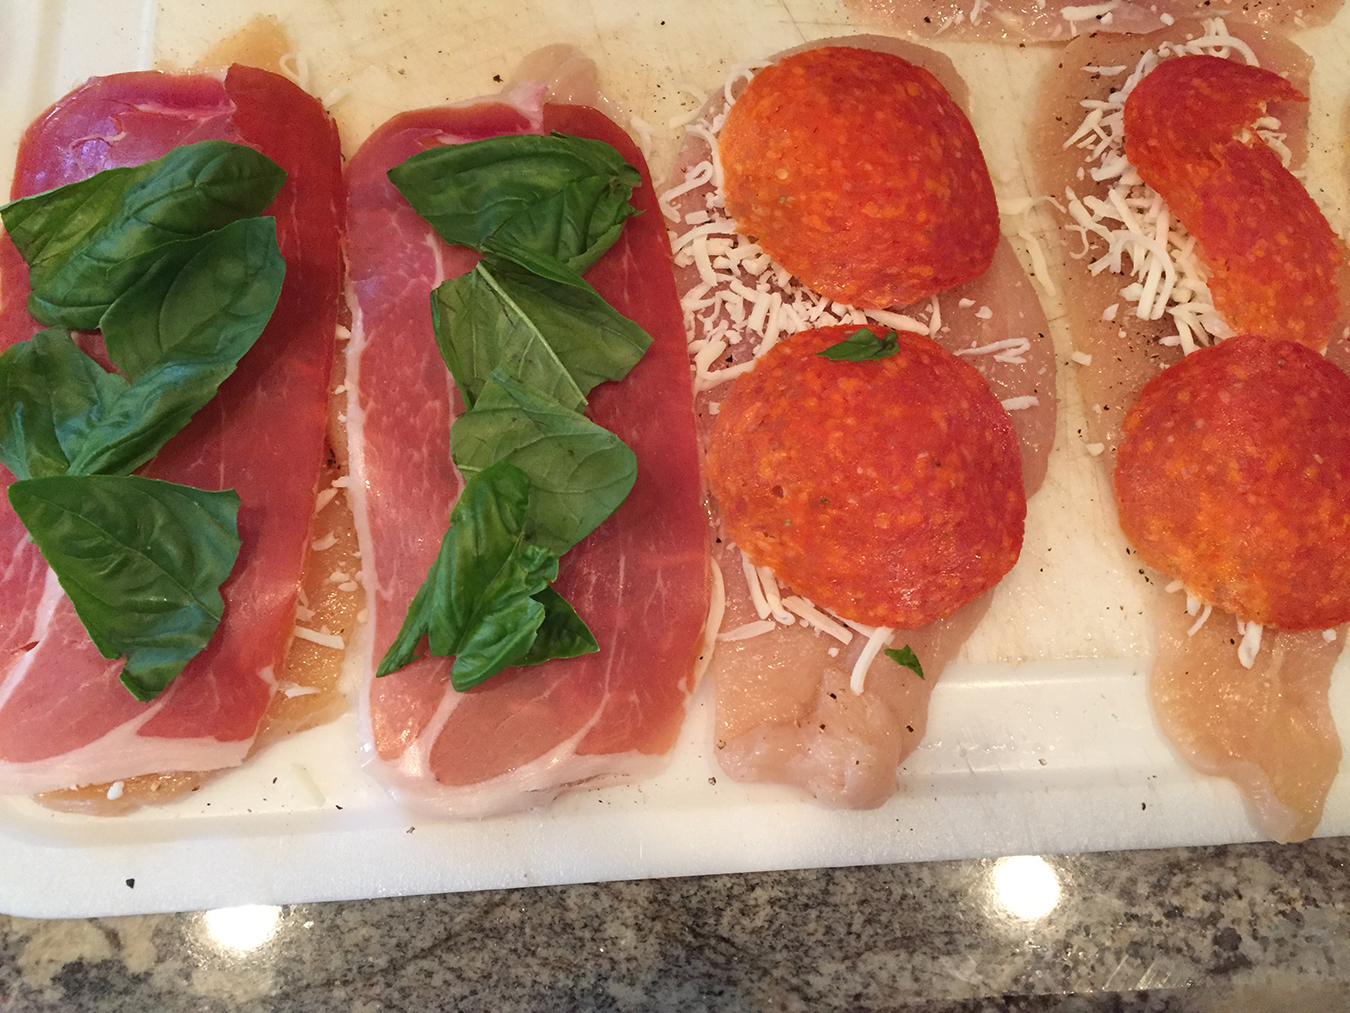
Place in single layers the filling ingredients that you choose.
Here are just a few tasty suggestions:

  • prosciutto, provolone and fresh basil
  • pepperoni and mozzarella
  • chopped artichoke hearts and tomatoes
  • chopped olive salad
  • sauteed mushrooms
  • crab meat


Step 3

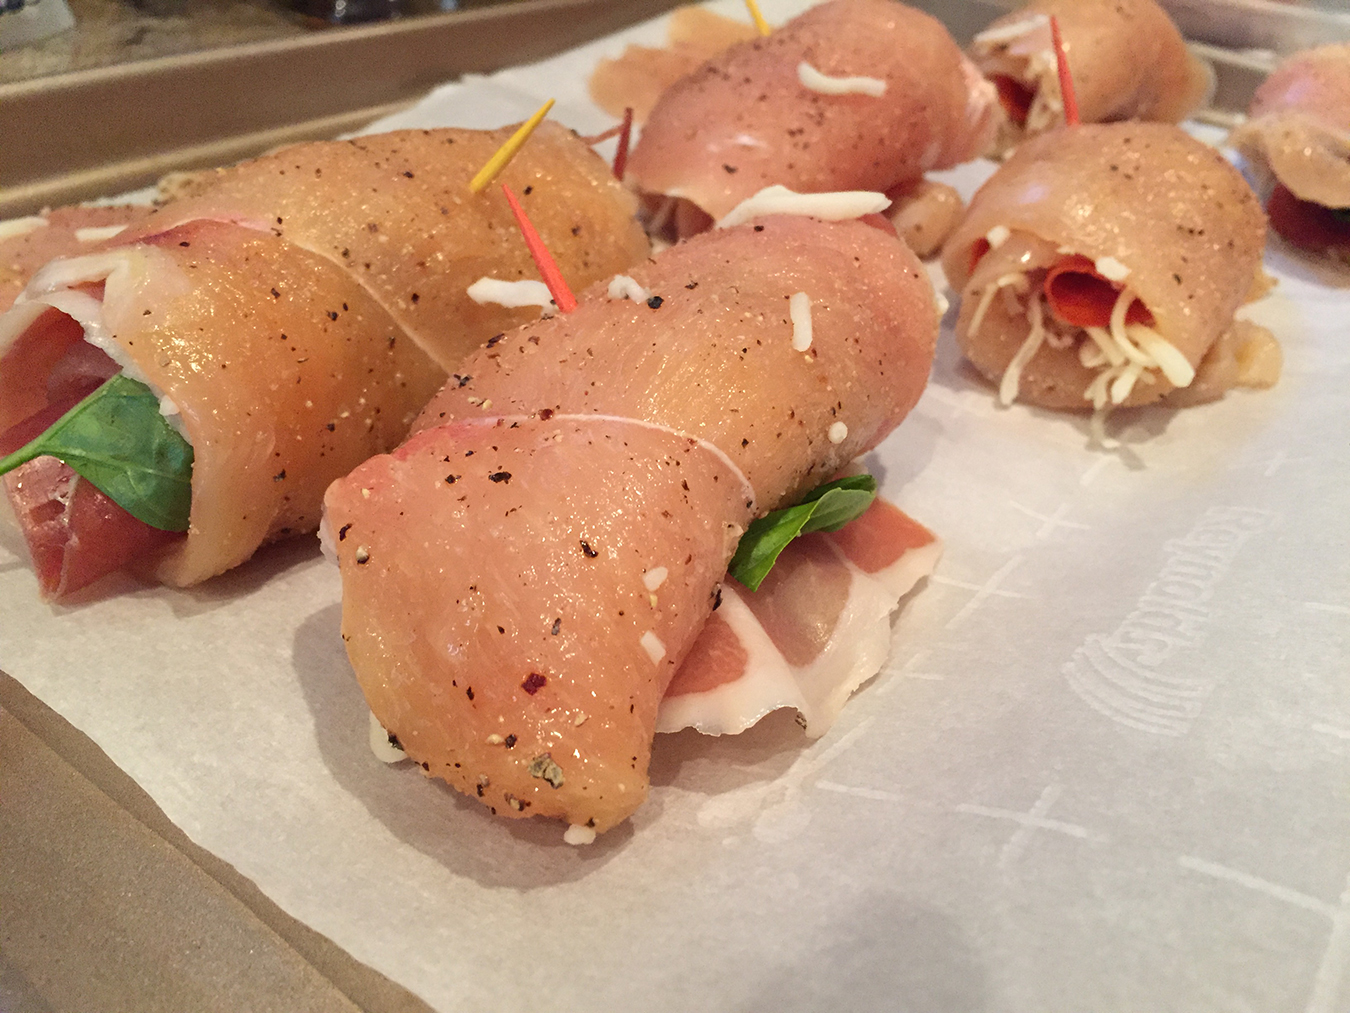
Carefully roll up the cutlets, and either tie them with butcher string or secure them with a tooth pick.


Step 4

Place the roll-ups on a baking tray lined with parchment paper. Bake at 350˚ for 35-40 minutes, until chicken is done.

Share

Baked Eggs and Toast

July 25, 2017 Entrees, Menu No Comments

A while back, I shared with you my recipe for Italian Eggs in a Basket. This is a classic dish which is made up of a hollowed roll that is served with a seasoned egg baked inside of it. Not long after I shared this recipe, I came across a similar recipe on one of those trendy 30 second recipe videos that are popular on social media. Instead of using a hollowed roll, you were to use slice of bread that was flattened in the middle. I gave it a try, and I liked it. I thought it would have been a fun and enjoyable breakfast for my kids as well…but I was wrong. For as much as we enjoy eating eggs in our house, fried eggs are not the usual standard. We’re a big scrambled and omelette family. Heck, sometimes I feel like I trick myself into thinking that I like fried eggs more than I actually do.. There are so many recipes today that incorporate fried eggs, such as pizza, burgers and even pasta…it’s easy to get caught up in the hype.

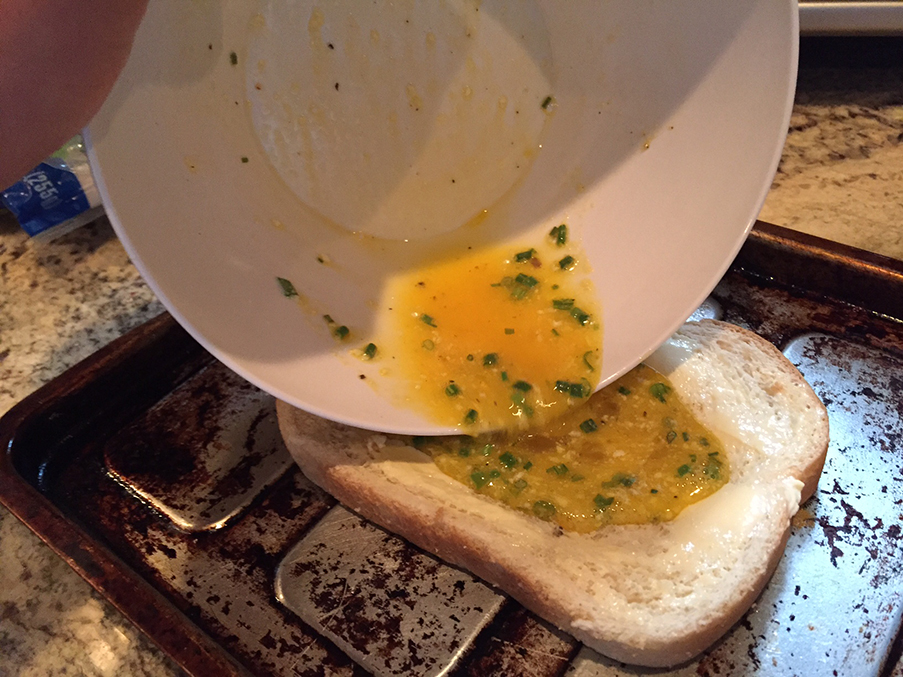
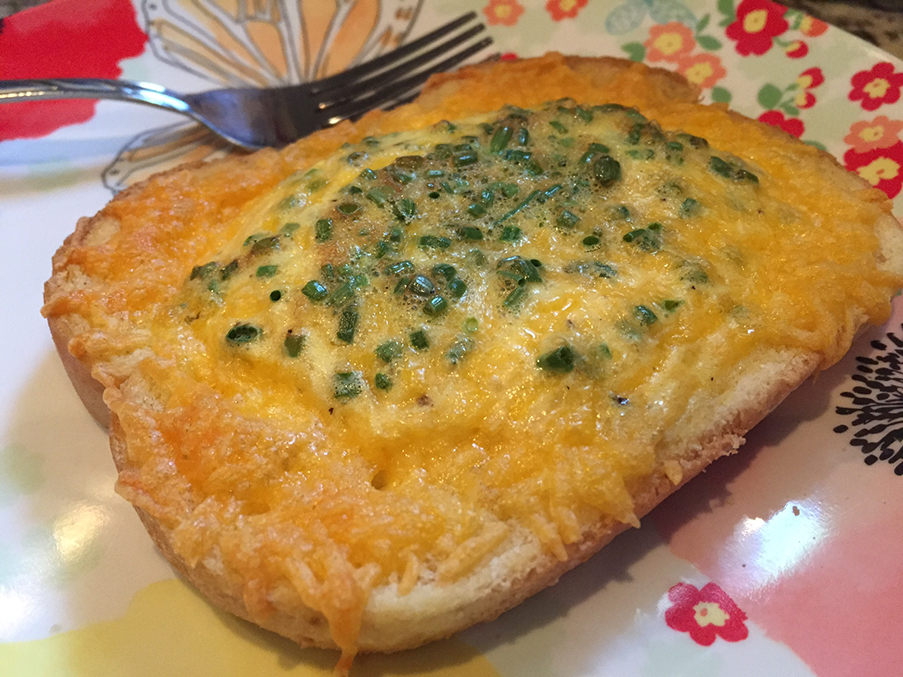
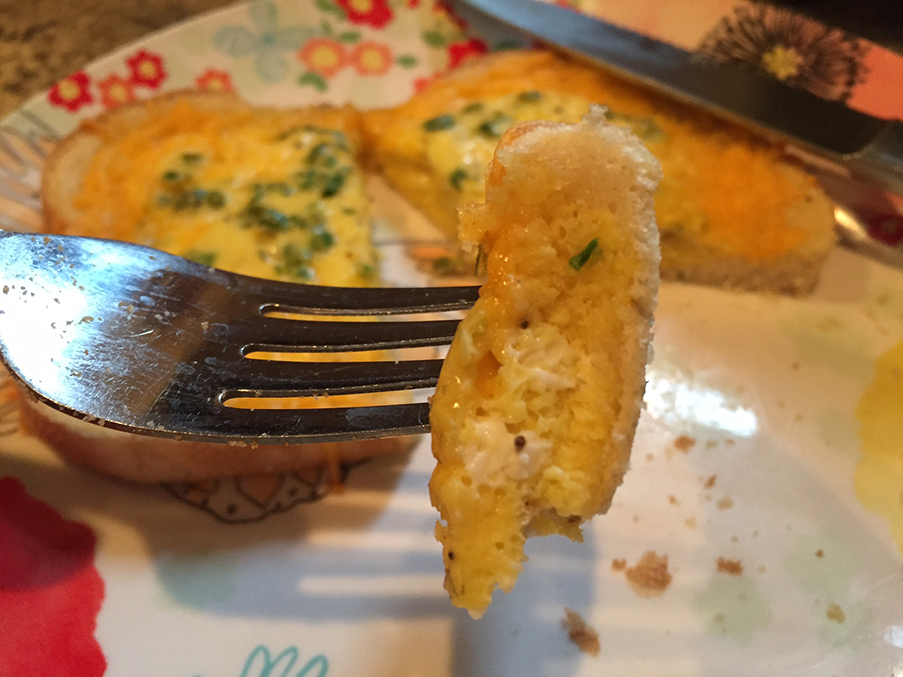
Instead of giving up on this recipe all together, I decided to just incorporate my method of making eggs to the recipe. I followed the same preparation steps, but instead of cracking an egg into the center of the bread, I poured my standard scrambled mixture of one egg, some parmesan cheese, chives, salt and pepper onto the bread, After 10 minutes in the oven, we were all enjoying a tasty and filling new breakfast treat. It has since become a breakfast standard in our house.

This recipe is incredibly easy to make, and you can adjust the egg batter to your liking. I would suggest to avoid adding too many heavy ingredients, as the toasted bread may fall apart. You could always serve the additional ingredients, such as vegetables or heavier breakfast meats, on the side. I would also suggest using a toaster oven as opposed to a standard oven, if possible, for one or two servings. The toaster oven will warm up much quicker with less power needed. If a standard oven is your only option, it’s totally fine. However, the toaster oven method will make things a bit easier for you for one or two servings.


Baked Eggs and Toast

Makes one serving

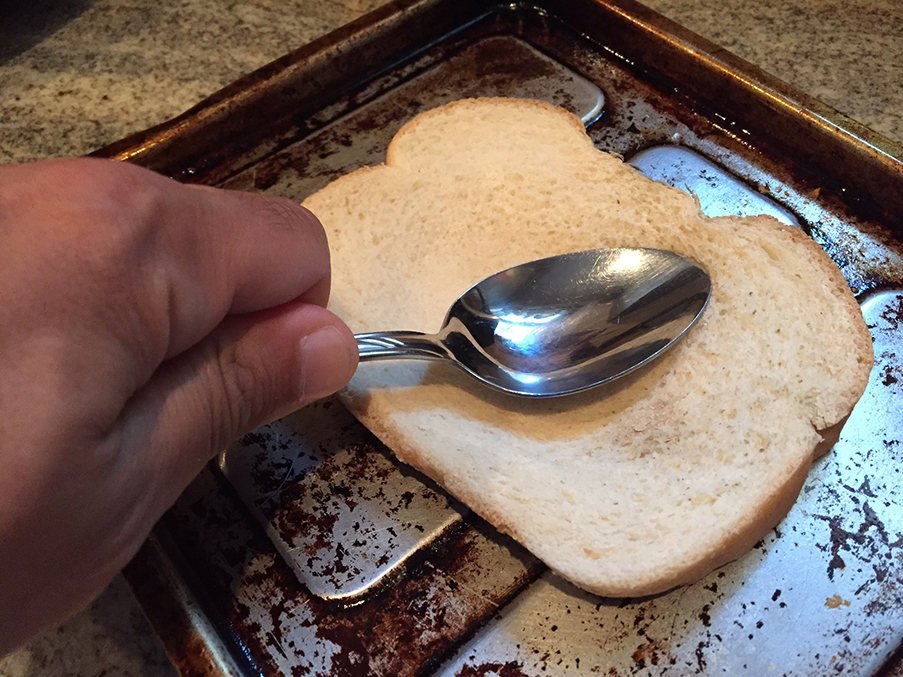
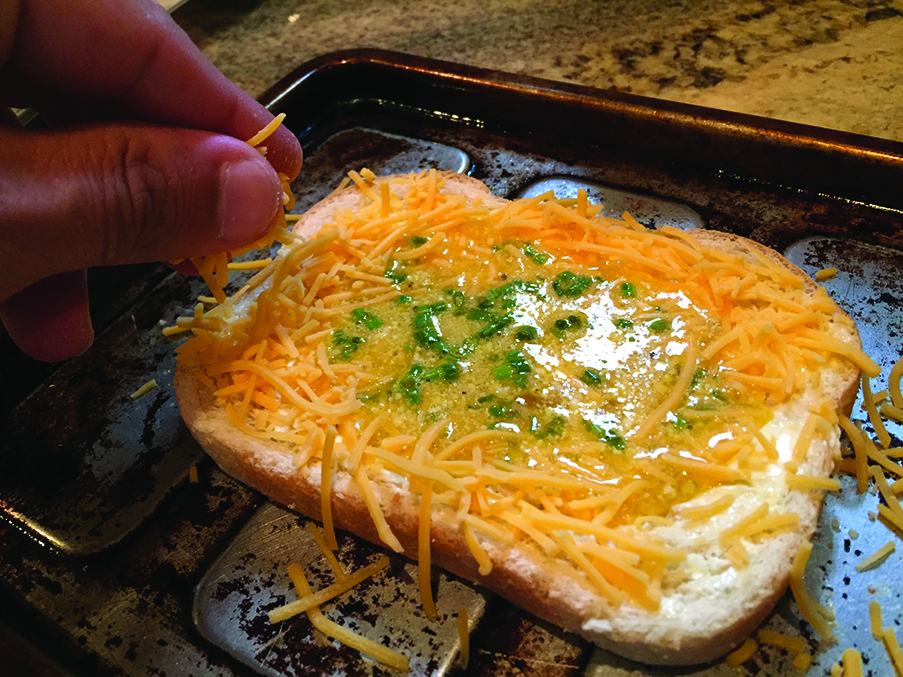
Step 1: Pre-heat your oven or toaster oven to 375˚. Take one piece of bread (white or wheat), lay it on a baking tray and flatten the center area with the back of a spoon or the palm of your hand. Lightly coat the edge of the bread with butter.

Step 2: Mix together one egg with your choice of omelette seasonings or spices. I prefer a teaspoon of parmesan cheese, a teaspoon of chives, and a dash of salt and pepper. Pour the egg batter into the center of the bread.

Step 3: Sprinkle some shredded cheddar cheese around the buttered edge of the bread.

Step 4: Place the tray into the oven or toaster oven, bake for 10 minutes or until the egg batter has set.

Serve and enjoy!
Share

Recent Comments

Archives

powered by
Socialbar