Home » Menu » Recent Articles:

NEW: Shepherd’s Pie Italiano


Ciao, fellow foodies. Our goal with “The Mamma meets the Cucina” is to keep the Italian recipes and traditions going in future generations of our now American families. We’ve got the rich heritage, but unfortunately, not many of us have real live nonne and small Italian village marketplaces at our fingertips. That’s why there’s “The Mamma meets the Cucina!”

So, we decided to kick off with a recipe that puts an Italian twist on an American classic – Shepherd’s Pie Italiano! Shepherds pie is one of those comfort foods…well, to me, Italian food is ALWAYS comfort food! It makes you feel warm and fuzzy (wait – maybe thats the vino…?) In any case, a hearty meal like this really makes me think of my grandparents and great grandparents. Before they came to America, they ate regionally. By this I mean that they ate whatever foods naturally grew in the climate and soil of their small towns. (Here, I must give a shout out to Guardia Lombardi – my grandparent’s small, small, small town near the tip of the boot) They lived off their land and used those regional ingredients to come up with such amazing dishes. To them it was peasant food – to us, it’s a delicacy hard to find in the states.

I always say – until I retire and move my family into our Italian villa on the Amalfi coast, the burden rests on me and my generation (as usual) to let these traditional style recipes live on in the future. It gives us a link to our past; it acts as a tribute to our ancestors; it keeps us hungry for more… (there’s gonna be a lot of that around here!)

So with an Italian touch, we turned a bunch of meat in a pie shell into a rich, hearty Italian sausage scallopini casserole type thing with a polenta topping! A regular old peasant dish, right?! Tell me your mouth is not watering already? Watch as Chef Condo reveals his Cucina secrets play-by-play for all of you paisans out there….

SHEPHERD’S PIE ITALIANO

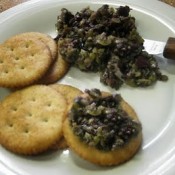
For this recipe, I’m taking the traditional Shepherd’s Pie (beef and vegetables in a brown gravy topped with a mashed potato crust) and am adding an Italian spin to it. I’m talking sausage scallopini topped with polenta.

This dish is done in three stages:
Stage One – the scallopini
Stage Two – the polenta
Stage Three – combining and baking the two to make the pie

The scallopini (stage one) can be done ahead of time and refrigerated (up to a day). There is a lot of natural flavor coming from the garlic, onions, peppers, mushrooms and sausage, so you don’t have to season much at all. I added a bit of black pepper and some Italian seasonings, and did not use salt at all. You can season to your liking.

The polenta (stage two) requires some time and effort. There’s only four major ingredients (water, cornmeal, salt, parmesan cheese – I also added a bouillon cube for extra flavoring), but you have to be committed for 20 solid minutes of continuous stirring. Otherwise you risk burning the polenta or having it turn out lumpy. You want a nice, smooth texture What I suggest is to get yourself into a zone. Create a relaxed and happy atmosphere to help those minutes just breeze by. Throw on your favorite CD (my go-to is either the Best of Dean Martin or Dave Brubeck’s Time Out), pour a glass of wine and have at it. You’ll reap the rewards, I promise you!

Stage three is the easy part. Pour the scallopini mixture into a medium baking dish, spread the just-done polenta on top, and let it bake for 20-25 minutes. You can hit it under the broiler for a minute or so to crisp up the polenta, if you like. Let sit and cool for a few minutes before serving.

1 lb. ground sweet Italian sausage, removed from casing
2 tblspn olive oil (plus more if needed)
2 cloves garlic, finely chopped
1 small yellow onion, finely chopped
1 green bell pepper, finely chopped
1 portabella mushroom cap, chopped
1 15 oz can tomato sauce
fresh ground black pepper
Italian seasoning
1 cup corn meal
3 cups water
1 tspn salt
1 chicken bouillon cube
1/4 cup parmesan cheese

Heat olive oil in a large sauce pan on medium-high heat, add garlic, heat for one minute. Add ground sausage, breaking up in pan, stir occasionally. When sausage is evenly browned, add onion and peppers, stir. Add mushrooms, stir. When peppers and onions become crisp-tender, add tomato sauce. Season with some fresh ground pepper and Italian seasoning (adjust seasoning to your liking). Stir, cover and simmer on medium-low for about 20-25 minutes, until sauce thickens, stirring occasionally. Remove from heat and set aside (you can prepare the scallopini portion earlier in the day and refrigerate to save time).

In a large sauce pan, place three cups water and bouillon cube, add salt, bring to a boil. Lower water to medium-low. Slowly add cornmeal a little at a time to water, stirring as you add. Do not add cornmeal all at once, or else it will clump. Stir cornmeal into water continuously for 20 minutes. You have to keep up with the stirring to avoid the polenta mixture from burning. About mid-way through, add parmesan cheese, continuing to stir. After 20 minutes, remove from heat.

Pour scallopini mix into a mid-size baking dish. Scoop polenta mixture on top and smooth out (like a cake frosting) to completely cover scallopini. Bake in oven uncovered at 350º for 20-25 minutes. Remove from oven, let sit for a few minutes. Serve and enjoy!

Share

NEW – Top This: Olive Salad

June 4, 2010 Appetizer, Menu 3 Comments

Marinated toppings and salads/spreads are a big thing in my house. When it comes to sandwiches, burgers, scrambled eggs or any other dish that would go well with a condiment, my wife and I are usually reaching for a jar of roasted red peppers, hot cherry peppers or bruschetta topping instead of ketchup, mustard and relish. There’s something about the combination of fresh vegetables mixed with olive oil, herbs and the tang of vinegar to really add a nice punch to a dish.

Roasted red peppers are, of course, the standby. They’re fairly easy to make, and nothing beats the taste and texture of home made. Whether you’re roasting your own or buying them jarred, they work well with just about anything, from pasta salad to a topping on a veal chop. For as good and versatile as they are, the most recent go-to jarred pepper in our house is Mancini’s Fried Peppers with Sweet Onion. Unlike roasted reds, they’re a little less on the tang and just a bit more on the heat. We’ve been buying these two jars at a time as of late!

One of my big late summer/early fall traditions as of late is marinating and jarring eggplant. It’s my way of keeping some old world traditions alive for my kids to enjoy and appreciate. Based on the response that I received from my post last year, it’s got me thinking that maybe I should make a few more jars this year…just in time for holiday gifts! To read more about my jarring process and serving suggestions, click here for the link to my marinated eggplant article.


Another great topping that we often use is bruschetta topping (made with chopped plum tomatoes, onions, fresh herbs, garlic and olive oil – think of it as Italian salsa). The traditional way to serve it is as a topping on a piece of toasted French or Italian bread rubbed with fresh garlic. However, the flavors and ingredients work so well together that I’ll often use it as a topping on white pizza, chicken or mixed with pasta.

Olives are, of course, a great appetizer side. They work well in salads, antipasto, as ingredients to main dishes, or on their own. They’re also an endless source of entertainment for my kids. Seriously, who hasn’t put olives on their fingers when they were young?!?! Although they only come in two colors – black (fully ripe) and green (unripe) – there’s a wide variety of pepared olives to choose from: traditional black and green (in small, medium or large), manzanilla (Spanish green olives, often stuffed with pimientos), kalamata (Greek black olives, brine cured), and gaeta (Italian black olives, salt cured and soaked in oil) just to name a few. My daughter, Julianna, has been eating green olives stuffed with gorgonzola cheese since she was 1-1/2, and her younger sister Ava is following suit right behind her!

This week, I’m going to combine the best of both worlds and make an olive salad/spread. I’m using three types of olives (medium black, medium green and kalamata), mixing it with some fresh garlic, oregano and basil (fresh or dried will work), crushed red pepper, vinegar, extra virgin olive oil and a little bit of grated parmesan cheese for an extra kick. Serves well as a bruschetta-style topping, mixed with pasta, or on your favorite pizza or sandwich.

Now, if you’re not a big fan of olives to begin with, this dish probably won’t change your mind on them. But if you are an olive lover, give this dish a try. I’m sure you’ll like it. And have fun with it…add your own favorite variety of olive, or try spicing it up by adding some peppers!

Ciao!


OLIVE SALAD

1 cup medium black olives, pitted
1 cup medium green olives, pitted (with or without pimientos)
1 cup kalamata olives, pitted
3 tspns red wine vinegar
2 cloves garlic, smashed*
1 tspn fresh oregano, chopped (or 2 tspns dried oregano)
1 tspn fresh basil, chopped (or 2 tspns dried basil)
1/4 tspn red pepper flakes
1 tblspn grated parmesan cheese
1/4 cup extra virgin olive oil (you can add more olive oil to desired amount)

Place all ingredients in a food processor, adding olive oil last. Pulse to chop until desired texture (I recommend chopped instead of smooth texture).
Place in a jar or bowl, cover and let refrigerate for at least an hour prior to serving.

*To smash garlic, place clove(s) on a chopping board, lay the flat side of a chef’s knife on the clove (sharp side facing away from you) then strike the knife with the heel of your palm, crushing the clove beneath the knife. The papery skin will slip right off the crushed cloves which can then be minced very fine or used in the recipe as it is. Not only does smashing garlic simplify the peeling and chopping process, it also releases the flavors of the garlic.

Share

Grilled Tilapia Tacos

May 27, 2010 Entrees, Menu 1 Comment

Is it Memorial Day weekend again? Already? I hate to use the old cliché that time flies…but slap a Superman cape on the clock! The good news is that it’s officially grilling season. I use ‘officially’ lightly, as I have many friends who are die-hard, year-long grill masters.

I am sure that many of you are planning a cook-out at some point this weekend. If so, try to think beyond the old standbye burger and dog. Yes, they are great on the grill and one of the best summer traditions, but don’t be afraid to have some fun. If you look at some of my posts from last year, you’ll find some good suggestions that have become grill-out staples for me.

For this season, my first grill-out suggestion is a fun, yet very healthy dish: grilled tilapia tacos. Tilapia is a very delicate and flaky white fish, with a very mild, not-so-fishy taste. It’s also inexpensive. Because tilapia will flake when cooked, you can risk having it fall apart while removing it from the grill. I suggest grilling it in an aluminum foil pouch. The foil pouch will allow the flavors of any seasonings to marry together, and will also help retain the moisture, so the fish will not be dried out. No flipping necessary.

I recommend using soft corn tortillas, quickly heated up on both sides on the grill. For toppings, fresh cole slaw mix works best. You get a variety of veggies that are nicely shredded and add a delicious crunch. I also recommend adding a drizzle of a nice citrus based dressing, salsa (I have a go-to pineapple salsa that is killer for this!) or a bottled marinade (garlic-lime or tequila lime marinade would work well). Top with a bit of fresh cut mango, and you’re all set.

Disclaimer – steel drum band music not included

Happy summer!

GRILLED TILAPIA TACOS

4 pieces tilapia
2 lemons, sliced and zested
olive oil
sea salt & fresh ground black pepper
corn tortilla shells
1 bag shredded cole slaw mix (found in the bagged lettuce section of your grocery store)
Your choice of citrus based marinade, salsa or dressing
1 mango, cut into small cubes.

Place one piece of uncooked tilapia on a piece of aluminum foil twice the size of the fillet, drizzle with olive oil and season with some sea salt, fresh ground black pepper and lemon zest, top with a slice or two of fresh lemon. Fold the foil over and seal edges with a double fold. Repeat with remaining pieces of tilapia. Place the pouches on direct, medium-high heat for approximately 10-12 minutes.

After you remove the foil pouch, be very careful when opening it. Lots of steam will escape. DIscard the lemon slices, remove the fish and flake it up with a fork, then place it on a dish for serving.

Meanwhile, quickly heat the corn tortillas on the grill just until the get warm. If they stay on too long, they will not fold properly.

Layer the tortilla shells with some tilapia, a bit of cole slaw mix, top with a drizzle of your marinade preference, add a few pieces of mango. Fold up and enjoy.

Share

Mediterranean Salad

May 20, 2010 Salads 2 Comments

Here’s a nice, fresh salad idea that’s perfect for spring and summer. Serve it as a main or side dish, or even wrapped in a tortilla as a sandwich. Lots of zesty flavor here! All of the tasty ingredients, especially the red onion, really bring the couscous to life. Try adding some roasted red pepper and cucumber for even more flavor and texture.


MEDITERRANEAN SALAD

1 cup uncooked couscous
1 clove garlic, minced
1/2 cup plus 1 tablespoon olive oil, divided, plus more for mixing
2 lemons
1/2 lb medium size raw shrimp, shelled and deveined
1 6-8 oz can medium black olives, pitted
1/2 container grape tomatoes
6 oz jar artichoke hearts, chopped
1/2 red onion, chopped
4 oz container feta cheese, crumbled
1/2 of 10 oz can of chick peas
1/4 cup fresh basil, chopped

Prepare uncooked couscous according to package directions. Place cooked couscous in a large mixing bowl, stir in a few drizzles of olive oil to avoid couscous from sticking, set aside.
In a large frying pan, heat up 1 tablespoon olive oil. Add garlic, heat for 30 seconds, add juice of one lemon, heat for additional 30 seconds. Add shrimp, stir for approximately 3-4 minutes, until shrimp are pink. Remove from heat, chop into large pieces, let cool.
Mix remaining 1/2 cup of olive oil with chopped basil and the juice and zest of one lemon. Add shrimp, olives, tomatoes, artichoke hearts, red onion, feta cheese and chick peas to couscous. Drizzle the olive oil dressing over couscous mixture. Mix well. Serve with a nice Pinot Grigio

Serves 6-8.

Share

Recent Comments

Archives

powered by
Socialbar