Recent Articles:

Foiled! Tips and Recipes for Grilling Foil-Wrapped Packs

Quick-hit videos and recipes for foil-wrapped packs have recently taken social media by storm. Just this past week alone, I’ve watched at least three new recipe videos for foil-packed meals on the grill…and this was after I made a delicious foil wrapped lobster tail, baby potatoes and corn on the cob meal on the grill for my birthday last weekend!

Foil-wrapped packs are assembled by placing a single-serving of ingredients onto large sheets of aluminum foil. The foil sheets are then folded up into sealed packets, then cooked either on the grill or in the oven. There are many benefits to preparing foil pack recipes, especially if you are preparing the foil packs on the grill. Because all of the ingredients are contained (including your main dish, sides, herbs and spices), you do not have to put any effort into brushing, seasoning, stirring or flipping anything during the cooking process. All of the ingredients get the work done on their own! The foil packs also make for a fun presentation when serving them to your friends or guests, so it cuts back on post-dinner clean up. Since everything is contained within the foil packs, there is also less chance of flare-ups caused by drippings.

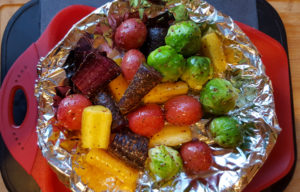
Seasoned vegetables, ready for the grill.

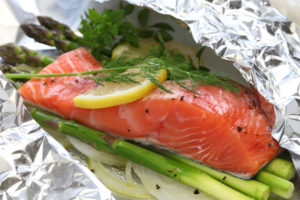
fresh salmon with asparagus in foil paper, ready for cooking.

Baked mexican chicken fajitas with spanish rice.

The recipes that you could make in a foil-wrapped pack are virtually endless. At the end of this article, there are links to some of the foil-wrapped recipes that I have made. I also have links to articles from tablespoon.com and foodnetwork.com, offering up 75 different foil-wrapped recipes. From appetizers, vegetables, seafood, pasta and fajitas, to roasted garlic, mussels, meatballs, popcorn and chocolate marshmallow banana boats….the list is just amazing! Again, many of these recipes could also be made in the oven, so the fun does not have to stop when grilling season comes to an end. But don’t worry, we have plenty of grilling time ahead of us!

A few things that you should keep in mind when preparing foil-wrapped packs:

• Be sure to use heavy aluminum foil (non-stick is preferred), or double up on the sheets if you are using thinner foil. You do not want any of your food to poke through or rip the foil at any time.

• If some of your ingredients naturally take longer to cook than others, you should prepare the items that take longer prior to adding them to the foil pack. A perfect example is potatoes. Even when cut down to small pieces, potatoes could take a while on the grill. If you are adding them to a pack with chicken, the potatoes should have enough time to cook on the grill. However, if you are adding potatoes to a pack with fish, the fish will cook much quicker than the potatoes. You will be better off preparing the potatoes ahead of time, then adding the cooked (or semi-cooked) potatoes to the pack.

• Always be very careful when removing the cooked foil packs from the grill, and especially when you unfold the cooked packs. The cooked food will be hot, and steam will be released when the packs are opened. Depending on the meal that you have made, there may also be hot oil in the pack that can burn you. Take your time removing and opening the packs, and be sure to use oven mitts.

• Most of all, be creative and have fun!


Recipe suggestions:


Grilled Tilapia Tacos

Grilled S’mores Sandwiches

Lobster Tail Foil Pack

Pack it Up! Pack it In! 15 Foil Meals for the Grill

50 Things to Grill in Foil


Images courtesy of istock.com

Share

Lemon Mascarpone Whipped Cream

May 25, 2017 Dessert No Comments

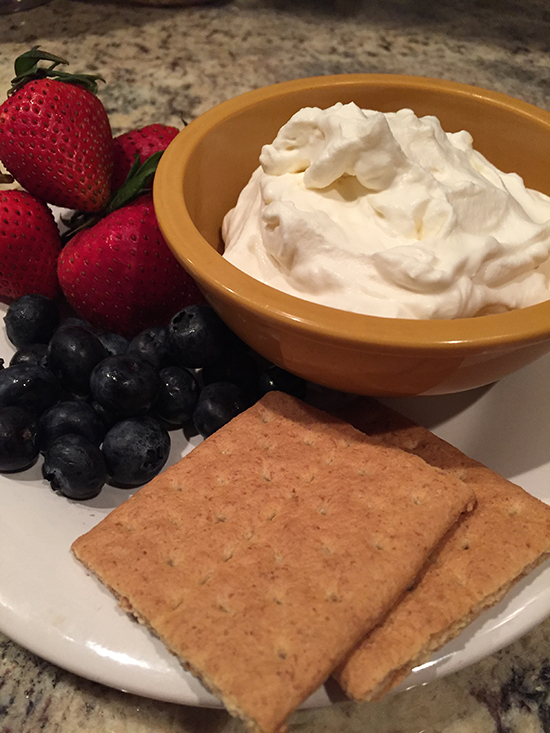
Memorial Day weekend is here once again, and it is time to start thinking about light and refreshing sweet summer recipes! Today, I’m sharing with you a super easy dessert recipe that can be used in many creative ways. We’re starting off with a basic home made whipped cream. Next, we’re going to build up the creamy texture by adding mascarpone cheese, which is a delicious Italian style cream cheese. To finish it off, we’re adding some fresh lemon juice and lemon zest. You can use this citrusy light whipped cream as a topping for pancakes or waffles, as a dip for fresh fruit and graham crackers (you will not believe how good this tastes with fresh strawberries and blueberries), as an icing for a spongy summer cake…or let’s be honest, you can even eat it on its own by the spoonful!


Lemon Mascarpone Whipped Cream

1/2 pint heavy whipping cream
1 tablespoon powdered sugar (plus extra if needed)
1 teaspoon vanilla extract
1/4 cup mascarpone cheese
1 teaspoon lemon zest
1 tablespoon lemon juice

Combine cream, powdered sugar and vanilla extract in a chilled mixing bowl. Using a hand mixer or a stand mixer, mix together until soft peaks start to form. Continue to mix, adding the mascarpone cheese a little at a time. Adding all of the mascarpone cheese at once will cause splashing. Continue to mix until stiff peaks form. Fold in the lemon zest and lemon juice. You can add additional powdered sugar if you prefer the whipped cream to be sweeter. Cover and refrigerate until ready to use.


Share

Strawberry Vanilla Infused Vodka

May 16, 2017 Dessert, Menu 1 Comment

It’s that time of year again, to start thinking about the summertime cocktails that you will be preparing to serve at your cookouts, sip on while down the shore or simply enjoy while on your back porch. Today, I’m sharing with you my recipe for an incredibly easy to make – and even easier to drink – strawberry vanilla infused vodka.

Infusing certain fruits with vodka, especially citrus fruits, can take a few weeks up to a few months to really extract the flavor to its fullest. However, the seasonal plump and juicy strawberries that are now available this time of year need only about 5 to 7 days to release their sweet juices when infused with vodka. There is no need to use a higher percentage alcohol base for this recipe. Basic 80 proof vodka will do just fine.

The trick, of course, is to use good quality vodka. You want this to be an enjoyable sipping drink. And let’s be honest…you don’t want to be serving cheap booze to your guests either. You have a couple of different directions that you can go with this recipe, depending on how involved you want to get. The easiest choice is to simply use a bottle of vanilla flavored vodka. There are a few brands available, but again, be sure to pick a decent brand. Don’t go cheap! If you want to take more of a purist approach, you can add 2-3 vanilla beans to unflavored vodka to make your own vanilla vodka. The process will take a bit longer, but will make for really tasty results…and it sounds impressive too!

Once the infusion process is done, you can either serve as is (over ice, as a mixer, etc.), or you can add simple syrup to it and serve it as a liqueur. You can add the simple syrup either per serving, or mix it with the entire batch. Just be sure to allow an extra day or so for the flavors to come together if you are adding the syrup to the entire batch.

However you decide to serve your strawberry vanilla vodka, be sure to have a lot of it on hand. I promise you it will be enjoyed!

Strawberry Vanilla Infused Vodka

1 pound fresh strawberries, cut into quarters, stems removed and discarded,
1 750-ml bottle good quality vanilla vodka*

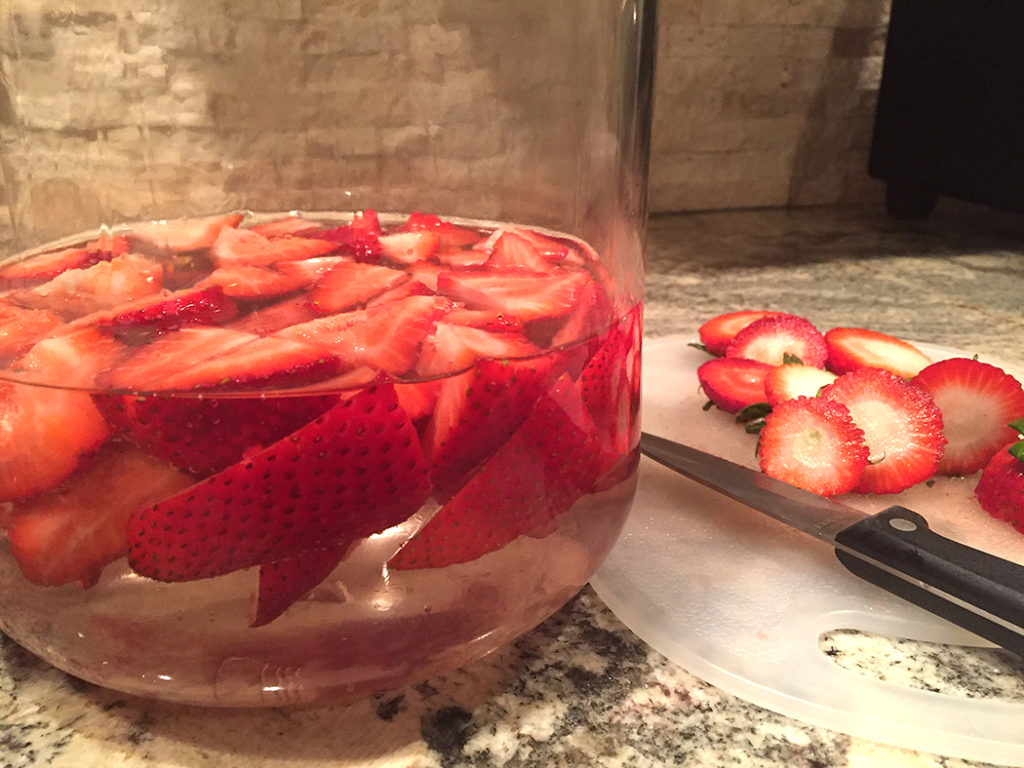
Place the strawberries into a large air-tight container. Pour the vodka over the strawberries, seal the container closed. Store in a dark, cool place for 5-7 days. Give the jar a light shaking once a day. The strawberries will lose their color once the flavor is extracted, and the vodka will turn a reddish-pink color. Strain and discard the strawberries from the vodka.

You can serve as is, or you can add simple syrup to sweeten it up.


Simple Syrup Recipe

1 cup water
1 cup sugar

(you can increase or reduce the amount needed by using the 1:1 ratio )

In a medium saucepan combine sugar and water. Bring to a boil, then let simmer, stirring until sugar has dissolved. Allow to cool. Combine with the infused vodka. If you are adding the simple syrup to the entire batch of infused vodka, allow it to sit for an extra day once mixed, so that the flavors come together.


*Infusing Vodka with Vanilla Beans

To make your own vanilla vodka, you will want to start with a good quality unflavored vodka. Add 2-3 vanilla beans, split length-wise but not scraped, to the vodka. Let the beans sit in the vodka for at least 7-14 days (the longer it sits, the stronger the flavor). Remove and discard beans once done. Then follow the steps above to infuse the strawberries with your vanilla vodka.

Share

Italian Desserts: The Ultimate Guide

April 19, 2017 Dessert, Menu No Comments

Although we are now a few days beyond the 2017 Easter celebration, I am still in recovery mode from all of the sweet and delectable treats that were enjoyed throughout the weekend. If your family is anything like mine, your refrigerator is still stocked with leftover cheese pies, cannoli and various other Italian desserts. There is, of course, no other way to celebrate a holiday (big or small) or special event in an Italian family than with a sweet table that appears to stretch miles long, stocked with dozens of decadent and creative mouth-watering desserts. As luck would have it, just about every Italian dessert that I can think of has been compiled, along with a description and photograph, in a recent article by Peter Genovese on nj.com. Fun videos and recipes also accompany many of the descriptions, which makes this compiled list all the tastier! So pour yourself a nice cup of coffee, pull up a chair, click on the link below and enjoy!


Courtesy of Peter Genovese/www.nj.com

Share

Recent Comments

Archives

powered by
Socialbar