Recent Articles:

Marinated Eggplants – Keeping it in the Family

October 25, 2016 Menu No Comments

One of the biggest traditions in the kitchen that I look forward to each year is marinating and jarring eggplants. I still have vivid memories from when I was very little of my Grandmother distributing her jars of marinated eggplants to the family this time of year, telling us to let the jars sit until Thanksgiving before opening them. The eggplants didn’t have anything to do specifically with Thanksgiving…but rather it was just right amount of time to allow the jars to sit and age. I never got the exact recipe from my Grandmother, but I did put together my own version a few years back. Everyone in my family still enjoys them and looks forward to when I hand out my jars, so I know that I am keeping a family tradition alive and well.

As I prepared to put together this year’s batch, our daughter Julianna asked if she could help. It may sound silly, but Julianna’s interest in helping me filled me with such pride and happiness. We always make it a point to involve our kids with preparing our meals as often as we can. They may not necessarily enjoy eating the meal if it is too experimental for them. But if they are involved with creating the meal, it is enough encouragement for them to at least sample it. And I’m fine with that.

To see Julianna’s interest in wanting to help with the marinated eggplants means so much more. It shows me that she has a true interest in our family history and traditions. Hopefully what she learned from helping me will stick with her, and will encourage her to keep those traditions alive.

Below are a series of photos that I took of Julianna following the step-by-step process of marinating and jarring. And not to worry…I made sure to carefully guide her through each step to avoid injury with the food processor and the boiling water.

You can find the link to my marinated eggplant recipe by clicking here.


new1

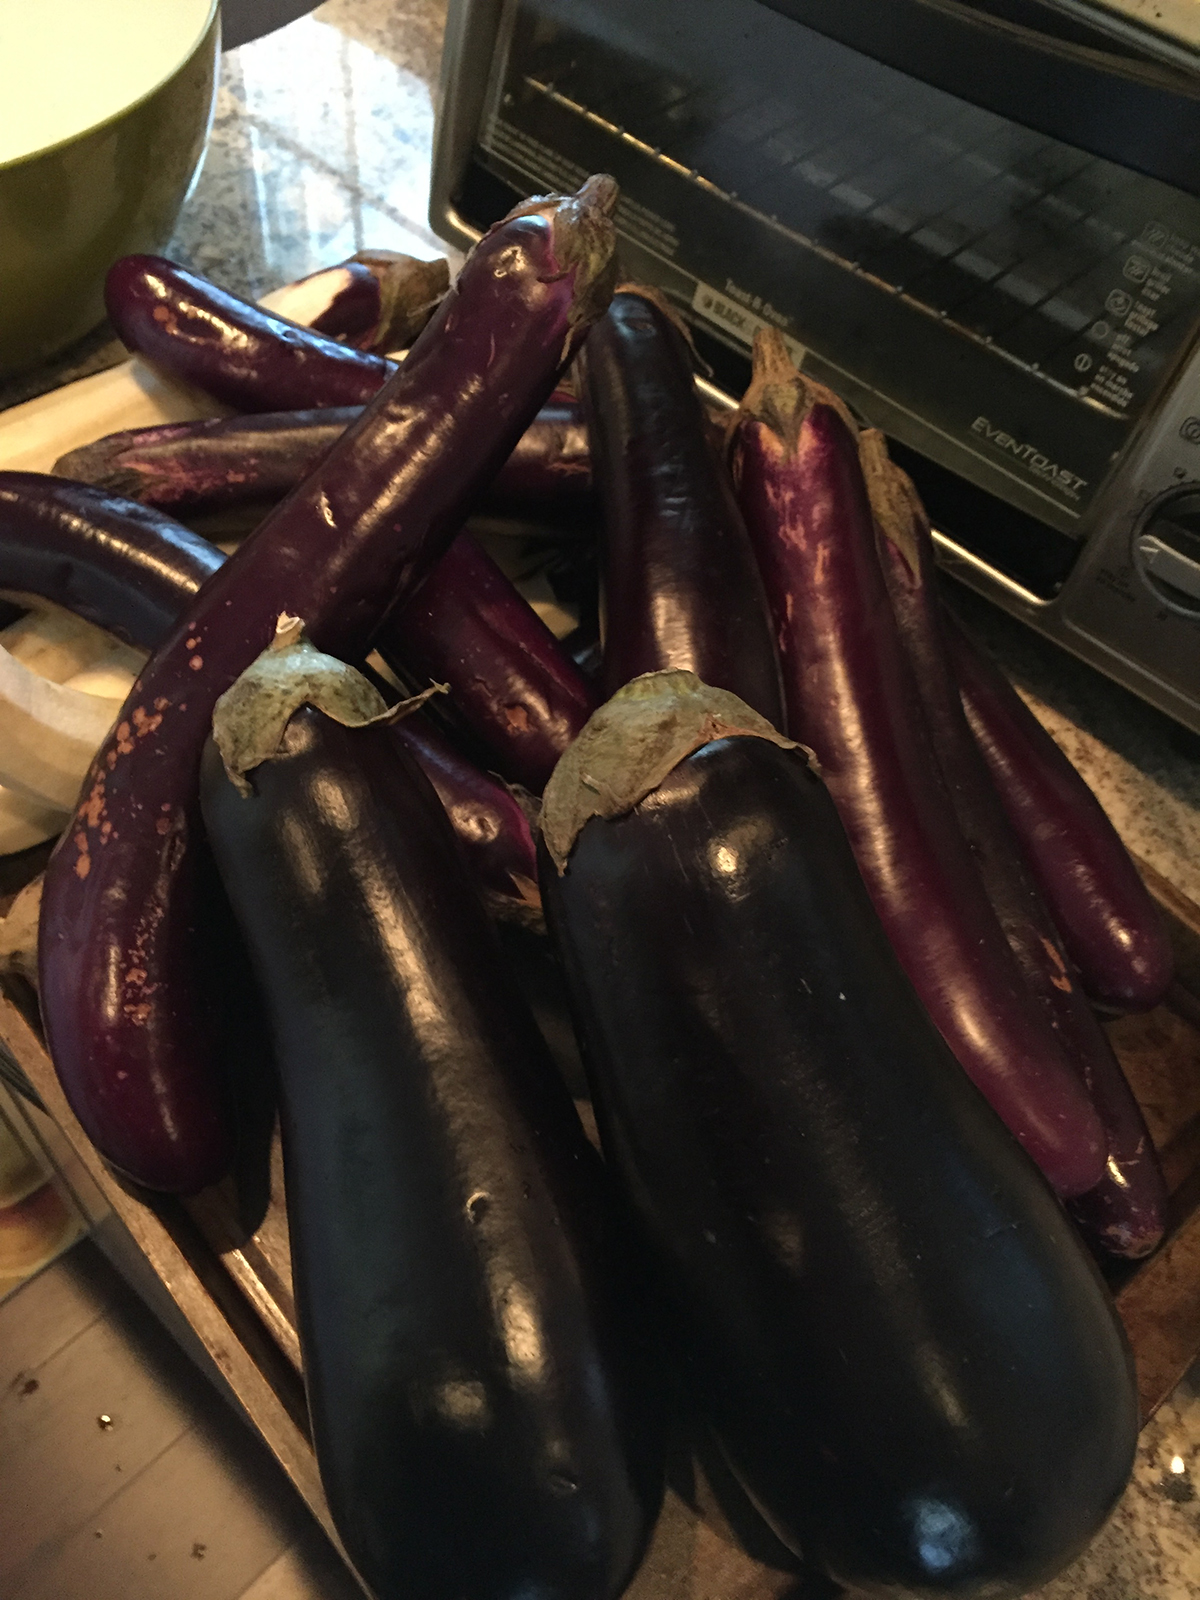
This year’s batch is a combination of Italian Globe and Japanese eggplants.


new2

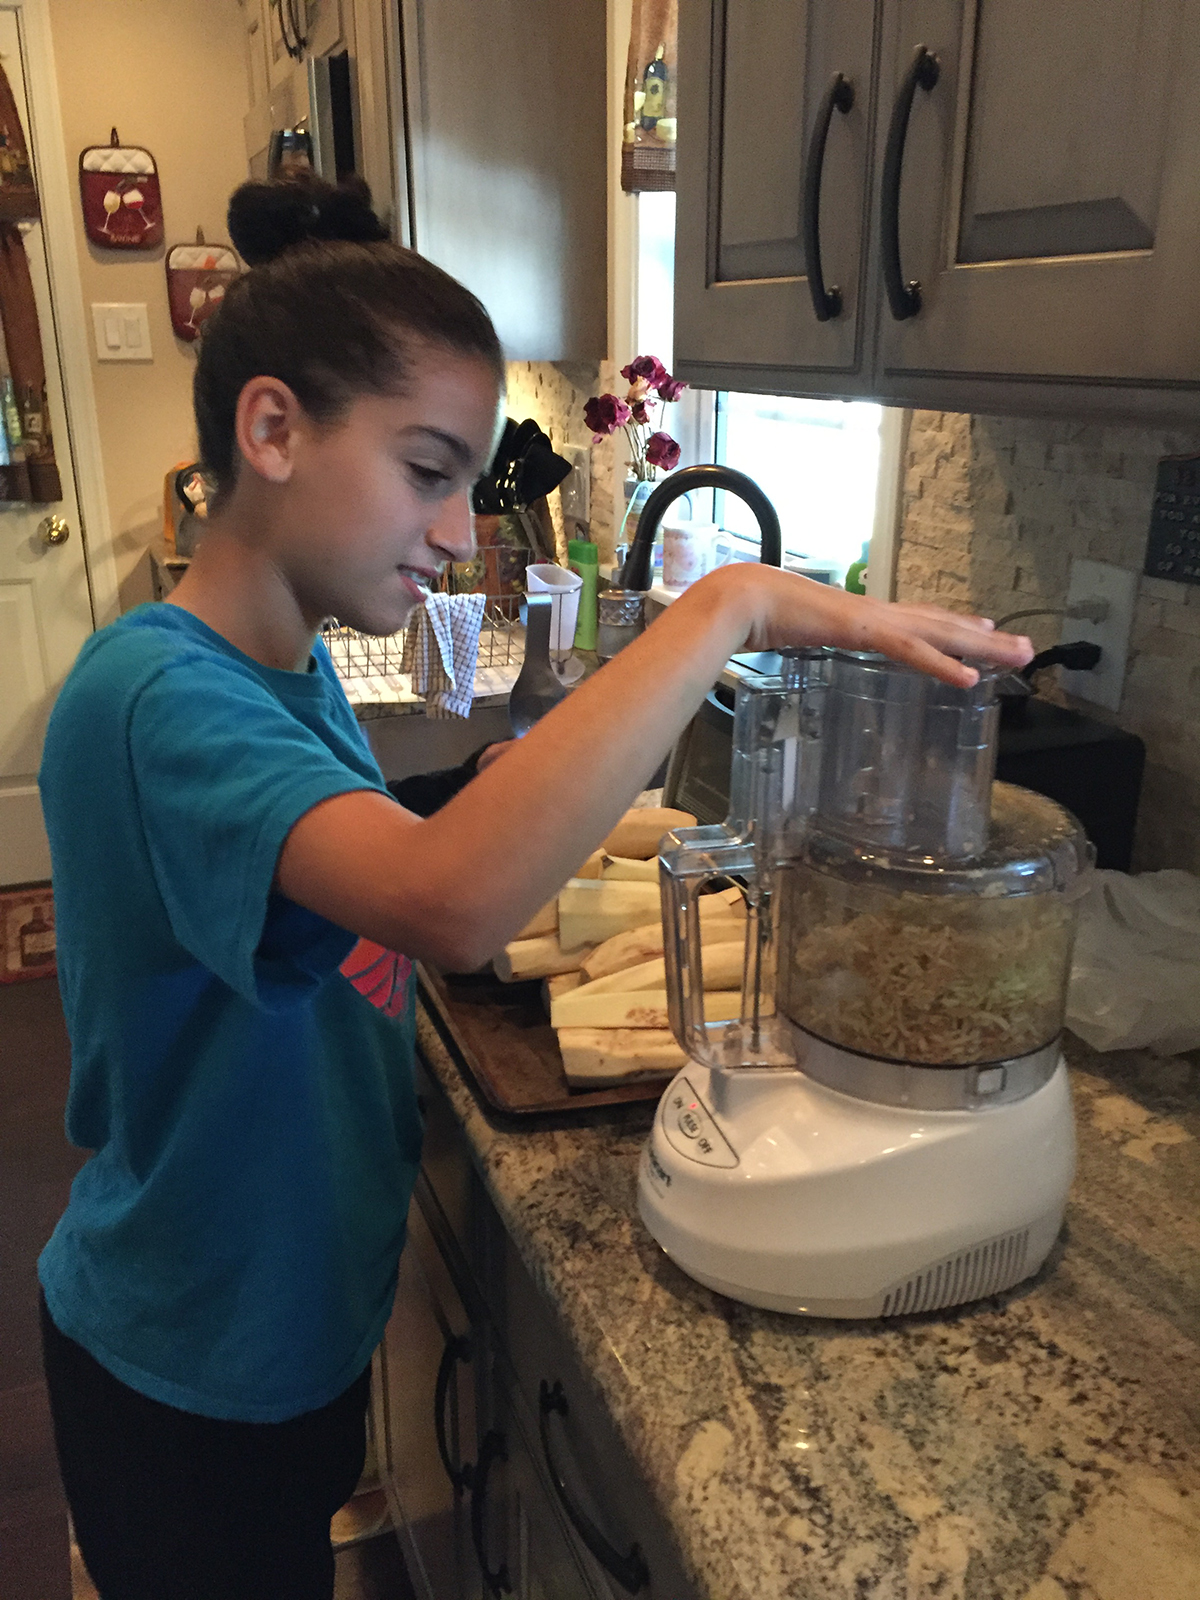
Running the peeled eggplants through the food processor, using the shredder blade.


img_3149

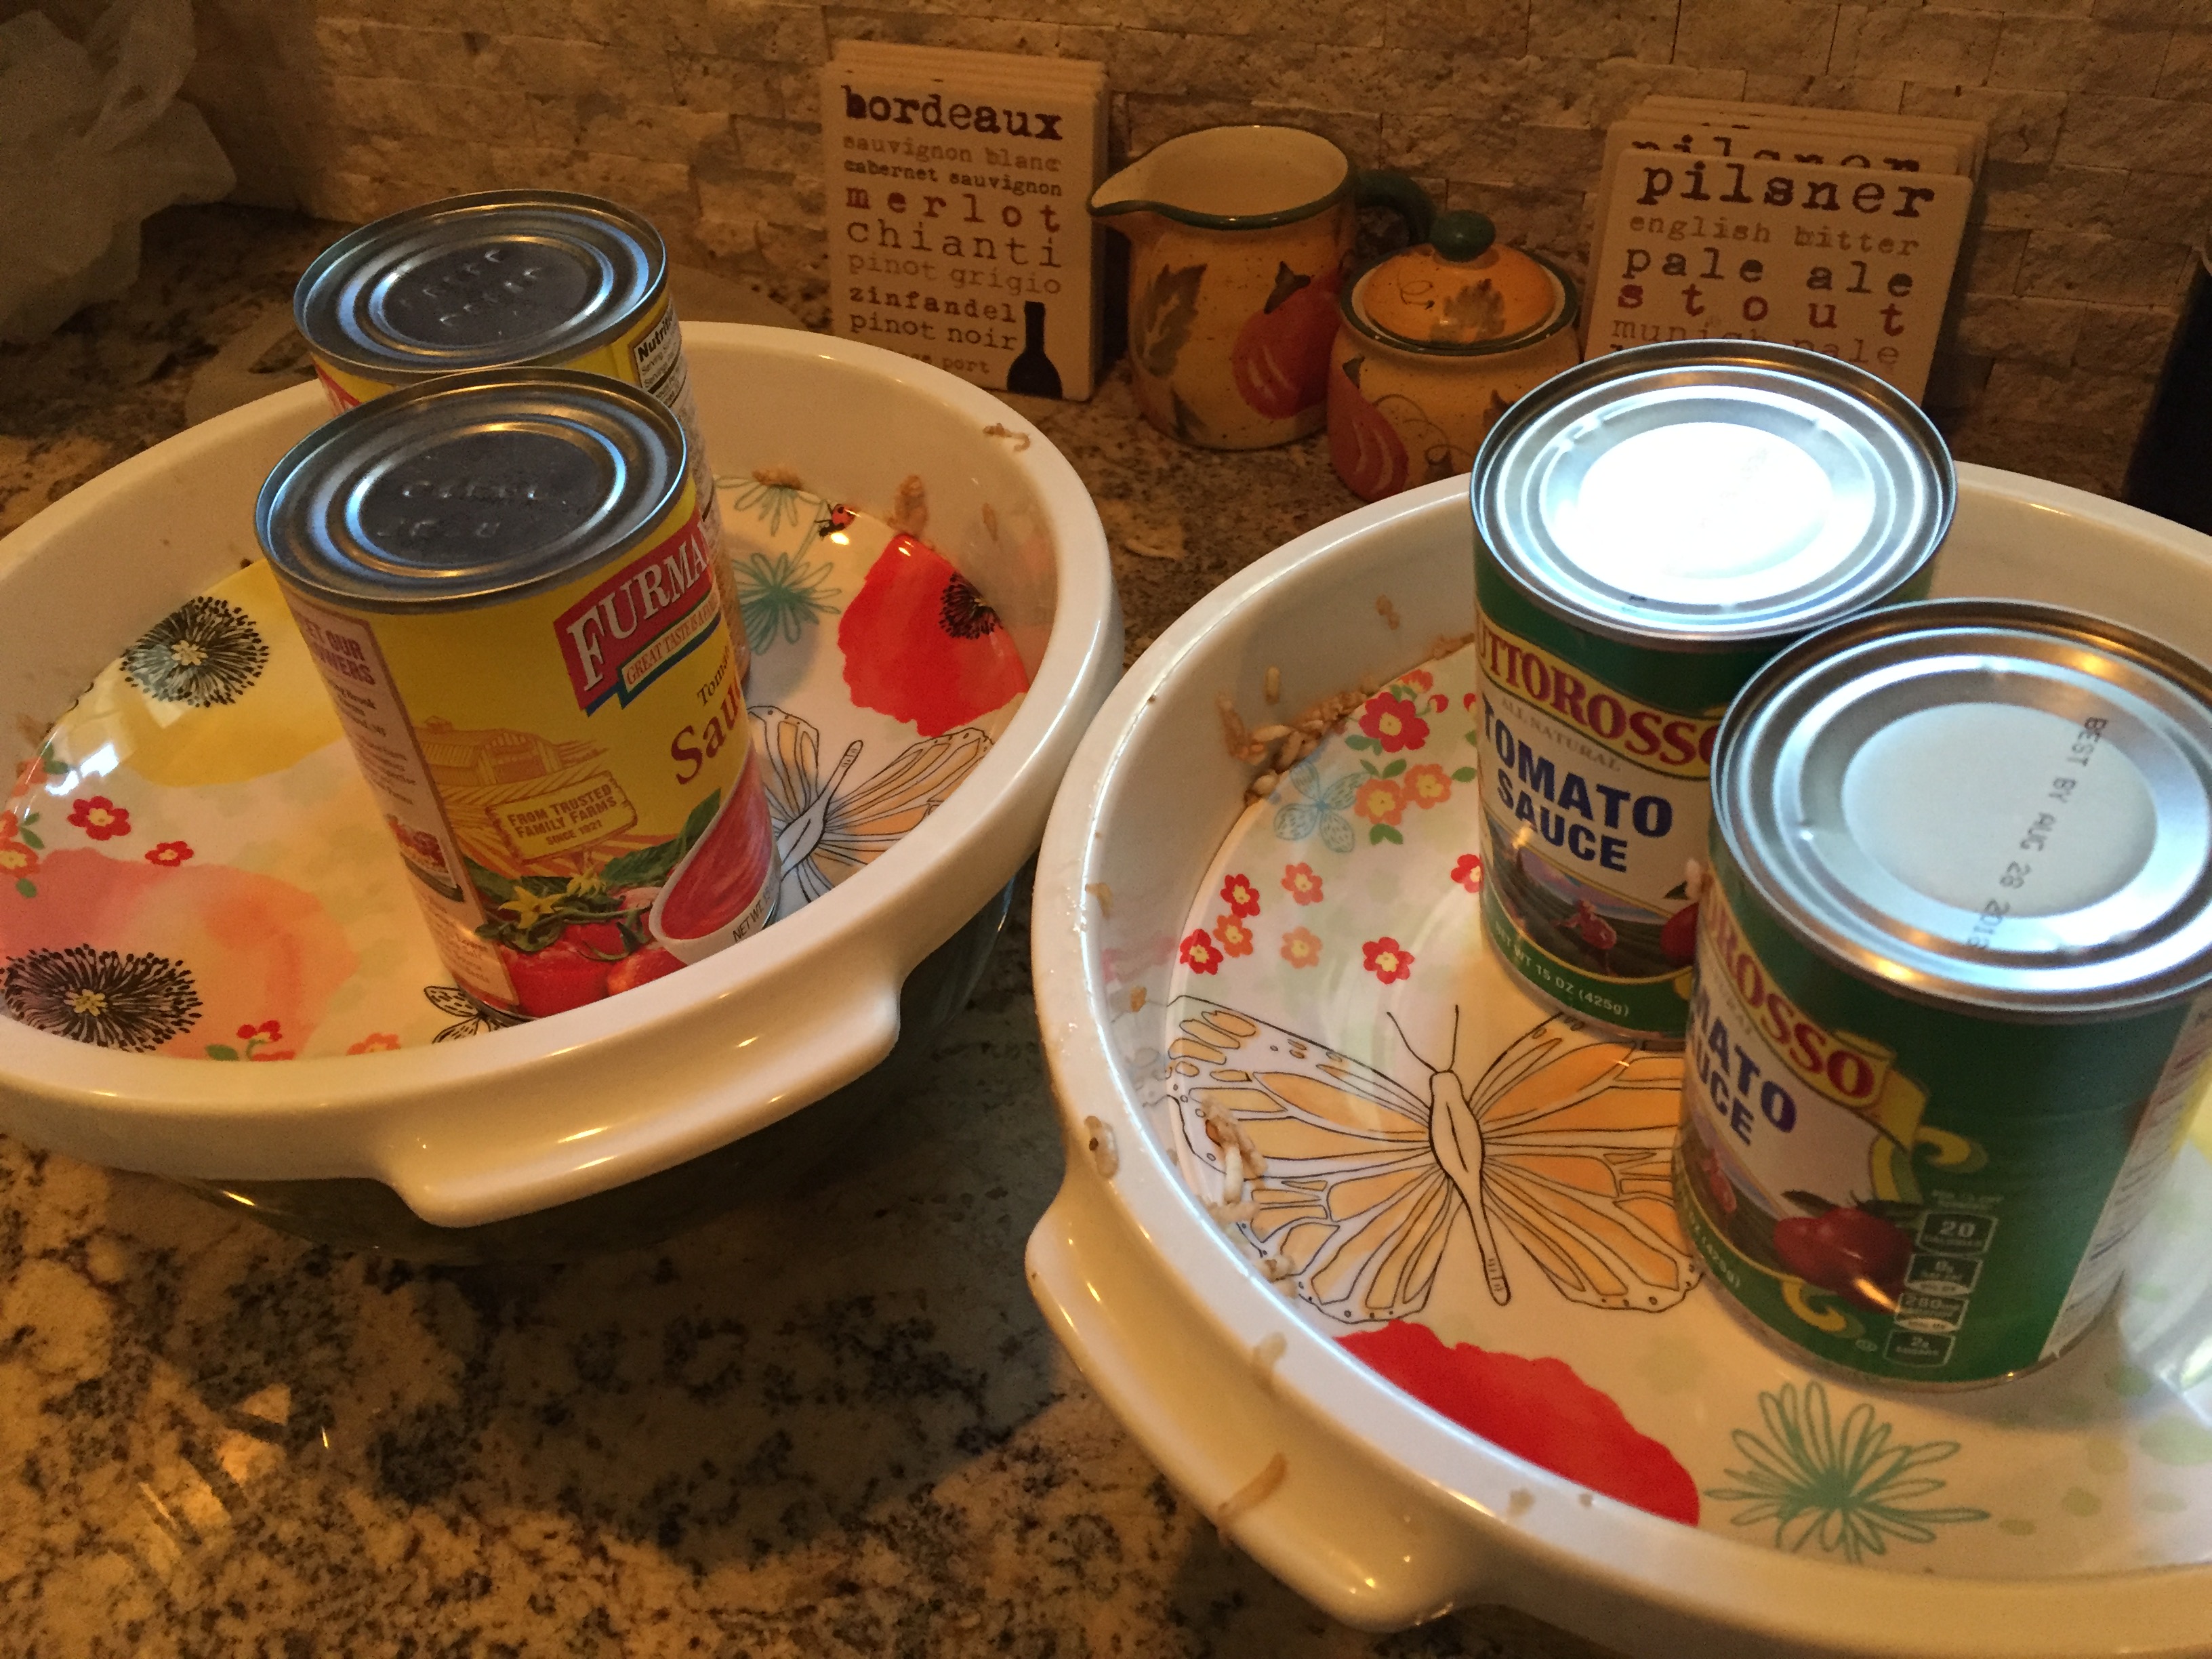
Weighing down the shredded eggplants tossed with salt, to strain out the bitter juices.


img_3153

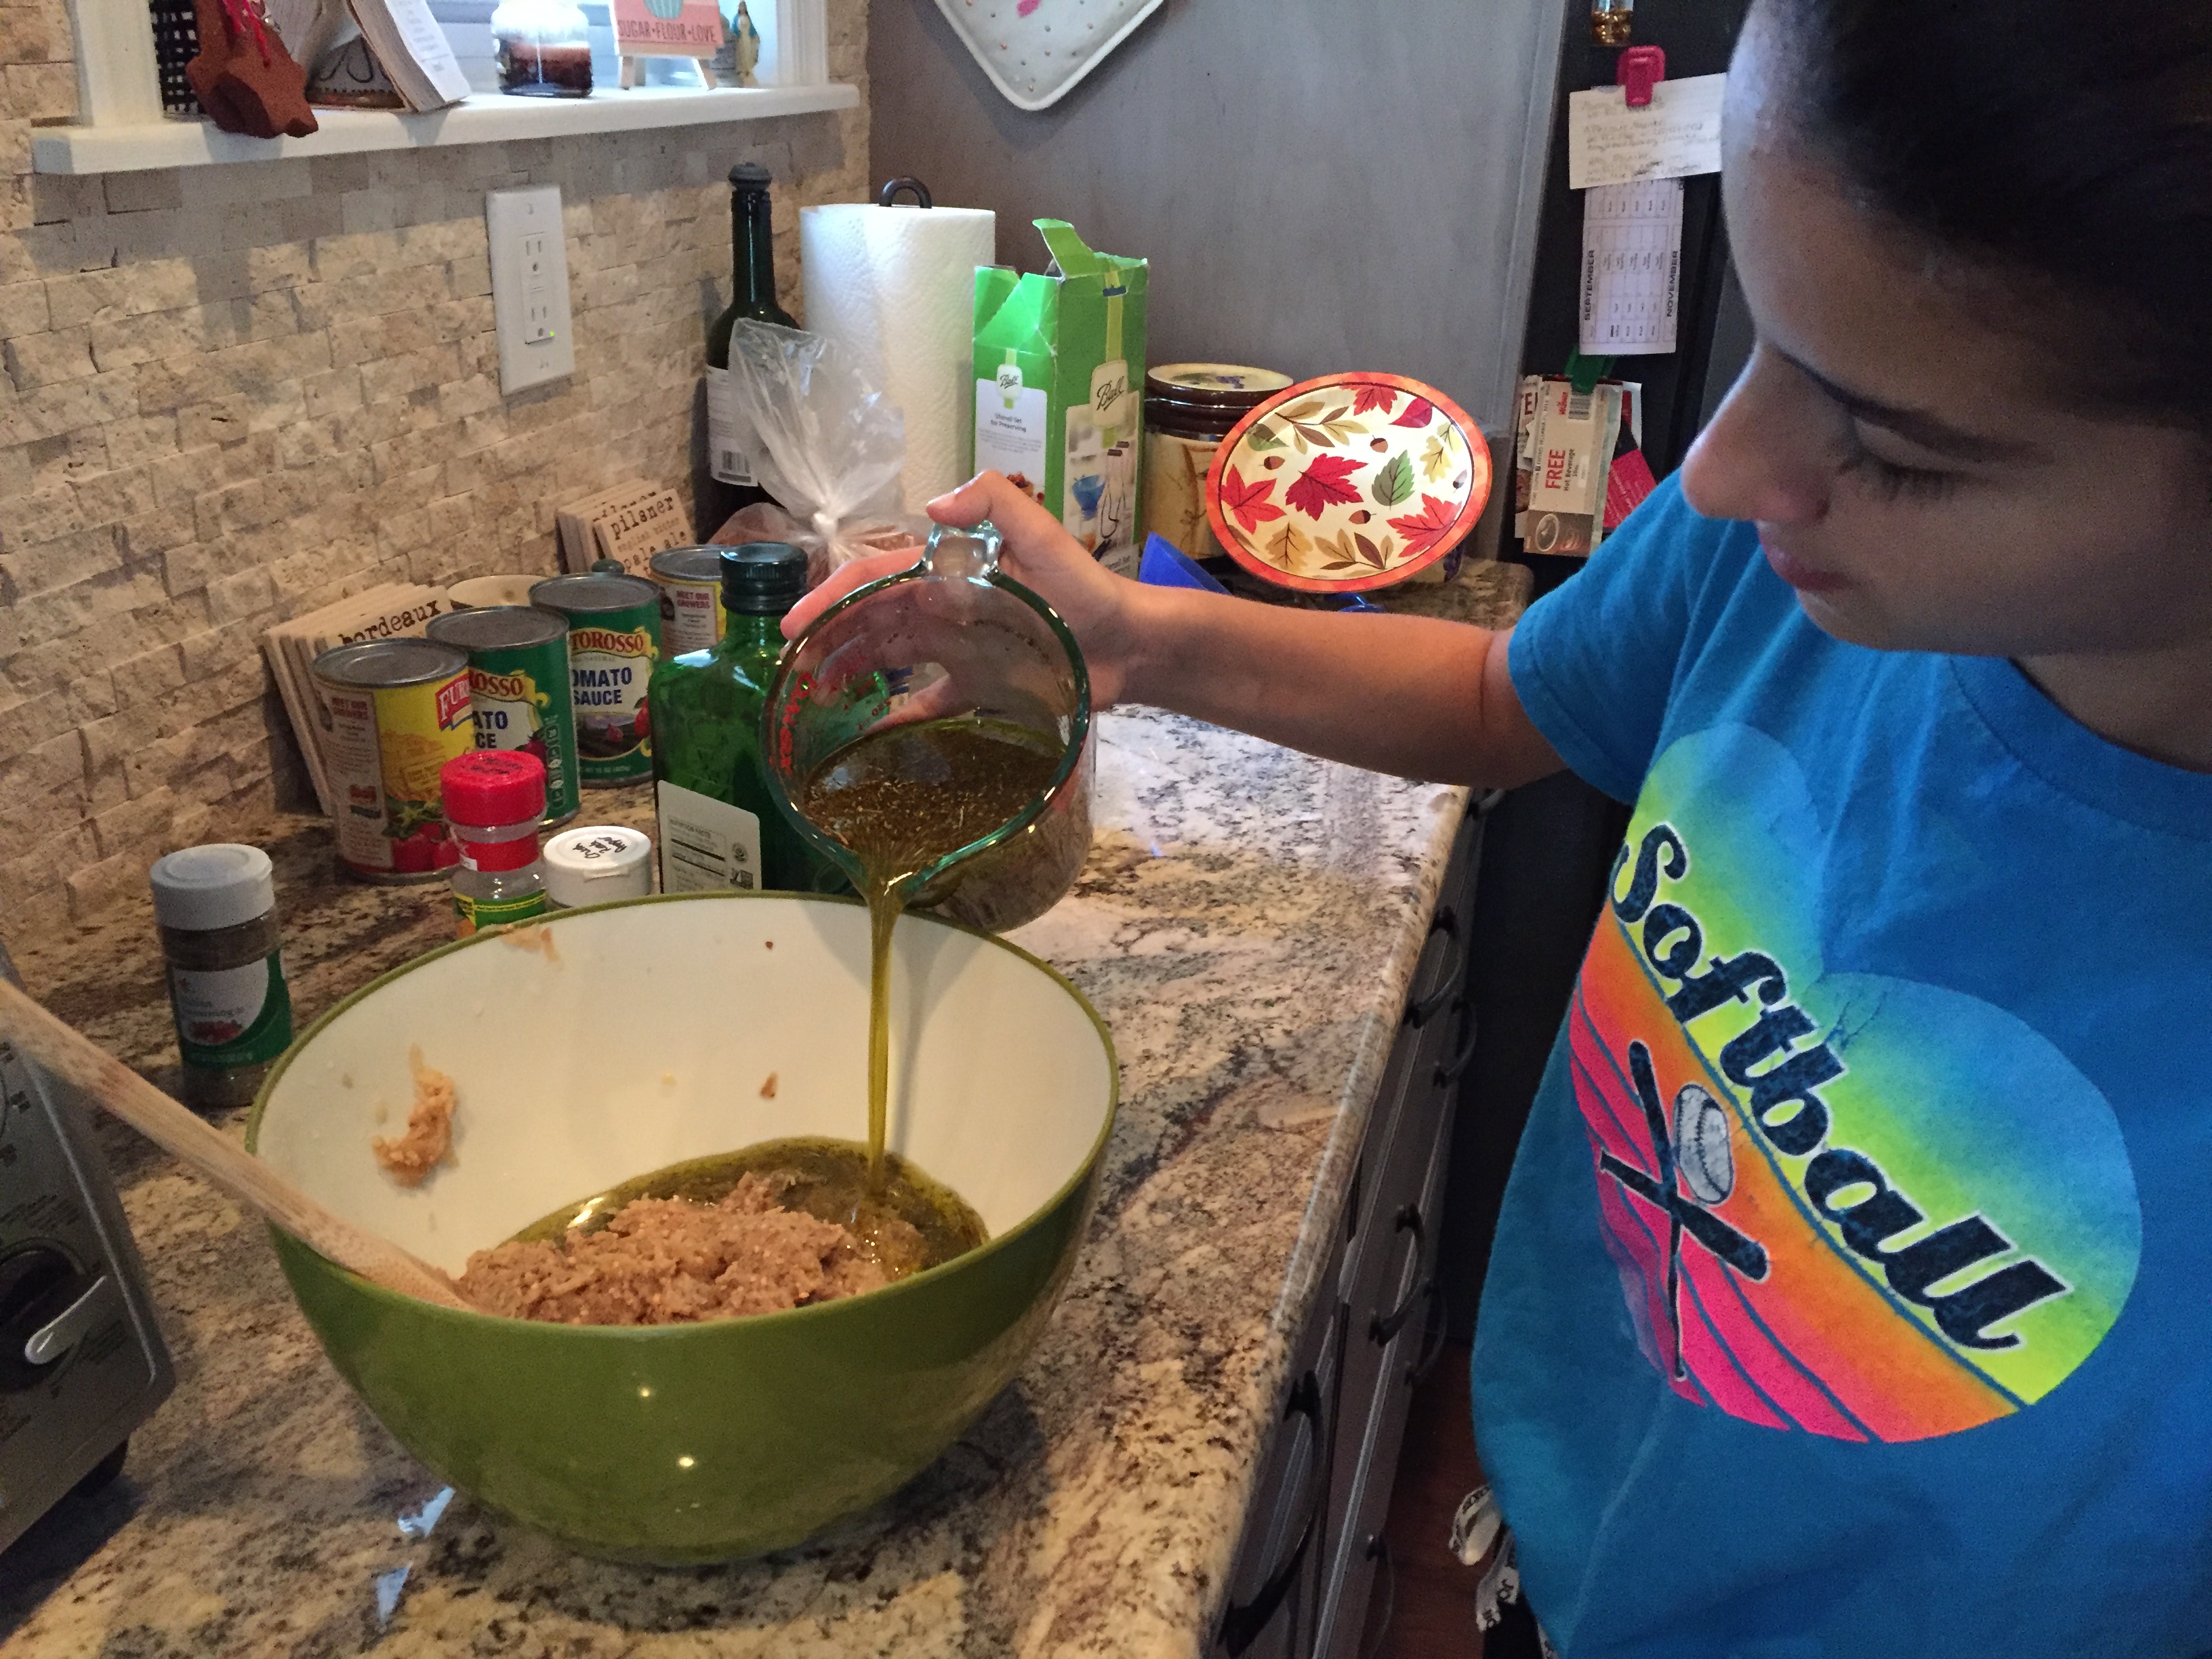
After rinsing the salted eggplants and soaking them in white wine vinegar, Julianna adds the olive oil herb mixture.


img_3155

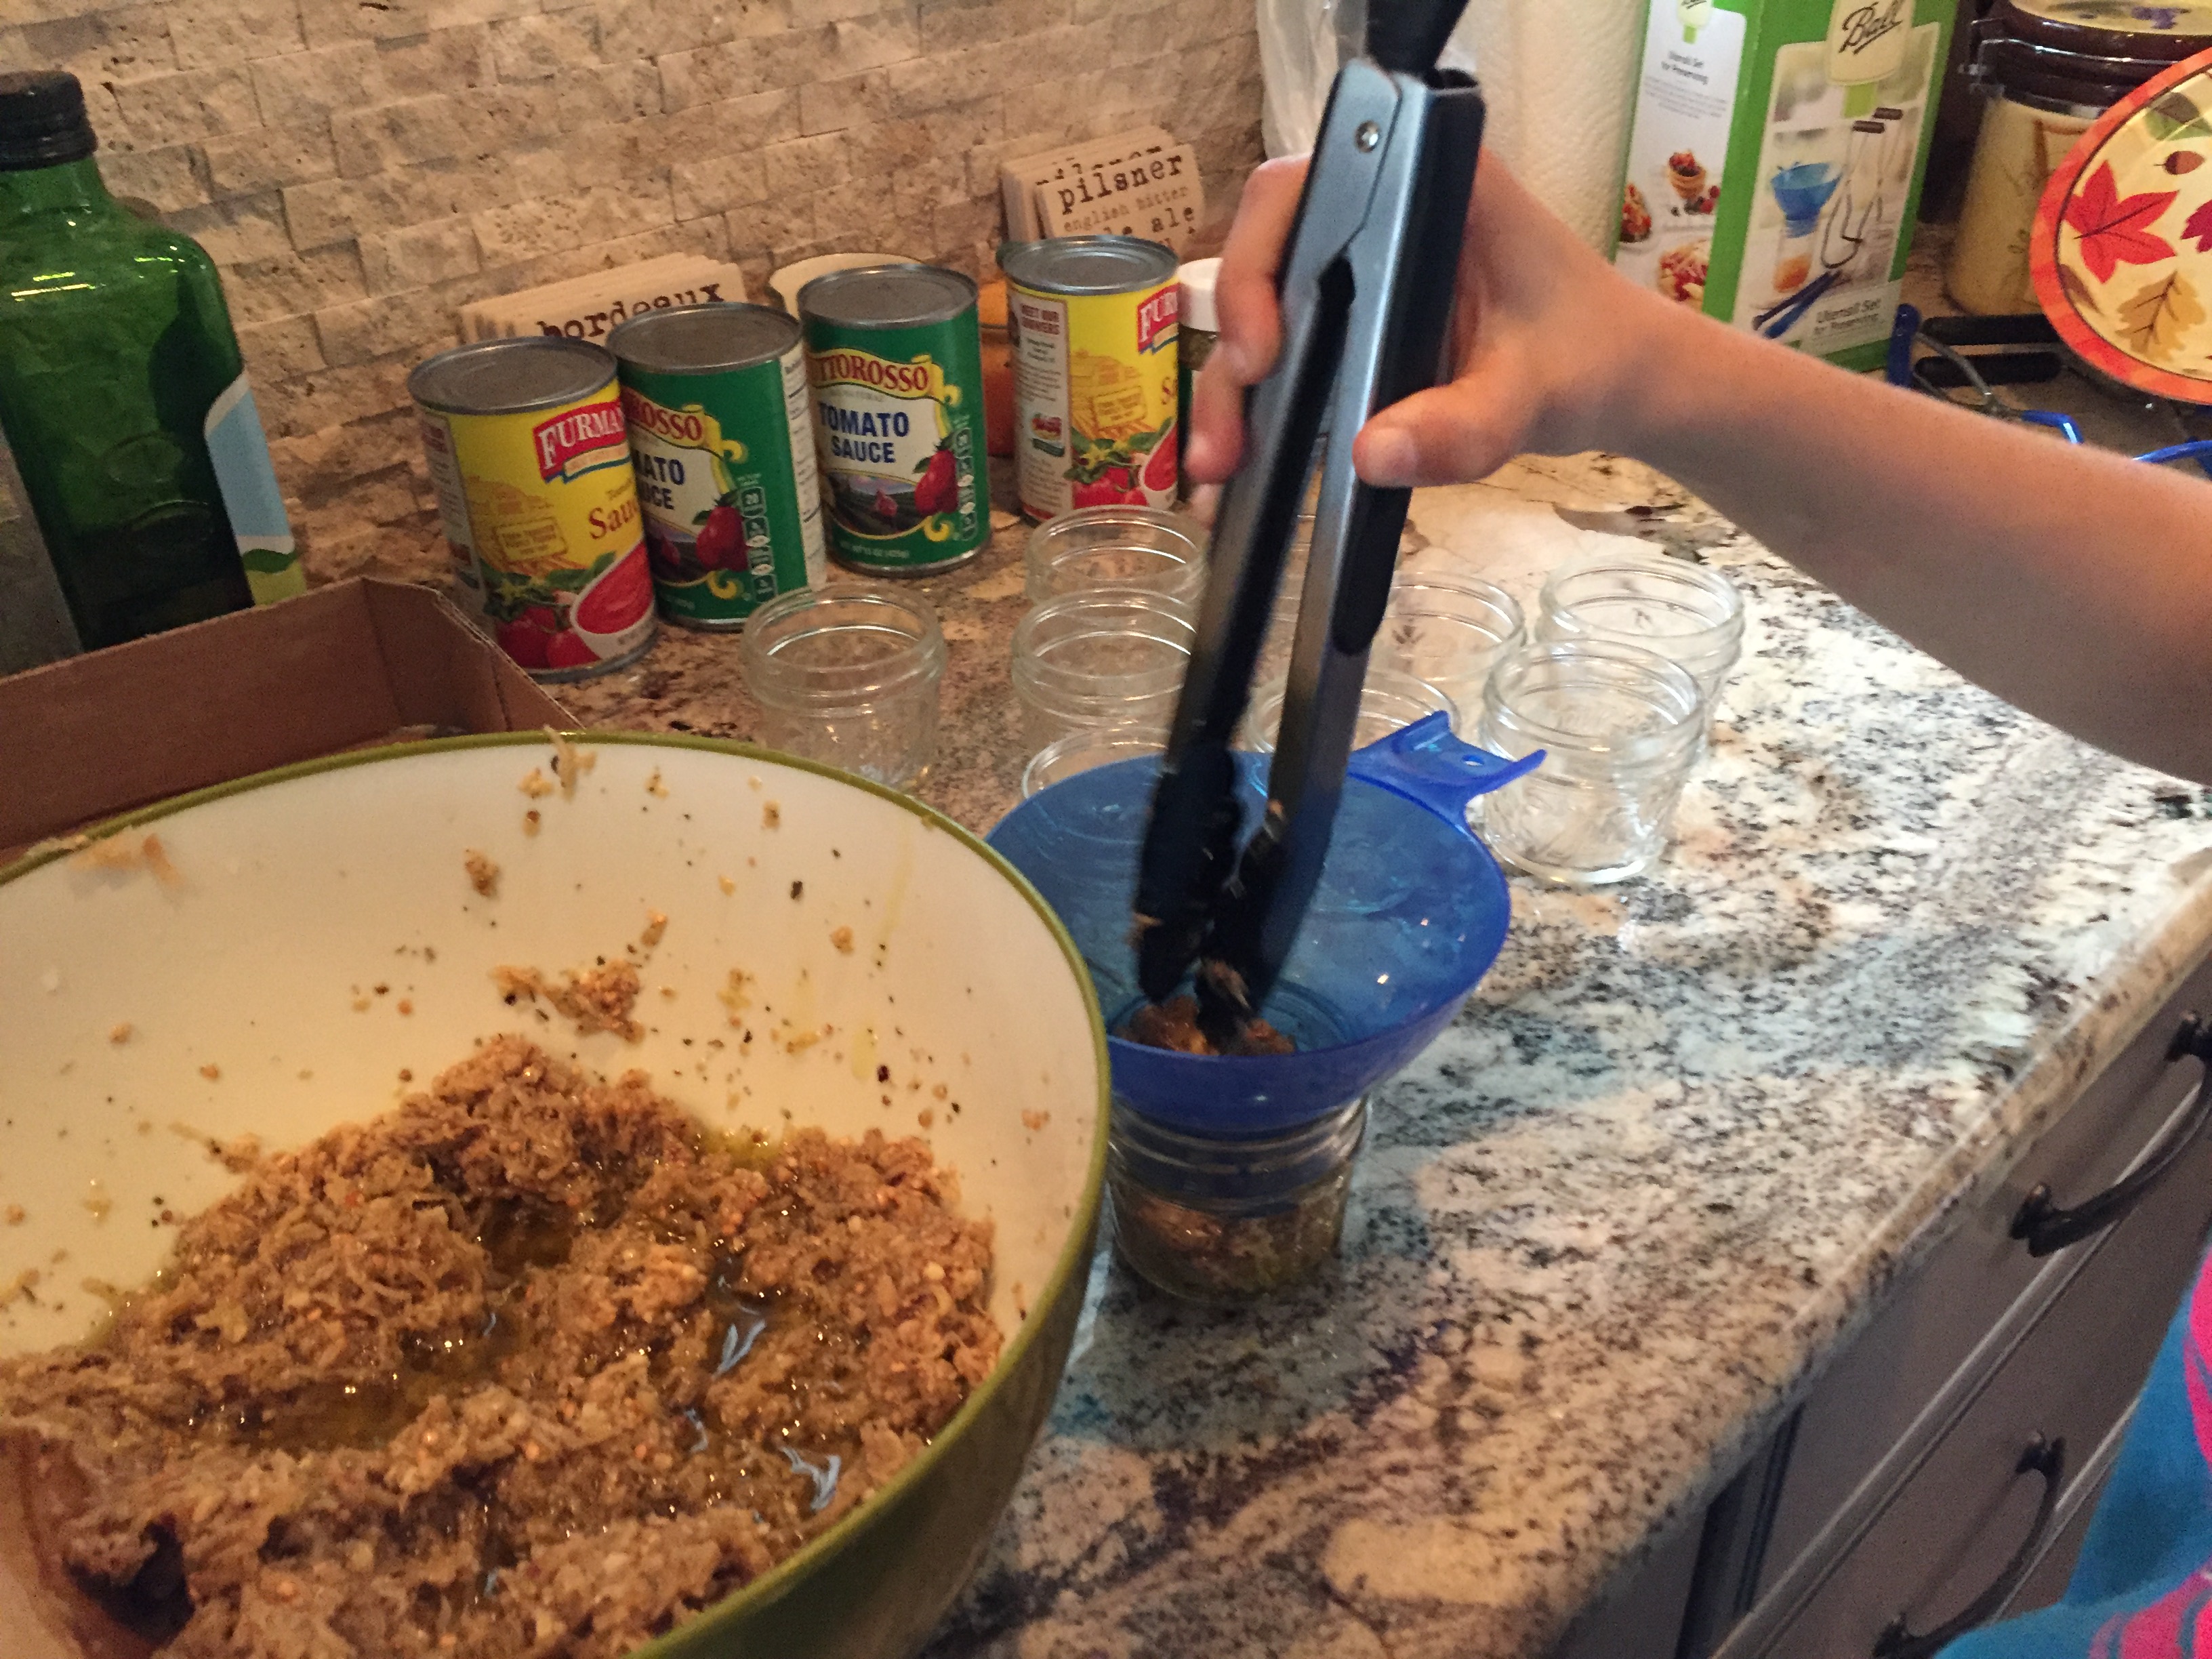
Placing the marinated eggplants into the jars.


new3

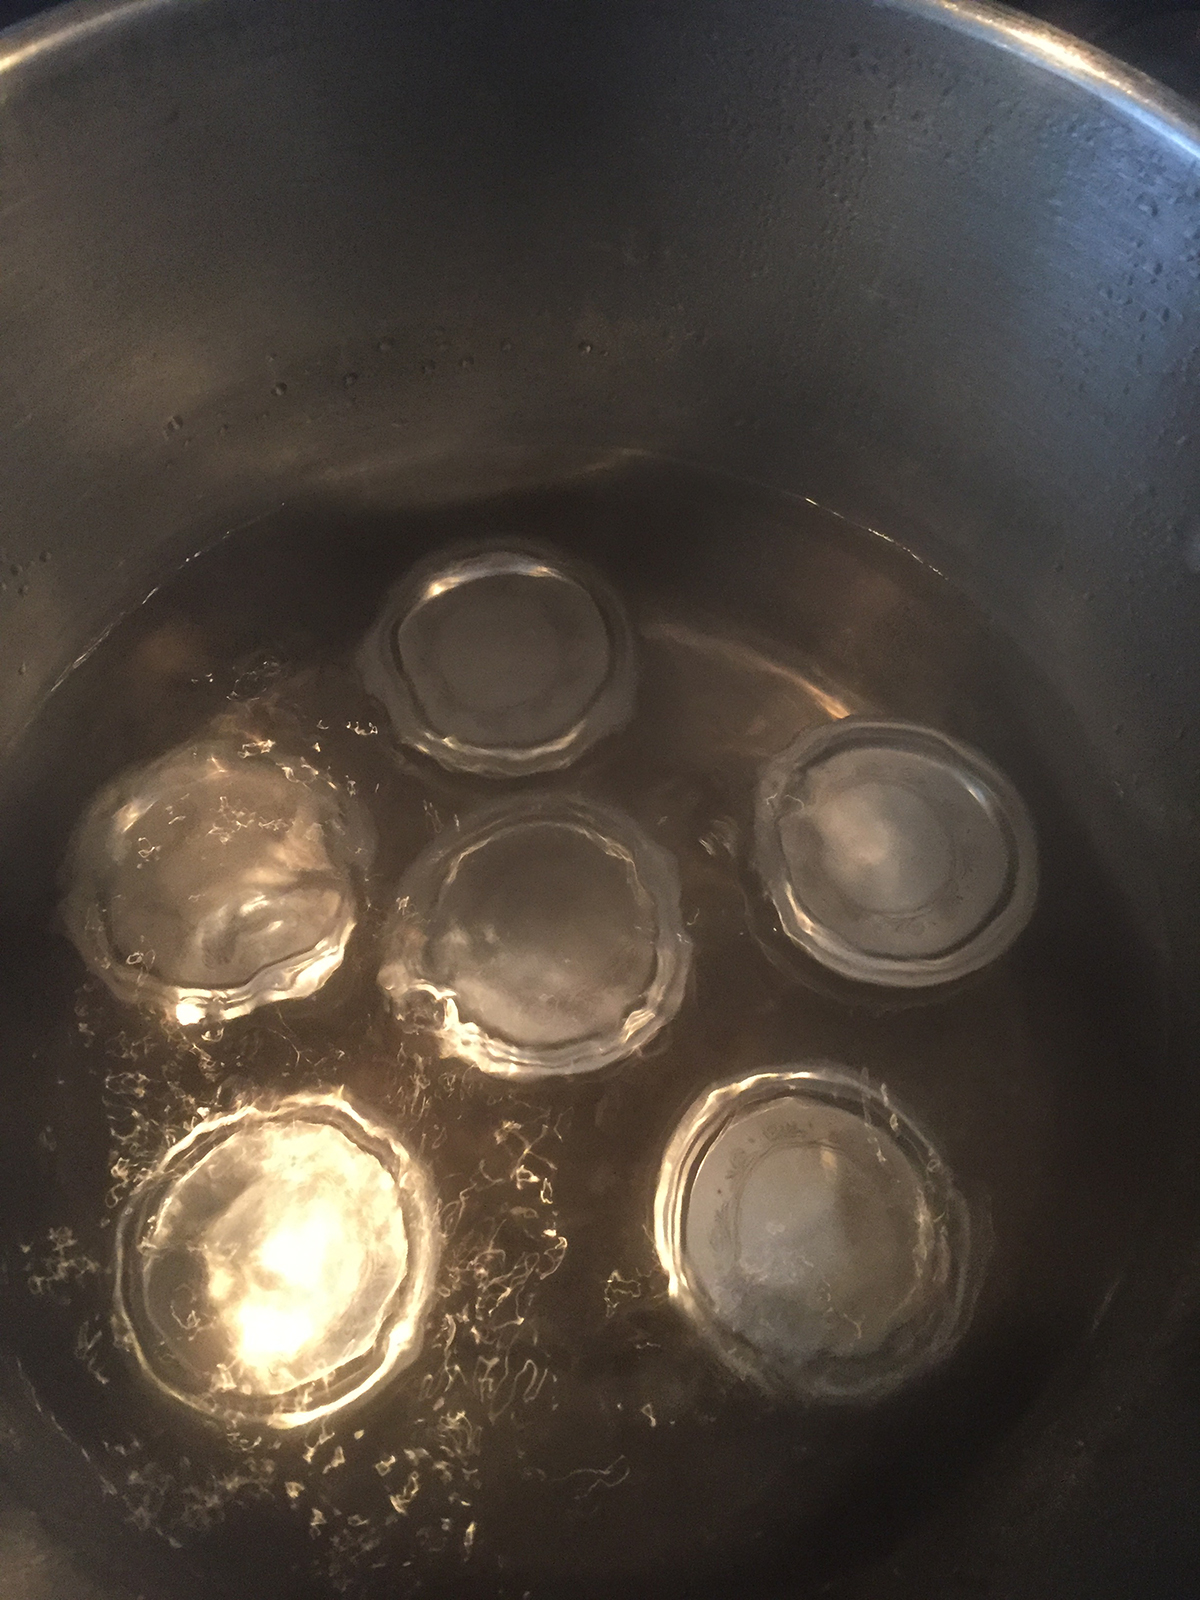
The bain marie (aka the water bath), to help seal the jars.


img_3158

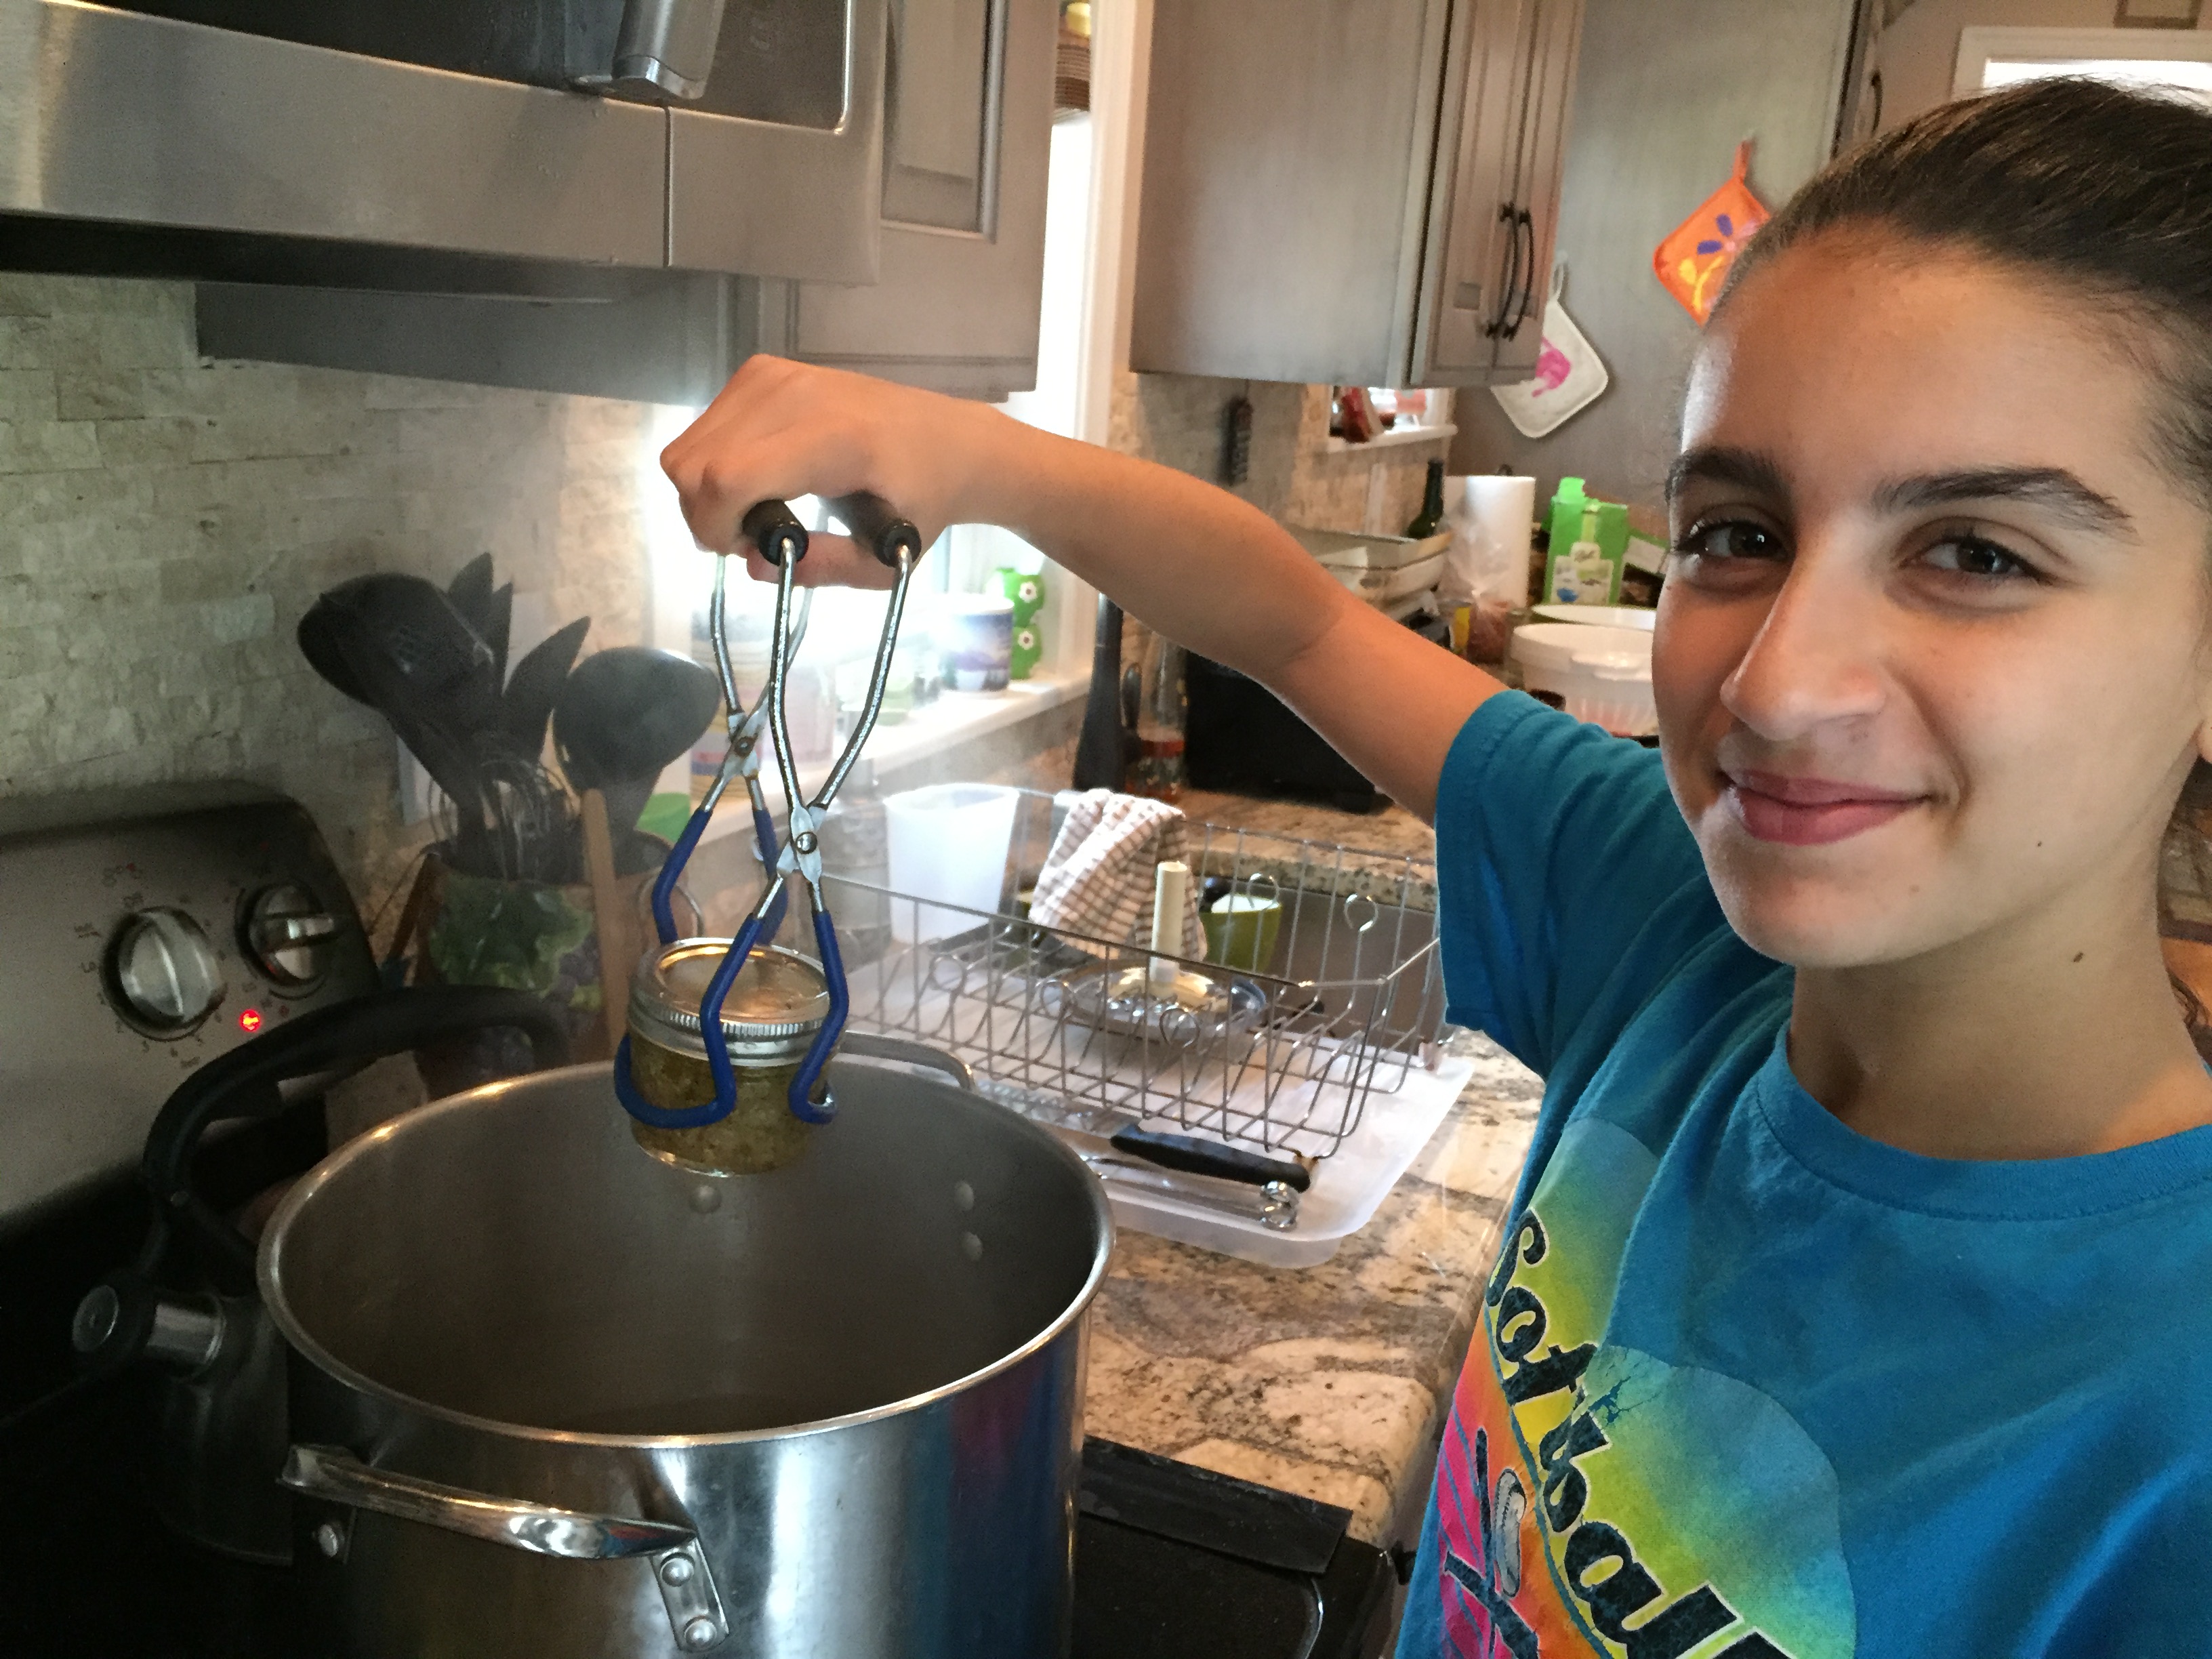
Carefully removing the jars to let them sit and cool. They’ll be ready to enjoy in about 4 weeks…just in time for Thanksgiving!


eggplant-jars_small

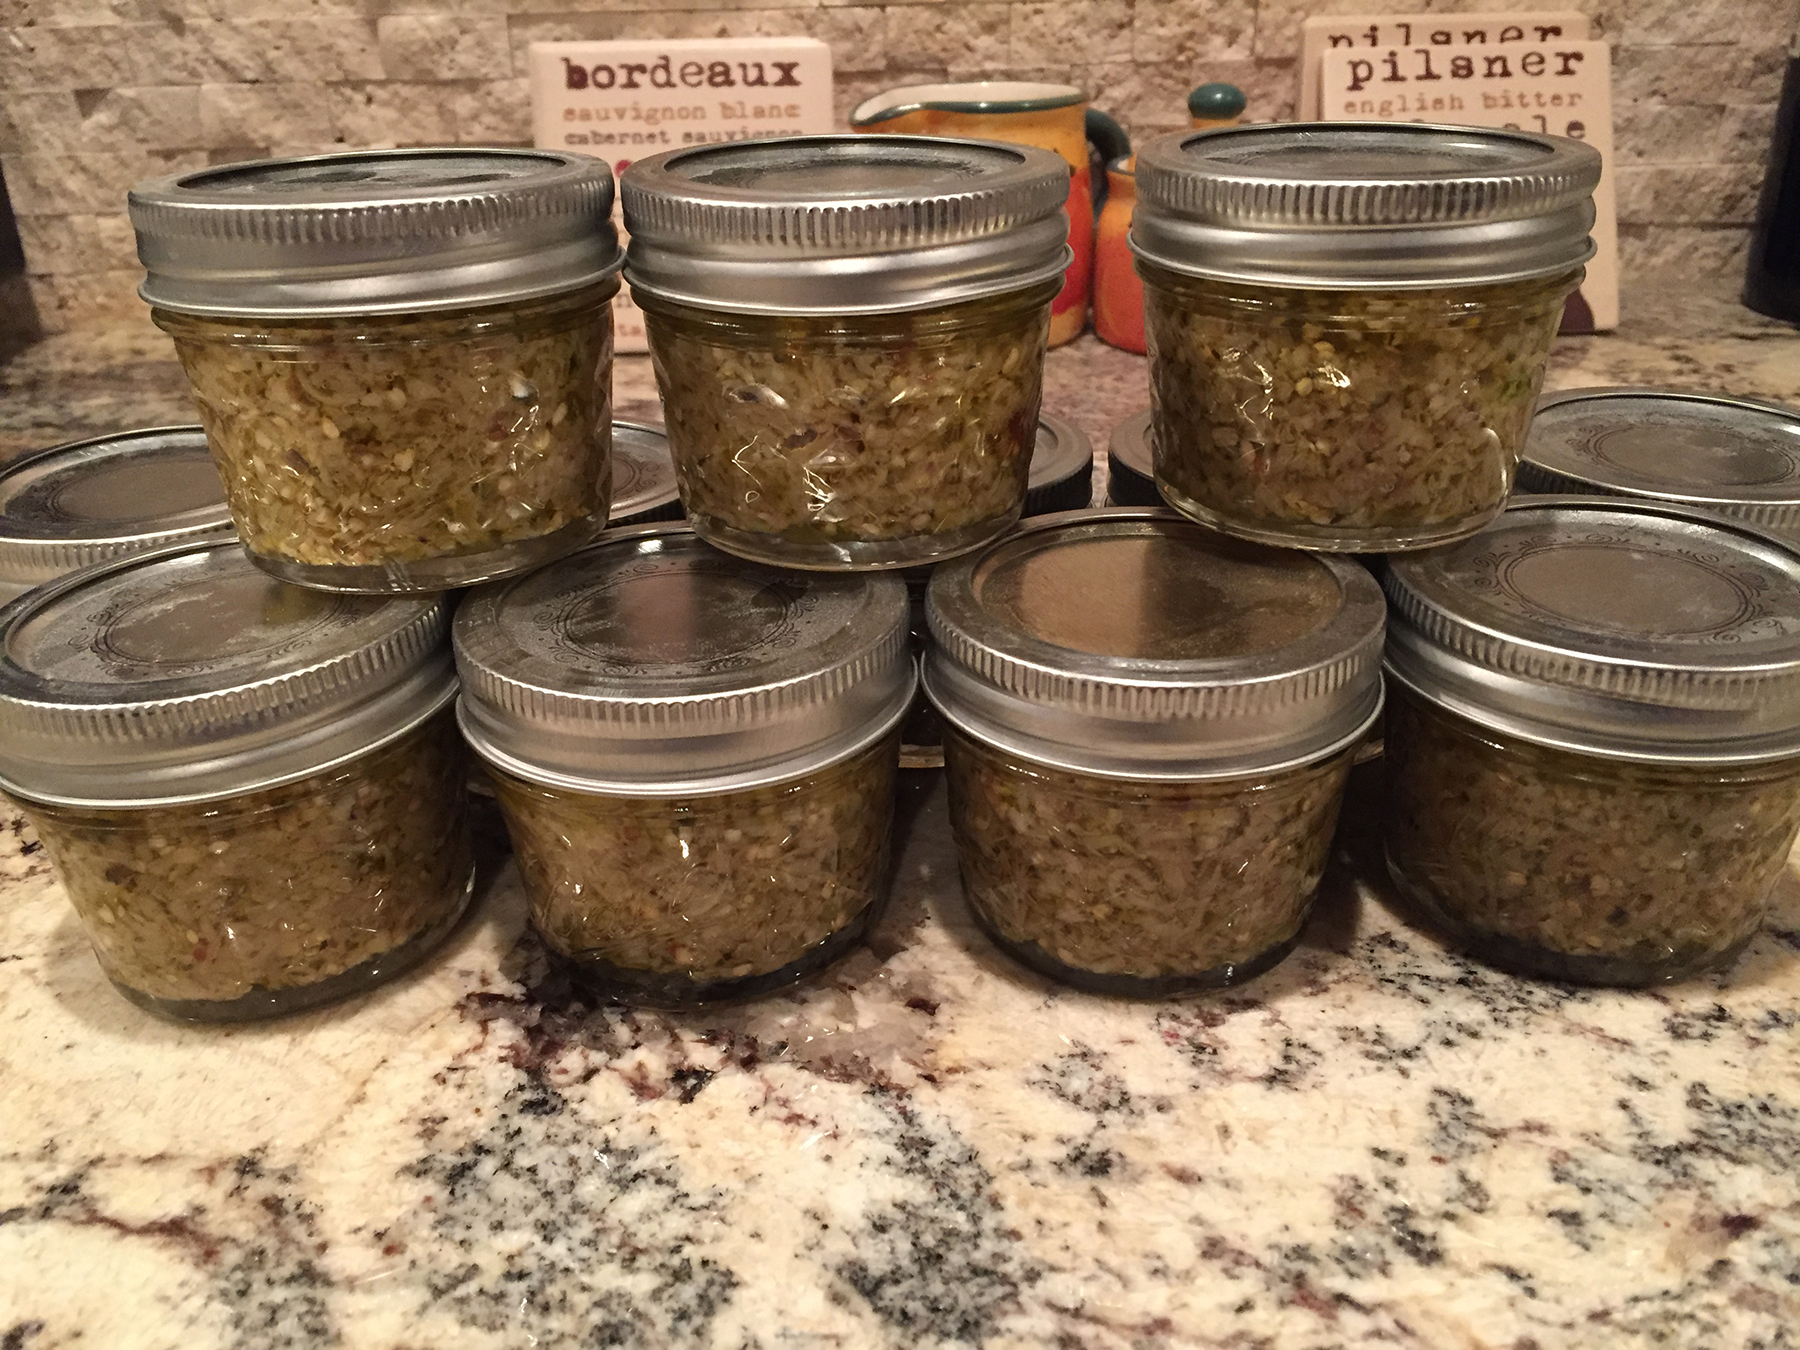
Julianna’s marinated eggplant!

Share

Pumpkin Spiced Whipped Cream

October 13, 2016 Dessert, Menu 1 Comment

Recently, I shared with you my recipe for Whipped Mascarpone and Greek Yogurt, served with puffed pastry and fresh fruit. Today, we’re going to add a little fall flavor to this recipe! All you will need are two additional ingredients that are autumn staples…pumpkin puree and pumpkin pie spice (a dash of cinnamon wouldn’t hurt either). The pumpkin flavor is not too overpowering…it’s just enough to put you into the autumn mood. Whether you decide to use my mascarpone and yogurt recipe, or the more traditional heavy whipping cream version, this delicious topping will go perfect with any fall dessert. Serve it over your favorite slice of pie, or along with spiced wafers or graham crackers. If you’re using the heavy whipped cream version, add a dollop in your cup of coffee, hot chocolate or apple cider. Or just eat it with a spoon!


Pumpkin Spiced Whipped Cream

Mascarpone and Greek Yogurt version
1/2 cup mascarpone cheese
1/2 cup non-fat plain Greek yogurt
2 tspn powdered sugar
2 tspn vanilla extract
1/2 tspn pumpkin pie spice
1/3 cup pumpkin puree
dash of cinnamon

Combine mascarpone, yogurt, powdered sugar, vanilla extract and pumpkin pie spice in a chilled mixing bowl. Using a hand mixer or a stand mixer, mix until thick and creamy. Fold in the pumpkin puree. Cover and refrigerate until ready to use. Top with a dash of cinnamon.


Heavy Whipping Cream version
1/2 pint heavy whipping cream
1 tbspn powdered sugar
1 tspn vanilla extract
1/2 tspn pumpkin pie spice
1/3 cup pumpkin puree
dash of cinnamon

Combine cream, powdered sugar and vanilla extract in a chilled mixing bowl. Using a hand mixer or a stand mixer, mix together until soft peaks form. Add the pumpkin pie spice and continue to mix until stiff peaks form. Fold in the pumpkin puree. Cover and refrigerate until ready to use. Top with a dash of cinnamon.


img_3107

Share

Roasted Italian Butternut Squash

September 29, 2016 Entrees, Menu No Comments

Nothing says autumn like the sweet taste of butternut squash. Whether it’s roasted with a little cinnamon, butter and brown sugar, prepared as a hearty soup, or served as a seasonal ravioli, butternut squash is a definite fall favorite. This recipe offers a nice balance of sweet and savory. The Italian seasonings work really well with the natural sweetness of the squash. This is a great side dish to serve with any autumn-inspired meal…be sure to keep it in mind come Thanksgiving time!


Roasted Italian Butternut Squash

I like to slice the top half as rounds, and the bottom half as long slices – this makes it easier to work around the pulp and seeds, and makes for a rustic presentation.

1 butternut squash, peeled and sliced into 1/2″ slices
1/4 cup olive oil, plus additional if needed
1/4 tspn salt
1/4 tspn pepper
1/2 tspn garlic powder
1 tspn Italian seasoning

I personally prefer to use a baking rack sitting in a baking dish or on a baking tray for this recipe, to allow for even cooking on both sides. If you do not have a rack that fits into a baking dish, you can just use a lightly sprayed baking tray and flip the squash slices halfway through baking time.

Preheat oven to 400˚. Place squash slices on a rack that is sitting in a baking dish or on a baking tray (see note above regarding the rack). Combine 1/4 cup olive oil, salt, pepper, garlic powder and Italian seasoning. Lightly brush the squash slices on both sides. You can lightly drizzle with additional olive oil if needed.

Bake for 35-40 minutes or until the slices start to brown along the edges, turning once at 15 minutes.

squash2

Share

Crab-stuffed Bell Peppers

September 14, 2016 Menu No Comments

When I first started preparing this dish, my intentions were to follow an old recipe of mine, which included mixing diced peppers with the remaining ingredients to make a warm crab salad. I’ve done this before and served it with crackers or over pasta. But the home-grown peppers that I had on hand looked so damn pretty, that I decided instead to stuff and bake the peppers. It was a delicious choice to make! Either method would work well, but if you have a handful of peppers ready to be used, give this stuffed version a try. It is a hearty and tasty dish for sure!

Note – the peppers that I used were mini bells, mini gypsy and sweet reds. You can use whatever variety of pepper you prefer.


Crab-stuffed Bell Peppers

16 oz canned crab claw meat
2 tbspn butter
1 large shallot, chopped
juice of 1 lemon
2 tbspn white wine
6 oz chopped artichoke hearts
1 cup breadcrumbs
olive oil
3 large or 5 small bell peppers, cut in half lengthwise and cleaned
(if you decide to mix the diced peppers with the remaining ingredients, one large bell pepper will be all you need).

Preheat oven to 400˚. Melt butter in a large pan over medium heat. Add chopped shallot, sauté until soft.  Add crab meat, lemon juice, wine and chopped artichoke hearts. Stir. Add 1 cup breadcrumbs plus tablespoon of olive oil. Stir until breadcrumbs are fully incorporated. You can add additional olive oil if needed. Heat until warmed.

Fill each pepper half with the crab filling. Place the peppers on a baking sheet or in a baking dish. Bake for 30-35 minutes, or until peppers are tender.

Serve warm.

crab1

Share

Recent Comments

Archives

powered by
Socialbar