Recent Articles:

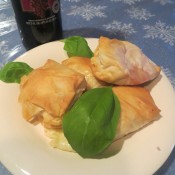
Capri Phyllo Squares
January 10, 2013 Appetizer, Menu, Salads No Comments

If you’re a fan of tomatoes, it’s highly unlikely that you enjoy eating them this time of year. Like a good friend of mine said on one of her Facebook posts, “winter tomatoes are pretty with no personality”. The response posted by another friend, saying that “they have the personality of Ted Baxter” still makes me laugh. But just because we are not in prime time tomato season does not mean that you cannot enjoy a store-bought tomato that is jazzed up with a little extra flavor when added to the right dish.

One of my favorite Italian dishes that uses tomatoes is the classic Capri Salad. A simple combination of tomato, fresh mozzarella and basil, the Capri is the perfect marriage of taste and texture. Whether served as a traditional salad drizzled with aged balsamic, or served appetizer-style on a fancy toothpick, it may be one of the most refreshing combinations that I like to enjoy throughout the year.

For today’s post, I’m adding a bit more depth and texture by incorporating a phyllo dough wrap to make an amazingly simple and tasty appetizer!

Capri Phyllo Squares
4 roma tomatoes, sliced (you’ll need 12 slices in all)
12 slices fresh mozzarella cheese
(tomato and cheese slices should each be about 1/2″ or so thick)
12 pieces fresh basil
1 packet of frozen phyllo dough, defrosted
(one packet should give you 18 sheets phyllo dough. You will then cut the sheets in half, leaving a total of 36 sheets)
melted butter for brushing
olive oil
salt and pepper for seasoning
balsamic vinegar

Turn oven on to 350˚. Place tomato slices on a baking tray lined with parchment paper. Lightly drizzle with olive oil and season with salt and pepper. Bake tomatoes in the oven for 7 minutes to soften a bit. Remove tomatoes from oven, leaving oven on.

To assemble the wraps, you will need three sheets of phyllo, stacked. Lightly brush one side of the stacked phyllo with butter. Place the butter brushed side down on a new baking tray lined with parchment paper. Place on the phyllo one slice of tomato, one slice of cheese and one basil leaf. Gently fold all four corners of the phyllo to cover the tomato, cheese and basil. Flip the square so the folded side is face down on the tray. Continue these steps until you have 12 folded phyllo squares spread out evenly on the tray. Place in oven for 10 minutes. Remove from oven, carefully remove squares from tray. Plate and serve immediately. For additional taste, add a very light drizzle of balsamic vinegar to the squares.

Share

Saying “Cheese” to New Resolutions!

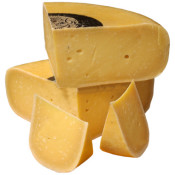
Another year, another round of New Year resolutions! Since starting this blog back in 2008, most of my resolutions have been food related (learning how to make home made pasta, new challenges with Una Mamma Italiana), and because of this my resolutions have been fun and enjoyable to partake in! This year, I have my cousin Jenny to thank for setting me up with my 2013 food-related resolution. Her Christmas gift to me was a fantastic book called Artisan Cheese Making at Home. The book is very well put together and is a lot of fun to look at – the pictures are absolutely mouth-watering. Everything from ricotta and mascarpone, to créme fraiche and greek yogurt, to cocoa rubbed jack cheese, ale-washed trappist cheese and tips on how to make smoked mozzarella are covered in appetizing detail. Obviously, some of these cheeses can’t even be considered just yet, not only for my lack of skills but for the lack of space and set-up in my basement. But that’s not going to stop me from reading and absorbing this book, attempting what recipes I can handle and sharing with you my journey in cheese making. If anything, I’m looking forward to trying out some of the suggested recipes included in the book…even if I have to sneak over to the 9th Street Market to get my hands on some good quality cheese, wrapped and ready to go.

I also have some other fun ideas in mind for the blog this year. Keep an eye out over the next few months for new recipes featuring:
• risotto
• soups
• pot pies
• pasta dishes
• my kids’ take on panzarotti vs. calzone

Plus…I’ll be joining my friend Carl for a very special home brewing post!

I’ll also be chasing down Una Mamma Italiana for another food challenge or two…and hopefully some other surprise visits from other special contributors.

Thanks again for visiting…here’s to a great and appetizing 2013!

Share

Warm Italian Crab Salad

December 21, 2012 Appetizer, Entrees, Menu No Comments

Now that we are just a few days away from celebrating the Feast of the 7 Fishes, which is one of the biggest and most important meals of the Italian and Italian-American culture, I am sure that most of you already have your menu planned. If you are looking for one more addition to your table, or another way to dress up one of your traditional dishes, this warm crab salad recipe is a tasty and versatile solution! With just a few basic ingredients and about 10 minutes of simmering on your stove-top, you can have this dish ready to be served in no time as an appetizer with crackers, mixed with a pasta in garlic and oil or even used as a stuffing in one of your other dishes.

From my kitchen to yours, I wish you a very Blessed and Merry Christmas.

Buona Natale!


WARM ITALIAN CRAB SALAD

1 red bell pepper, diced
1/4 cup chopped onion
1/4 cup chopped celery
2 tbsp. butter
2 tbsp. white wine
Juice of 1 lemon
8 oz. canned crabmeat*
1/3 cup seasoned breadcrumbs

*8 oz. of canned crab meat equals two 6 oz. cans (found with other canned fish) drained, or a half of a 1 lb can of pure packed crab meat (found in grocery store seafood section)

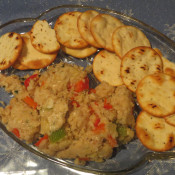
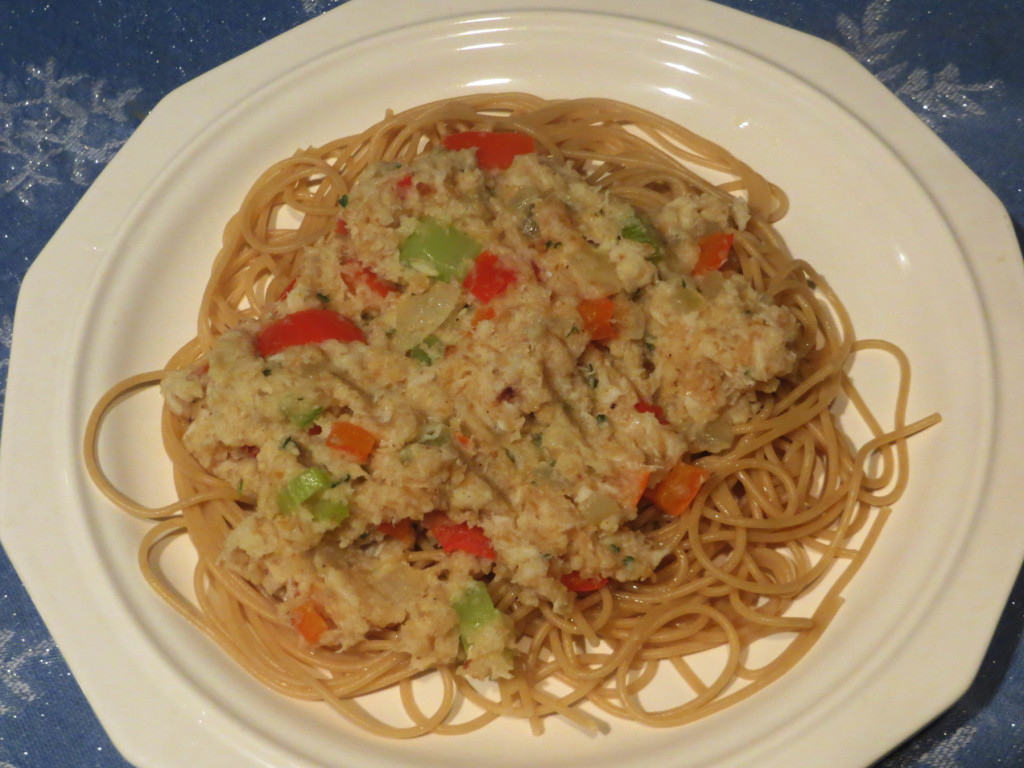
Heat butter in a pan until melted. Add onions and celery; heat until soft. Add crab meat, wine and lemon juice; stir. Add breadcrumbs, stir until warm. You can then serve it on top of pasta with garlic and oil or as an appetizer with crackers, as pictured below.

crab 1

crab2

Share

Homemade Torrone? Bah, Humbug!

December 13, 2012 Menu No Comments

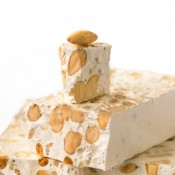
Every once in a while I get the itch to try something new in the kitchen, some kind of dish that I am totally unfamiliar with. Since we are in the Christmas season, I thought I would attempt to make home-made torrone (the Italian nougat candy that is very popular this time of year). Big emphasis on the word ATTEMPT.

I checked out a bunch of nougat and torrone recipes, and they all sounded similar and easy enough to follow. Bring some sugar and honey to a high temperature boil, slowly pour it into whisked egg whites, beat on high, stir in toasted almonds or pistachios, pour into a pan lined with edible wafer paper/rice paper, let sit overnight. I also found a recipe for chocolate torrone, so I decided that I would give not one, but two batches a try: a chocolate mint and a chocolate cherry. If anything, I figured it would be a learning experience…and boy, was I right!

Here’s what I have learned while ATTEMPTING to make torrone:

1. Precision is key (aka, this is why I am not a baker or a candy maker)
Although I followed the recipe that I chose to the tee, I also added some melted chocolate, along with peppermint extract and cherries to the mixes – which meant that there was more liquid in the mix than was called for. The taste was exactly what I wanted for both, but the texture was less of a nougat and more of a VERY runny salt water taffy. Seriously, you could have eaten it with a spoon. Some friends have told me that this also could have been due to the warm and muggy weather that we were having. Again, this is why I don’t bake. My gravy and eggplant parm were never screwed up because of bad weather.

2. Be careful with substitutes
One of the other key ingredients to a true torrone is edible wafer paper, or edbile rice paper (the thin lining on the top and bottom the torrone that we always compared the taste of a communion wafer when we were kids). While wafer paper is most likely not available at your local grocery store, you can find it at specialty stores and gourmet food shops. I decided to follow the advice of another foodie website, which suggested just using Asian spring roll shells, which are also a form of rice paper. WRONG!!!! While these shells do look similar to the wafer paper found on torrone, the texture is way too thick and crunchy. It was like adding shards of glass to the torrone.

3. Heating up sugar can be disastrous (also part of the Precision problem)
Like I said above, the recipes made it sound so easy. Just heat up the sugar and honey until the candy thermometer reads 310˚. And yes, it would have been just that easy, had I not turned my back for about 10 seconds during my third attempt. Within no time, the hot liquid candy spilled over the pot, all over the range, and actually caught fire on the burner. I was seconds away from having to reach for the extinguisher! I got it all under control…only to have to spend the next hour chiseling away at chunks of burnt sugar on the stovetop.

So, after suffering through and wasting 12 cups of sugar, 9 egg whites a whippin’, 6 pieces of dark chocolate, 4 jars of honey, 3 people laughing at me, 2 cut fingers and a stovetop charred and burned, I say BAH, HUMBUG to home made torrone! In fact, I don’t even want to see a little blue box of store bought torrone this year. Instead, I’ll stick with the delicious Christmas cookies and desserts that are made by my wife, our family and our friends.

If you are looking for a delicious holiday dessert recipe, check out the Holiday Rum Cake recipe that I shared on my blog a few years back by clicking here.

And if you want to try some of the best biscotti and ricotta cookies ever, be sure to visit my good friend Natalie Stone at Bella’s Biscotti by clicking here. They are THE BEST!


Share

Recent Comments

Archives

powered by
Socialbar