Recent Articles:

Pumpkin Lasagna

October 7, 2012 Menu 3 Comments

I’ve been planning to make a pumpkin lasagna for a while now, and have spent a good amount of time researching different ways of how to do so. I’ve come across a lot of unique recipes – most that simply mix the pumpkin and spices into the ricotta cheese. Lasagna, in my opinion, is a very elegant pasta dish, and should be treated as such when assembling. I really wanted this dish to stand out, and while the idea of mixing the pumpkin and ricotta was on the right track, it just seemed too one-dimensional. Too simple.

My next thought was ‘what kind of sauce do I add to this to give more depth and complexity.’ Believe it or not, most of the recipes that I found used a red sauce (some of the recipes were even written by ‘celebrity’ tv chefs). I don’t know if the red sauce really would work, but it was definitely not the direction that I wanted to go. I also thought about a cream sauce, but was afraid that it would make the lasagna too heavy and just plain-old sloppy. Again, lasagna should be an elegant dish…runny, sloppy lasagna is definitely not what I wanted.

What I finally decided on was to use the pumpkin as the sauce. By doing this, it would help separate the pumpkin from the cheese, while at the same time creating the exact depth and texture that I wanted in this lasagna. The pumpkin sauce would also help keep the lasagna noodles from drying out.

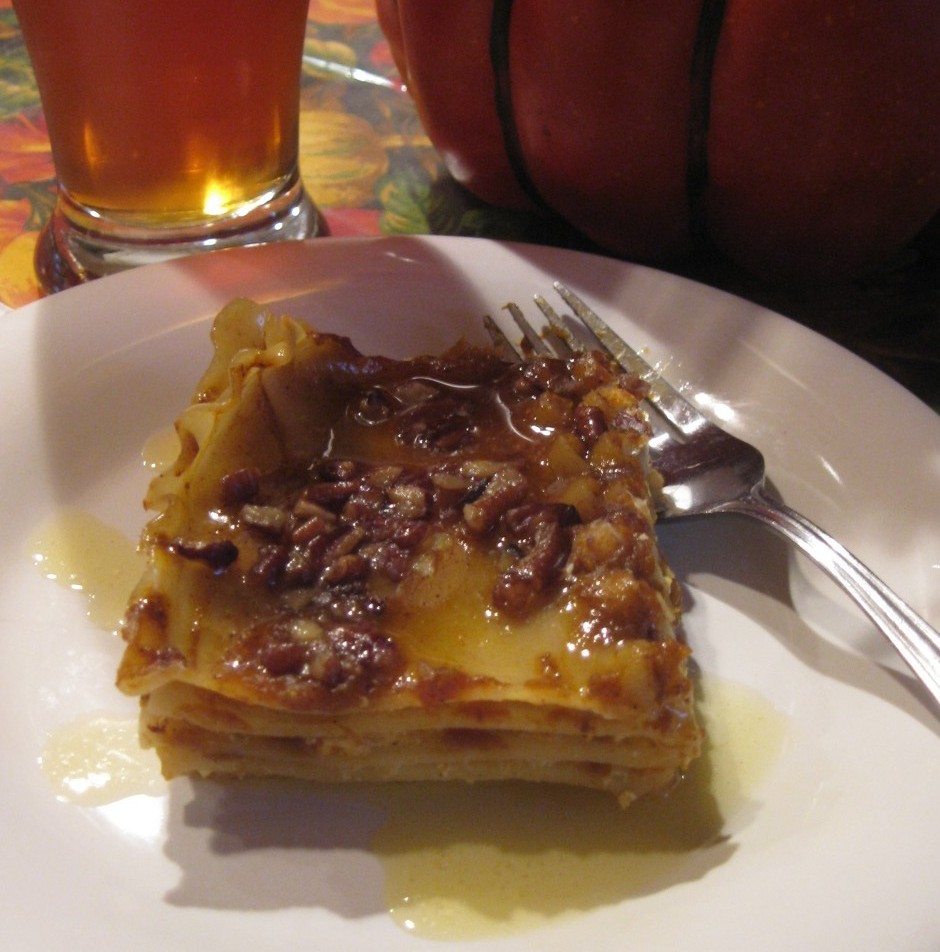
I used all of the usual pumpkin spices to make the sauce (allspice, cinnamon, nutmeg, ginger, brown sugar) along with some maple syrup to thicken it up a bit. By following the traditional lasagna layer method (pasta, cheese, sauce, repeat), the assembly was perfect. I topped it off with some toasted pecans for a little extra crunch.

Because there is a good amount of sweet spices included, I used thin layers of pumpkin and cheese so that the pasta would still stand out. I also made a brown butter sage sauce to drizzle on top of the individual servings to add a bit of savory. Although the butter sage sauce wasn’t really necessary (the pumpkin spices were perfectly balanced), it added a beautiful balance.

I was very happy with this dish…it was the perfect fall taste that I was hoping for. I hope you enjoy it!

PUMPKIN LASAGNA
Adapted from a recipe on Life Currents

1 (15 ounce) can pumpkin puree
1 teaspoon salt
1/4 teaspoon freshly ground black pepper
1/2 teaspoon ground nutmeg
1 teaspoon ground cinnamon
1/8 teaspoon ground ginger
3 tablespoons light brown sugar
1 tablespoon maple syrup
1 box uncooked lasagna shells (you will need 12 shells for this)
1 (15-oz) container ricotta cheese
8 ounces shredded mozzarella
1/2 cup finely shredded Parmesan cheese
1/2 cup pecan pieces, lightly toasted in a pan with 1 tspn melted butter

Brown Butter Sage Sauce
1 stick butter
10 fresh sage leaves

Prepare the lasagna shells as instructed on the box (you can do this ahead of time), place aside to cool and dry.

Preheat oven to 400º. In a mixing bowl, combine the pumpkin, salt, pepper, nutmeg, cinnamon, ginger, brown sugar and syrup. Set aside. In a separate bowl, mix the ricotta, mozzarella and parmesan cheeses.

Lightly coat a 13×9 baking dish with cooking spray. Add a light coating of the pumpkin mixture to the bottom of the dish. Place three pasta strips into the dish, side by side. Top each strip of pasta with about a tablespoon of the cheese mixture, spread it out on the pasta. Add a thin layer of the pumpkin sauce, spread it out evenly. Repeat these steps (pasta, cheese, pumpkin) until you finish up with the three final strips of pasta. Top with the remaining pumpkin mixture, then top with the toasted pecans. Cover with aluminum foil, bake in oven for 45 minutes. Remove from oven, keep covered and let cool for 10 minutes.

While the lasagna is cooling, melt the stick of butter in a small sauce pot, until it starts to brown. Add the sage leaves, let them simmer in the butter for 20-30 seconds. Remove and discard sage leaves. Remove butter from heat.

Slice and plate the lasagna, lightly drizzle each piece with a bit of the butter sauce.
Share

Fall Spaghetti Squash

October 3, 2012 Entrees, Menu No Comments

Looking for a healthy and tasty seasonal side dish that’s quick and easy to prepare? Try a little spaghetti squash! Along with the other variety of squash that are popular this time of year (acorn, butternut and pumpkin), spaghetti squash are easy to find at farmers markets and in your grocer’s produce section. While I do enjoy the taste and various textures of all the squash mentioned above, the spaghetti squash, in my opinion, is easiest to prepare. The spaghetti squash, which is oblong in shape, shares the same hard exterior flesh as the other squash when raw. When cooked, however, the interior of the spaghetti squash falls from the flesh in strands or ribbons, similar to spaghetti.

There are a few different ways to prepare spaghetti squash, the most common being baked in the oven, sliced in half, cut-side face down in a baking tray filled with a bit of water. While I am not a big fan of using the microwave these days, the spaghetti squash is actually very easy to prepare in ‘nuker’. Whether you are preparing the squash at meal time or in advance, the cooking and prep time are just a few minutes. Once the squash is cooked, you can toss it with spaghetti sauce, a little salsa, or even just some butter and parmesan cheese. This, of course, being my favorite season of the year, I couldn’t resist sharing with you my autumnal take on this dish. Just follow the simple steps below, making sure to handle the squash VERY CAREFULLY once cooked. While microwaving the squash does save lots of time, the squash will be extremely hot when done and will need to be handled with a towel or an oven mitt.

FALL SPAGHETTI SQUASH

1 spaghetti squash
1 tbspn brown sugar
1 tbspn butter
1 tspn vanilla extract
Salt and Pepper to taste

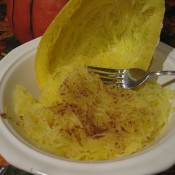
Generously pierce the skin of the squash. Place in the microwave at high for 3 minutes. CAREFULLY remove the squash, let sit for a few minutes, until cool enough to handle. This will soften the flesh and will allow you to easily cut the squash in half length-wise and scoop out the seeds. Lightly moisten the inside of both halves of the squash with some water. Place both halves cut-side face up back into the microwave, and cook on high for 4 minutes. CAREFULLY remove the squash and again set aside for a few minutes until cool enough to handle. Using a fork, gently scrape the inside of the squash into a bowl. The inside will fall off of the flesh in strands similar to spaghetti. Add the brown sugar, butter, vanilla, salt and pepper. Stir and serve.

Note – you can adjust the amount of brown sugar, butter and vanilla to your liking. You can also add other fall favorite spices to this, such as nutmeg, cinnamon or allspice. You can also add pecan pieces for a little crunch.

Share

Stuffed Peppers and Eggs

September 24, 2012 Entrees, Menu 1 Comment

Some of my favorite go-to meals during the week, especially on the days when there’s not a lot of time to prepare a big meal, are the old-fashion standards. Potatoes and eggs, pasta and beans, a quick soup, and my personal favorite, a nice peppers and eggs sandwich. For this post, we’re going to get a little creative with the peppers and eggs. This recipe will save you prep time, as the peppers and eggs bake in the oven instead of on the stovetop. It also makes for a nice looking presentation if you’re serving it as a meal any time of the day for family and friends.

Bell peppers (green or red) work best for this. Instead of dicing your bell peppers, you are simply going to cut the pepper in half length-wise, from the top of the stem to the bottom of the pepper. No need to remove the stem, it helps with the presentation. Gut out all of the seeds, but be sure not to puncture the pepper. You don’t want any holes in the pepper (I’ll explain why in just a bit). Lightly wipe down the peppers, both inside and out, with a little olive oil. Place the peppers cut side up on a lightly greased baking dish.

Next, you’ll want to mix up your eggs. You’ll need two eggs per pepper. I use a basic mixture of egg, salt, pepper and some parmesan or feta for taste and texture, topped with a little bruschetta. You can add whatever ingredients you normally like to add to your eggs. Chopped mushrooms, bacon bits, ham, onion….go wild!

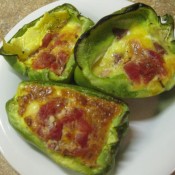
Carefully pour the egg mixture into the pepper halves, almost to the top of the pepper. This is why it is important that you do not puncture the peppers…you don’t want your batter to run out all over the baking dish. You can then top the peppers with shredded cheese, breadcrumbs, sliced tomatoes, salsa…again, whatever you prefer with your eggs.  Place the tray into a 350º pre-heated oven. Bake for approximately 30 minutes, or until the egg batter has set firmly in the peppers. Serve immediately.

*Note – if you add liquid to your egg mixture, say milk or water, or a liquify salsa mixture, you will need to add additional baking time for the egg batter to settle. Keep checking on the peppers and eggs, just to make sure that they don’t burn.

Share

Fresh Basil-Mint Pesto

September 17, 2012 Appetizer 1 Comment

Even though it may be a bit late in the season to talk about using fresh herbs from your garden (my herb plants starting going south a few weeks back), it’s never a bad time to keep this quick tip in mind next time you are making fresh pesto. By simply cutting the amount of fresh basil in half, and replacing the other half with fresh mint – in other words, using equal parts basil and pesto – you end up with a tasty and vibrant alternative to an already fresh home made sauce. Whether you are serving it on pasta, chicken, salmon, baked potato, or as a vegetable dip, the fresh mint pesto will be sure to please!


Fresh Basil-Mint Pesto
Adapted from simplyrecipes.com

1 cup fresh basil leaves, packed
1 cup fresh mint leaves, packed
1/2 cup freshly grated Parmesan-Reggiano or Romano cheese
1/2 cup extra virgin olive oil
1/3 cup pine nuts or walnuts
3 medium sized garlic cloves, minced
Salt and freshly ground black pepper to taste

Combine the basil and mint with the pine nuts, pulse a few times in a food processor. (If you are using walnuts instead of pine nuts and they are not already chopped, pulse them a few times first, before adding the basil.) Add the garlic, pulse a few times more.

Slowly add the olive oil in a constant stream while the food processor is on. Stop to scrape down the sides of the food processor with a rubber spatula. Add the grated cheese and pulse again until blended. Add a pinch of salt and freshly ground black pepper to taste.

Use immediately, or refrigerate in a sealed container for up to a week.
Makes 1 cup.

Share

Recent Comments

Archives

powered by
Socialbar