Recent Articles:

In the Kitchen with Dom: The video!

April 23, 2012 Menu No Comments

One of the genuine pleasures of writing a blog is making contacts with others who share a similar passion. I have been fortunate enough to make several meaningful relationships over the years with other bloggers and foodies (all of whom you can find links to here at Cucina Domenico). Recently, my friend Dan Putkowski, author of several books including Bonk’s Bar and An Island Away, contacted me about capturing a little of what I do in the kitchen on video. Dan also has his own successful blog, The Bent Page, which is comprised of many great photos and videos of travel, literature, food and product review. Dan’s motto is “It’s a small world, but big enough for me.” His blog is a perfect representation of that!

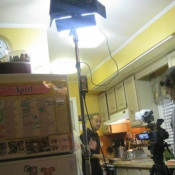
Just this past weekend, Dan and his wife Heather (who is a good friend of mine for many years), visited our house and filmed a very nice video of myself in the kitchen, preparing a typical Sunday afternoon Italian-American dinner. Not only was the video a blast to make, but it was also yet another excuse to sit around the table on a Sunday afternoon with good friends.

I am very proud and honored to be featured on one of Dan’s videos. I hope you enjoy it. And please be sure to check out Dan’s blog, The Bent Page. You will definitely have a good time there!

Share

Valpolicello Ripasso: Affordable Wine with High-end Taste!

April 13, 2012 Menu No Comments

I am a firm believer in not having to spend too much money for a good bottle of wine. I have found that $10-$12 can often get you a very enjoyable bottle. I am also one that still appreciates the charm of the old fashioned bottle of Italian wine that is encased in the wicker basket. While many consider it cliché nowadays, I still find it nostalgic seeing the old wicker bottle on the table on a Sunday afternoon with a plate of meatballs and pasta.

With that said, I have also had the opportunity to enjoy higher priced wines at various dinner parties or events, my favorite being Amarone. And yes, there is a difference in taste with higher end wine. The complex, silky smooth texture is one that you can quickly identify with a better bottle. Even if you are not well versed in wine etiquette (which I am not, by the way), your tastebuds just know that something different, something special is happening right at the first sip. But for many (myself included), spending a large amount on a good bottle of wine is just not feasible. Amarone will run you anywhere from $45 up to $120 dollars.

Just recently I came across an interesting article in La Cucina Italiana that offers a practical solution if you are looking to enjoy the taste of a higher end wine, specifically Amarone. Because the grapes used for Amarone wine are so concentrated and full of flavor,  you are able to extract flavor from the grapes a second time around. Not enough flavor to produce an entire new round of wine, but when combined with Valpolicello, a fruity and less complex – and much more reasonably priced – Italian wine, you get what is called Valpolicello Ripasso (ripasso meaning repassed or refermented). While this is more of a one off of a true Amarone, there is enough flavor and texture that is carried through, which gives the traditional Valoplicello a more complex and interesting taste. Valpolicello Ripasso is also a fraction of the cost of Amarone, available for about $25 a bottle.

While this may also be out of the budget for many for an everyday bottle, it is a reasonable price for a nice birthday, anniversary or house warming gift. It is also an affordable option to take along to a BYO. Nowadays you can easily drop $25 on a bar bill for what I call entry-level house wine. With Valpolicello Ripasso, you spend the same amount as you would  for a few glasses of house, but you get a much more enjoyable, and better quality wine!

* You can find the La Cucina Italiana article Amarone con Amore, by Anthony Giglio, by clicking here.

My $10.99 Pick: Casillero del Diablo Carmenere

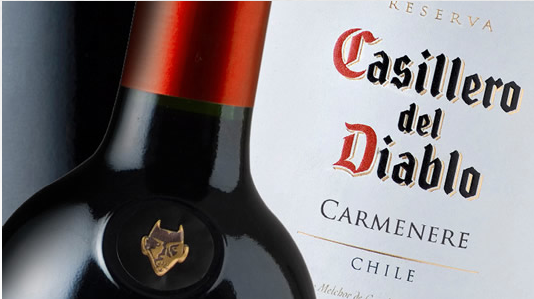
Whenever I make a trip to the Wine & Spirits shop, I always make sure to grab a bottle of my ‘go-to-wine’, Casillero del Diablo Carmenere. It’s a Chilean red wine whose taste, according to wikipedia, falls anywhere between cherry-like, slightly smokey and spicy, earthy, with a hint of dark chocolate. I, personally, give it a perfect three on the ‘easy’ chart: easy to find; easy to afford; and easy to drink. I’ve brought it to many dinner parties and have often given it out as a gift, and am always told by everyone how much they enjoy it. For $10.99 a bottle (occasionally on sale for $8.99), you can’t go wrong!

For more info on Casillero del Diablo, click here.


Share

Taralli Dolci di Pasqua (Easter Ring Cookies)

Earlier this week, a good friend of mine had asked me for a recipe for Easter cookies that her Mom would make. I knew exactly what kind of cookies they were based on her description, but had no recipe for them. I reached out to Emma, my guest blogger and keeper of many traditional Italian baking secrets. Sure enough, Emma also knew exactly what I was looking for, and she had the recipe on hand! Thanks, Emma for again taking the time to put together this tremendous cookie recipe. I hope you all enjoy!

TARALLI DOLCI di PASQUA (EASTER RING COOKIES)
By Emma Caperelli Loerky 

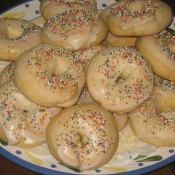
In keeping with Dominic’s traditional Italian Easter food theme, I have decided to share a recipe that is similar to the one my mom always makes during the Easter season. The recipe comes from one of my favorite cookie cookbooks, Cookies Unlimited, by Nick Malgieri. It is a  very easy to make cookie called Easter Ring Cookies or Taralli Dolci di Pasqua. Fancy tools are not required to make them because the dough is mixed by hand, cut into 16 pieces (or, if you prefer smaller cookies, you can divide the dough into up to as many as 40 pieces), rolled between your hands to form a rope, at which point the ends are pinched together to form a circle. After baking and cooling, the cookies are then dipped into a glaze and sprinkled with multicolored nonpareils.

This is a mildly sweet cookie and is meant to be eaten with a cup of coffee or tea (or, as my son prefers to eat them, with a nice, cold glass of milk). These cookies stand up to dunking well, and, in my opinion, that is how they are best eaten.

A few things to make note of when making this cookie:

If you divide the dough into smaller pieces, cooking time will most likely be cut in half. In my oven, I found that the cookies were finished after about 25 minutes, so be sure to check the cookies often during the last 5 – 10 minutes of baking time. And, as with all cookies, halfway through baking I switched the baking sheets from top to bottom and also rotated the pans to ensure even baking. The cookies are done once they turn a light golden brown color.

Also, the icing sets VERY quickly, so make sure you have your nonpareils ready because you will need to sprinkle each individual cookie immediately after dipping it in the icing or the nonpareils will not stick. Don’t say I didn’t warn you. And don’t skimp on the icing, it brings a lot of the sweetness to the cookie. I like to dunk the cookie in the glaze a few times just to make sure the cookie is sufficiently iced.

Which brings me to my next tip – I usually have just enough icing for my cookies without any leftovers to spare. It could be because of my thoroughly dunking each cookie in the glaze several times, but you may want to double it just to be safe. And because the glaze sets so quickly, you will most definitely need to reheat it in between icing the cookies. I found it easier to keep it warm on low heat over the stove, but, should you choose to do this, be careful not to let it burn, or to get it on your skin. I learned the hard way that the icing can get very hot.

Lastly, these cookies spread quite a bit during baking so you don’t want to overcrowd them on the cookie sheet. Depending on the size of your pan, I recommend no more than 6 cookies per cookie sheet for the large cookies. If you choose to make your cookies smaller, leave at least 2 inches between each cookie to allow room for them to spread.

Enjoy and Happy Easter!

Easter Ring Cookies
From Cookies Unlimited by Nick Malgieri

Cookie Dough Ingredients:
5 1/2 cups all-purpose flour
1 1/2 tablespoons baking powder
pinch of salt
6 room temperature eggs
1 cup granulated sugar
12 tablespoons (1 1/2 sticks) unsalted butter, melted
1 1/2 tablespoons vanilla extract

Icing Ingredients:
3 cups confectioners’ sugar
4 tablespoons water
1 tablespoon lemon juice
1 teaspoon vanilla extract
Multicolored nonpareils

Instructions 

For the dough:
Preheat oven to 350 degrees.

In a medium bowl, whisk together flour, salt and baking powder. Break eggs into a large bowl and whisk until broken. Whisk in the sugar in a stream followed by the melted butter then the vanilla, whisking smooth after the addition of each ingredient. Using a rubber spatula, fold the flour mixture into the wet ingredients. Turn the dough onto a lightly floured surface and knead lightly.  Divide the dough into 16 equal pieces (or up to 40 if you prefer smaller cookies). Using your palms, roll each piece of dough into an 8 inch rope. Pinch the ends of the rope together to form a circle. Place the dough on parchment lined cookie sheets at least 2 inches apart. Bake for about 30 minutes, or until puffed and golden, rotating the pans about halfway through baking. Transfer cookies to a wire rack and cool completely before glazing.

For the glaze:
Combine all icing ingredients in a saucepan and heat on low until the mixture is lukewarm, stirring often. Hold one of the cooled cookies by the bottom and dip the top of the cookie into the glaze, letting the excess icing drip back into the pan. Immediately sprinkle with the nonpareils, and place on a wire rack to let the icing set.
Share

Easter Cheese Bread

March 31, 2012 Appetizer, Menu 1 Comment

Of all the recipes that I have featured on my blog, this is one that I am most excited to share with you. Not only is it another fine example of an Italian delicacy that is enjoyed during the Easter season, it is also a recipe that I have been searching out for years! A few years back we were visiting our friend at her parents’ house. Her mom, who is from Italy, shared with us an Easter cheese bread that she made. She called it ‘pastiche’ (pronounced pas-teech). It was a savory bread that had cheese baked into the texture, and it was one of the most delicious breads I’ve ever tasted. When I asked if she would share the recipe, she looked at me, smirked and said in her slight broken English, “nah, you can’t make this.” As it turns out, this recipe was a special recipe that came from her home town, and it was something that I figured was just guarded by those who learned how to make it over the years. Honestly, it was like a punch to the gut being told ‘no’.

Never being one that is told that I can’t do something, I spent the next few years searching out the recipe, but with no luck. There were no recipes online for ‘pastiche’, and the most results I would find for a search on Italian cheese bread was for Domino’s bread sticks. Epic fail.

But finally, this year I found a lead. Apparently, our neighbors’ friends, who are also from Italy, make a bread this time of year that they call pastiche. I also found out that they are from Abruzzi. My friend’s parents are from Abruzzi. I begin to think “hey, this is all starting to add up!” I searched out Abruzzi cheese bread and..BINGO! I finally found what I was looking for.

Crescia al formaggio is a traditional savory Umbrian bread that is made during Easter time with various cheeses, specifically grated Pecorino Romano and/or Parmigiano, along with chunks of a semi-sharp-or sharp cheese (such as provolone or fontina) folded into the dough. Although quite flavorful on its own, it can also be served  during any meal along with eggs, prosciutto and other Italian meats, or even with peppers.

To say that I was happy when I found this recipe would be an understatement. As soon as I read the description and saw a photo online, I knew that I had finally found what I was looking for. And, to my my surprise, there were quite a few variations that I found of this bread. Some were honestly more difficult than others, incorporating home-made cheeses. I now understand why my friend’s mom doubted my skills. But I also found some other less complicated versions. One that specifically intrigued me was at Italian Food Forever. I gave the recipe a try, and it tastes exactly how I remembered. Pure heaven. I reached out to Deborah Mele of the website, and she graciously agreed to allow me to share her recipe here. Thank you very much, Deborah!

But what about the mystery of ‘pastiche’?

Of all the recipes that I found, none of them refer to it as pastiche. I’ve tried various searches over the years on the word (not eve sure if I were spelling it correctly). Nada. I have also since found out that our neighbors friends do not use flour in their recipe. Only eggs and home made cheese. So while theirs may not be the same ‘pastiche’ as I’ve had before, it was enough to lead me to a solution. But finally, after a little deep digging, I did come across one possible answer. According to Wikipedia, pastiche (which aslo means hodge -podge) is the French version of the Greco-Roman dish pastitsio or pasticcio, a kind of pie made of many different ingredients. I guess this is the Easter bread version of the Gravy vs. Sauce argument.

Whatever you choose to call it, definitely add this recipe to your Easter menu.

Buona Pasqua!

CRESCIA – UMBRIAN CHEESE BREAD
Courtesy of Deborah Mele at Italian Food Forever

Yield: 1 Large Loaf

Prep Time: 2 1/2 hrs

Cook Time: 40 mins

A cheese packed bread traditional to Umbria often served with cured meats.

Ingredients:

1 3/4 Cup Warm Water
1 Tablespoon Active Dry Yeast
6 Extra Large Eggs
1/2 Cup Olive Oil
1 Tablespoon Coarse Black Pepper
1 Tablespoon Sea Salt
2 Cups Grated Pecorino Cheese
8 Cups All-purpose Flour (Or Tipo 0)
8 Ounces Young Pecorino Cheese Cut Into 1/2 Inch Dice

Directions:

(Note – this recipe calls for a soufflé dish, but I used a spring form pan and it worked fine).

Spray a large soufflé dish with oil, and using a strip of parchment paper, line the top of the dish adding an additional 2 to 3 inches of height.
Add the yeast to the water in a bowl and mix, then let sit 5 minutes until bubbly.
In another bowl, beat first the 6 eggs, then add the olive oil, salt, pepper, and grated cheese.
Add the yeast mixture to the egg mixture and stir until combined.
Add half the flour and stir, and then continue to add flour one cup at a time until you create a firm dough that is not too sticky.
Dump the dough onto a lightly floured surface, and knead by hand, folding in the diced cheese as you work the dough.
Knead for about 5 minutes or until the cheese has been incorporated into the dough, and the dough is smooth.
Lightly oil a large bowl with olive oil and let the dough rise until doubled, covered, in a warm spot.
Punch down the dough and form it into a ball and place it into the prepared soufflé dish.
Preheat oven to 375 degrees F.
Cover the bread with a kitchen towel and let it rise for about 30 minutes.
Bake the bread for about 35 to 40 minutes, or until it reaches an internal temperature of 190 degrees F.
Let the bread cool for 10 minutes, remove it from the baking dish and let cool to room temperature before cutting into it.

Adapted From Mary Ann Esposito

Share

Recent Comments

Archives

powered by
Socialbar