Recent Articles:

Butternut Squash Ravioli
January 9, 2011 Menu, Pasta No Comments

While I was putting together my list of upcoming recipes that I am planning to post, I found myself leaning towards a lot of pasta recipes. Being that pasta is probably THE standby Italian dish, it’s no real surprise. And I’m not just referring to a standard plate of Sunday pasta with gravy and meatballs. Pasta can be a very versatile ingredient in many creative dishes. So it was an easy decision to make a special Pasta category on my blog. Just as The Mamma Meets the Cucina, Family Recipes, and Guest Recipe with Emma appears every few weeks, I will now start to highlight a special pasta dish under the banner The Pasta Dish. This special section will feature a variety of topics and recipes, such as: home made pasta recipes, creative pasta sauces and toppings, and links to some of my favorite celebrity pasta dishes (and I have quite a few of them bookmarked!). I hope you get as much enjoyment reading the new section as I do posting it.


BUTTERNUT SQUASH RAVIOLI
Served with Brown Butter Sage Sauce

Today’s dinner was extra special. Aside from getting to use one of my favorite vegetables incorporated into one of my favorite pastas, my daughter Julianna was very eager to help me roll out the pasta. Spending time in the kitchen with family is always a special occasion, and getting to have my daughter to help out and share in the fun is always a bonus.

I found a good recipe for butternut squash ravioli filling. The most time consuming part is baking the squash in order to purée it, and you can do this ahead of time. After that it’s just mixing a few key cheese ingredients and letting it sit while you roll out a basic pasta dough. We used a ravioli stamper to press out the ravioli shapes, but I’m sure that many of you – like myself – have stories of our grandmothers using a juice glass to press out the ravioli.

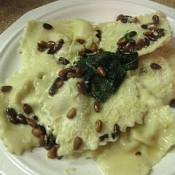
I used Mario Batali’s brown butter and sage recipe for a quick and complimentary sauce, adding some toasted pine nuts as a final touch. Delicious, filling and lots of fun. Three key ingredients to a successful meal!

Ingredients

For the ravioli
3lb Butternut Squash
3/4 Cup Ricotta Cheese
1/4 Cup Parmesan Cheese
1/4 Teaspoon Cinnamon
1/4 Teaspoon Nutmeg
1 Teaspoon Fresh Ground Black Pepper
Salt, to taste
1/2 Cup Bread Crumbs

Slice squash in half, lengthwise. Remove seeds and pulp, place cut side down in a baking dish filled with a bit of water. Bake at 350º for 45 minutes. Let cook, scoop out flesh, purée. Add cheeses, cinnamon, nutmeg, salt and pepper, blend. Add breadcrumbs, blend. Cover and set aside in refrigerator.

Next, make a basic pasta dough – you will need 2lbs of dough, which is approx. 4 cups of flour and 4 eggs. This will make approximately 28 ravioli.

When pasta is rolled out, place one sheet of dough on piece of wax paper. Mark the dough where you will be making the ravioli cuts. Place 1 tablespoon of filling in the center of each expected cut. Place a second sheet of dough on top (you may need to lightly brush the second sheet with an egg wash if the dough has dried out to help the sheets stick together). Press out the ravioli with a ravioli cutter.

Bring a large pot of salted water to a boil. Gently add the ravioli to the water and cook 4-5 minutes.

For the sauce
4 tablespoons butter
8 sage leaves
1/2 lemon, juiced
1/4 cup grated Parmigiano-Reggiano
1/3 cup toasted pine nuts

While your pasta cooks, melt butter in a 12 to 14-inch saute pan and continue cooking until golden brown color appears in the thinnest liquid of the butter. Add sage leaves and remove from heat. Add lemon juice and set aside. Drain the pasta, but leaving a small amount of cooking water, and gently pour into saute pan and return to heat. Add the cheese and toasted pine nuts, toss to coat and serve immediately.

Share

Melanzana Caprese

January 3, 2011 Entrees, Menu No Comments


Here’s a meal that ended up being an impromptu spin-off of a major dish. Our original plans for the day after Christmas were to have my Mom over for dinner. I was going to make Nick Stellino’s Baked Pasta with Eggplant Sauce (note: if you are ever planning a dinner for 4-6 people, this is a MUST GO TO dish!). Well, the weather outside was frightful and Mom was not able to make it through the impending snowstorm.
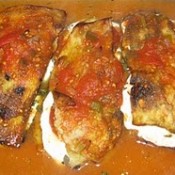
Instead of putting in the time and effort to make this glorious, yet very filling dish for just my wife and I (sadly, my kids haven’t developed the appreciation yet for such a fine meal), I decided to put the eggplant to simpler use. Not wanting to just make my standard eggplant parm casserole, I came up with a way to incorporate the flavors of a Caprese salad – fresh basil, tomatoes and chunky slices of fresh mozzarella. While I did not have fresh tomatoes on hand, I did have a can of stewed tomatoes. Using the chunky portions of the tomatoes in the eggplant and reserving the juice to lightly pour on top made for the perfect substitution. The end result was just as tasty and flavorful as a traditional parmesan casserole, but with more of a fresh, crispy spin and less of a gooey, bread crumb encased texture. I can honestly say that I will probably make this version more often than a standard eggplant parm casserole!
Melanzana Caprese

1 large eggplant, skin removed
1/2lb fresh mozzarella cheese, sliced
Fresh basil, chopped
1 14.5oz can stewed tomatoes
flour, seasoned with salt & pepper and garlic powder
Preheat oven to 350º. Slice eggplants into thin, long slices from top to bottom (instead of traditional round slices). Dredge eggplant slices into flour so each slice is well coated.
Cover the bottom of a large frying pan with some extra virgin olive oil, heat. When oil is hot, place eggplant cutlets into pan, no more than three at a time. Fry 3-5 minutes on each side until golden brown. Add more olive oil as necessary. Set fried cutlets aside to slightly cool.
In a 9×13 baking dish, place one layer of cutlets. Top each cutlet with some fresh mozzarella cheese the tomatoes from the stewed tomatoes (reserve the juice for later) and the fresh basil. Place a second row of eggplant cutles on top. Gently pour the juice from the stewed tomatoes over the cutlets. Cover with foil.
Place tray into oven, bake for 15-20 minutes. Serve with a side of pasta or rice.
Share

The Mamma Meets the Cucina: The Feast of the Seven Fishes

From the Mamma…

Christmas Eve’s Feast of the Seven Fishes or “La Vigilia” comes from a long standing Catholic tradition of avoiding meat on the vigil of (vigil = the night before) the Feast Day of Christmas. Tilapia is a favorite meatless dish in our house, which is why I chose to highlight it for this blog post. Now, our family might not have ALL seven dishes include fish, but we will throw on some shrimp fra diavolo, even if it is served sans capellini as an appetizer. But the tilapia and the pasta dish are a staple for us on Christmas Eve. It’s yummy enough to impress the crowds of friends and family, but easy enough to handle as we quickly end the game of Scopa and rush to Midnight Mass! So give these a try – even if it’s not for La Vigilia – they make a great accompaniment to each other.

PARMESAN CRUSTED TILAPIA
This recipe is one of easy, healthy , and tasty all at the same time. Even kids are huge fans – whaddaya know?! A kid-pleasing fish dish without the word “stick” in the title!

1/4 cup grated parmesan cheese
1/4 cup grated romano cheese
1/4 cup yellow cornmeal
1/2 cup Italian seasoned bread crumbs
1/2 cup melted butter
4-6 tilapia loins

Coat the tilapia in the melted butter. Mix all dry ingredients. Season with salt & pepper to taste. Coat the tilapia i the bread crumb mixture. Place on parchment lined baking sheet and bake for 15-20 minutes at 400 degrees. Serve immediately with a side of GEMELLI PASTA!!

CHRISTMAS EVE GEMELLI
This dish is so simple, yet full of flavor. The red and green of the tomatoes and the arugula make a great addition to the Christmas tablescape.

1 lb. Gemelli pasta
1 can crushed tomatoes
6-8 cloves garlic, minced
e.v.o.o.
1 bag arugula
salt
pepper
crushed red pepper

Add 2-3 tbsps of e.v.o.o. to a large, deep skillet. Saute the garlic until light caramel in color. Add the arugula and cook until slightly wilted. (NOTE: you could use spinach here if you do not like arugula. The idea is to get the green color and an added distinct flavor) Remove and set aside. Add the crushed tomatoes, crushed red pepper, salt & black pepper to taste. Simmer for 20 minutes or so. Boil the gemelli till al dente. Just before draining, add the arugula back in. Drain the pasta and toss with the sauce. Serve immediately.

From the Cucina…  

My family has been celebrating Christmas Eve with the traditional Feast of the Seven Fishes for as long as I could remember, and of course many years before that. For years, our meal would consist of most of the traditional dishes, such as baccala soup, smelts and shrimp. Non-fish dishes, such as spaghetti aglio e olio (garlic and oil) and chicken cutlets would also be served for those not-so-much into seafood. Over the past few years, my cousins, my brother and sister-in-law, and myself have been stepping up to help relieve our aunts and Grandmother from the heavy kitchen duties, while at the same time trying to update the menu a bit with some more modern dishes such as seared scallops and crab cakes. However we still make sure to keep some of the traditional staples in the rotation.

This year I am very proud and honored to be taking over one of the crown jewels of the table, stuffed calamari. Now chances are that many of you are only familiar with the more popular Italian eatery appetizer, fried calamari. Unlike the fried rings, stuffed calamari is actually using the whole calamari tube, stuffed with a breadcrumb and cheese filling, and cooked slowly in a pot of red sauce (I don’t use the word gravy here because there is no meat involved). When cooked, they resemble a stuffed shell, and they are tender enough to cut without a knife!

If you have never tried stuffed calamari, I encourage you to do so. Whether you serve it along with pasta or on its own, I guarantee you it will make for a special part of your meal, especially if you are planning to celebrate a traditional Italian Christmas Eve.

STUFFED CALAMARI
Makes 8-10 pieces

1 lb. calamari tubes, cleaned (you can purchase cleaned calamari tubes in the freezer section of your grocery store)
1/2 cup breadcrumbs
1/4 cup parmesan cheese
2 teaspoon parsley
salt and pepper to taste
1 teaspoon garlic powder
Olive oil (enough to add to mixture until proper consistency)
* you can also chop the unused calamari tentacles and place them in the stuffing mixture for extra texture and flavor. Uncooked shrimp will also work well

Sauce Ingredients
1 29oz can tomato sauce, plus 1 can water
2 cloves garlic, minced
1 teaspoon sugar
salt and pepper to taste
1/4 cup grated parmesan cheese

In a large pot, sauté garlic in heated olive oil. Add tomato sauce and sauce seasonings. Add water until desired consistency. Bring to a slow boil, then lower the temperature to simmer.

Mix stuffing ingredients, add oil and mix with hands until you get a nice, meatball-like consistency. Using a spoon, loosely stuff each calamari tube. You don’t want to pack the tubes, because the stuffing will expand and the calamari will shrink when cooked. Secure the open ends of the tubes with a toothpick. Add the tubes to the sauce, cook on a medium-low simmer for 2 hours. You’re looking for a string cheese consistency when you slice into the calamari. Serve and enjoy!

– We would like to wish all of our readers a happy and peaceful holiday and the warmest wishes for the New Year. Buon Natale!
Share

New Guest Recipe – Gingerbread

It’s beginning to look (and feel) a lot like Christmas! As we quickly approach the holidays, what better way to celebrate than with a delicious gingerbread! This week, my good friend Emma shares with us a fantastic gingerbread recipe, and also works her magic to give us a gluten-free version! Enjoy!

Where to begin with this month’s blog? I guess I should start by telling you that I had every intention of blogging about Struffoli (aka Honey Balls) for the Christmas season. My intentions were so good that I actually went out and bought an expensive, imported bottle of Limoncello for that exact purpose. However, a million other little things happened to prevent me from getting the chance to make it. For example, my cat got sick…twice! And I took in some foster kittens even though I said I was going to take a break until after the holidays. And, of course, I got hit with the cold from hell. All of this in between wanting to spend as much time with all of the people whom I love that happened to be visiting from out of town this month.

So, I decided to blog about a recipe that I had made before and knew would turn out well. It’s a gingerbread recipe by Emeril that I came across a few years ago. This recipe has been bulletproof for me. Seriously, I have made countless substitutions to this recipe and each time I’ve had perfect results. I’ve done everything from using dark molasses in place of the regular (and/or a combination of the two when I’ve fallen short of one or the other), to adding bittersweet chocolate chips. In case you’re thinking about adding the chocolate chips (which I highly recommend), let me just warn you that they did sink to the bottom of the pan during baking. I’m pretty sure this can be remedied by coating the chips in 1 – 2 tbsp of the flour mixture before adding it to the batter, or you can always try sprinkling the chips on top before baking. Either way, I think they were a delicious addition and worthy of trying again.

When making this recipe into the gluten-free version, I discovered that I didn’t have quite enough of any of the various gluten-free flours that I keep around. So, I ended up using equal parts of two different gluten-free flour blends. In the end, the recipe worked. My only complaint is that it rose a little too high and collapsed slightly in the middle after baking, but that can easily be fixed by adjusting the amount of baking soda in the recipe. Most importantly, it had no negative effect on the taste or texture of the bread.

Oh, and did I mention that dark beer plays a huge role in this gingerbread? I didn’t, did I? Well it does, and I think it may be what sets this gingerbread apart from all other gingerbread recipes. Since making this bread a few years ago, I have learned that while I don’t care for the taste of dark beer on it’s own, I love the flavor it lends to baked goods. And, more often than not, I will have a few bottles of it stashed in my fridge just in case I get the urge to bake with it.

GINGERBREAD
by Emeril Lagasse

Ingredients
1 stick unsalted butter (room temp)
1 cup turbinado sugar
3 large eggs
2 cups all-purpose flour
2 teaspoons ground ginger
1 1/2 teaspoons baking soda
1 teaspoon cinnamon
1/2 teaspoon salt
1/2 teaspoon cloves
1/4 teaspoon freshly grated nutmeg
1 cup molasses (regular or dark will work, but I prefer the dark)
1 cup Guinness, or other dark beer

Directions
Preheat oven to 350 degrees F. Grease a 13 x 9-inch cake pan and line with parchment paper. (Please note: I usually use the mini foil loaf pans instead of the cake pan and bake for approximately 10 minutes more than called for. I get two loaves, which are the perfect size for gift-giving. On several occasions, I’ve even made it in a full loaf pan. I can’t quite remember how long it took to bake but I want to say about an hour and 15 minutes, and you may need to tent the pan with foil to prevent the top from getting too dark.)

In a large bowl, cream together the butter and sugar. Beat in eggs one at a time. In a medium bowl, sift the flour, ginger, baking soda, cinnamon, salt, cloves, and nutmeg, In a third bowl, combine the molasses and beer and stir to dissolve. Add the dry ingredients and beer mixture alternately to the egg mixture, starting with and ending with the dry ingredients. Pour into the prepared pan and bake until puffed and set, about 35 minutes. Remove from pan and let cool in the pan on a wire rack.

GLUTEN-FREE GINGERBREAD
adapted from Emeril Lagasse

Ingredients
1 stick unsalted butter (room temp)
1 cup turbinado sugar
3 large eggs
2 cups gluten-free flour mix (I used 1 cup King Arthur Flour’s g/f flour blend and 1 cup Bob’s Red Mill g/f flour blend)
1 teaspoon xanthan gum
2 teaspoons ginger
1 1/2 teaspoons baking soda (I had a minor issue with this recipe puffing up and collapsing slightly in the middle, so you may want to adjust the amount of baking soda used.)
1 teaspoon cinnamon
1/2 teaspoon salt
1/2 teaspoon cloves
1/4 teaspoon freshly grated nutmeg
1 cup molasses (regular or dark will work, but I prefer the dark, especially since the g/f beer I used is not as dark as the Guinness)
1 cup Redbridge Gluten-free beer

Directions
Preheat oven to 350 degrees F. Grease a 13 x 9-inch cake pan and line with parchment paper. (Please note: I usually use the mini foil loaf pans instead of the cake pan and bake for approximately 10 minutes more than called for. I get two loaves, which are the perfect size for gift-giving. On several occasions, I’ve even made it in a full loaf pan. I can’t quite remember how long it took to bake but I want to say about an hour and 15 minutes, and you may need to tent the pan with foil to prevent the top from getting too dark.)

In a large bowl, cream together the butter and sugar. Beat in eggs one at a time. In a medium bowl, sift the gluten-free flour, xanthan gum, ginger, baking soda, cinnamon, salt, cloves, and nutmeg, In a third bowl, combine the molasses and beer and stir to dissolve. Add the dry ingredients and beer mixture alternately to the egg mixture, starting with and ending with the dry ingredients. Pour into the prepared pan and bake until puffed and set, about 35 minutes. Remove from pan and let cool in the pan on a wire rack.

Share

Recent Comments

Archives

powered by
Socialbar