Home » chicken » Recent Articles:

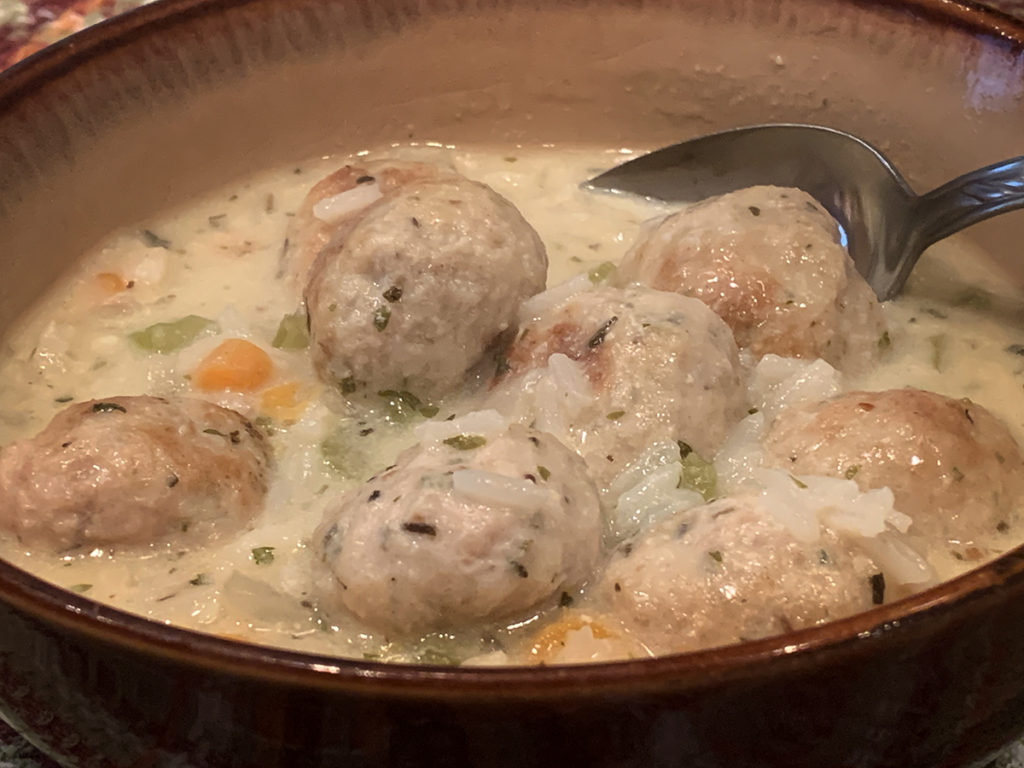
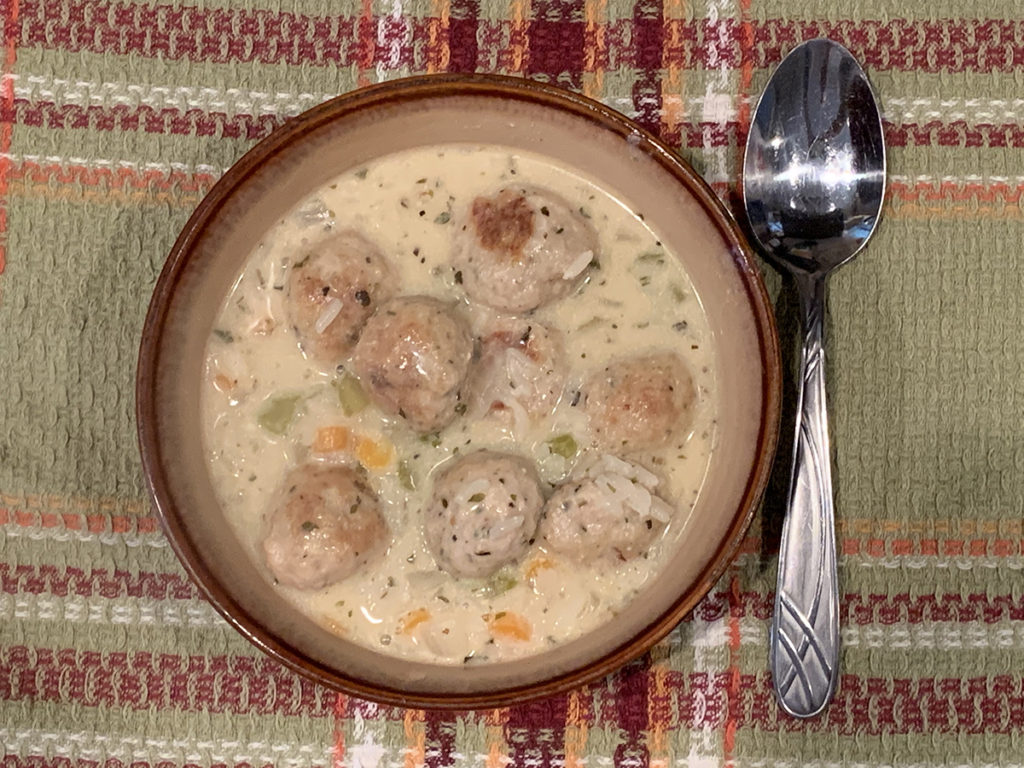
Chicken Meatball Soup with Creamy Lemon Rice
April 23, 2020 Menu No Comments

This recipe started with the intentions of making a simple lemony chicken broth-based soup. As I began to build on the ingredients that I wanted to include, the recipe took on a rich and creamy life of its own, and I was very pleased with the results. The beauty of this recipe is that its texture can be adapted depending on the ingredients that you choose and how they are incorporated.

Being that we are currently living through these strange and uncertain times where grocery shopping can be difficult and frustrating, I focused on using as many basic and common ingredients as I possibly could. Pretty much all of the ingredients in this recipe are standard, however I have given suggestions for substitute ingredients in case you do not have certain items on hand.

Let’s start with the liquid base. I used 4 cups of low sodium chicken broth, adding 1 cup of evaporated milk (which I happened to have on hand in my pantry). The evaporated milk will help thicken the broth and add a bit of a sweet creaminess. If you don’t have evaporated milk, but would still like to give a creamy texture to the broth, you can use 3/4 cup whole milk plus 1/4 cup half and half. Or if you prefer to go a non-dairy route, you can use a cup of almond, soy or coconut milk. If you are looking for a more liquidy, not-so-creamy broth, just eliminate to milk all together, and add another two cups of broth – 6 cups total.

The rice that you choose – and how you decide to incorporate it – will also have an effect on the recipe. I chose to use white rice, and decided to cook the rice in the broth to create a thick and creamy, risotto-like texture. The cooked white rice will absorb much of the liquid, so you may have to add more liquid if necessary. The cooked rice also absorbs much of the seasoning and flavor, which is why I prefer this method. If you want to use white rice but are not looking for a very thick texture, you can cook the white rice on its own and add it to the simmering broth before you are ready to serve it.

You can choose to use a different type of rice or grain all together, like a wild grain rice or quinoa. You can also decide to cook the rice or grains directly in the broth, or cook it on its own and add it to the simmering broth. If you decide to cook the rice or grains in the broth, it will take a bit longer to cook, and it will not thicken up the broth as much as the white rice would.
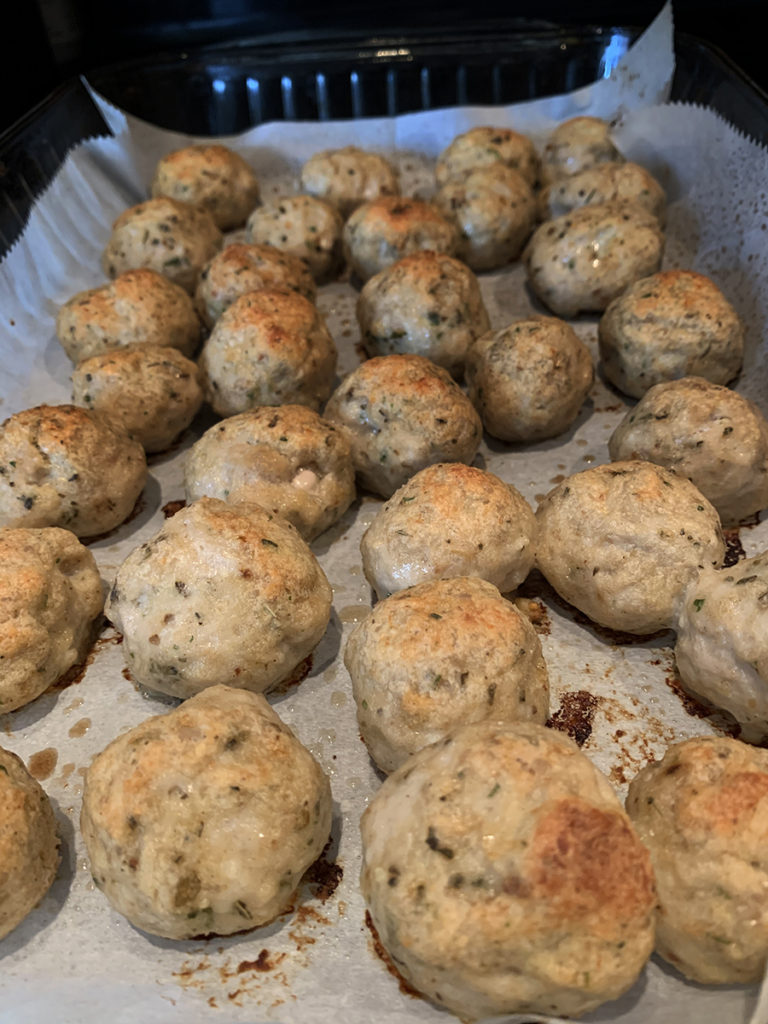
When using meatballs in soup, my personal preference is chicken meatballs. They are a bit lighter than traditional meatballs, and still carry the flavor that shredded or chopped chicken would add to a soup. Also, meat supplies can be sparse in the grocery stores during this time of quarantine. You may find ground chicken to be more easily available than ground beef. Of course, you can use whatever ground meat you prefer when making this dish!
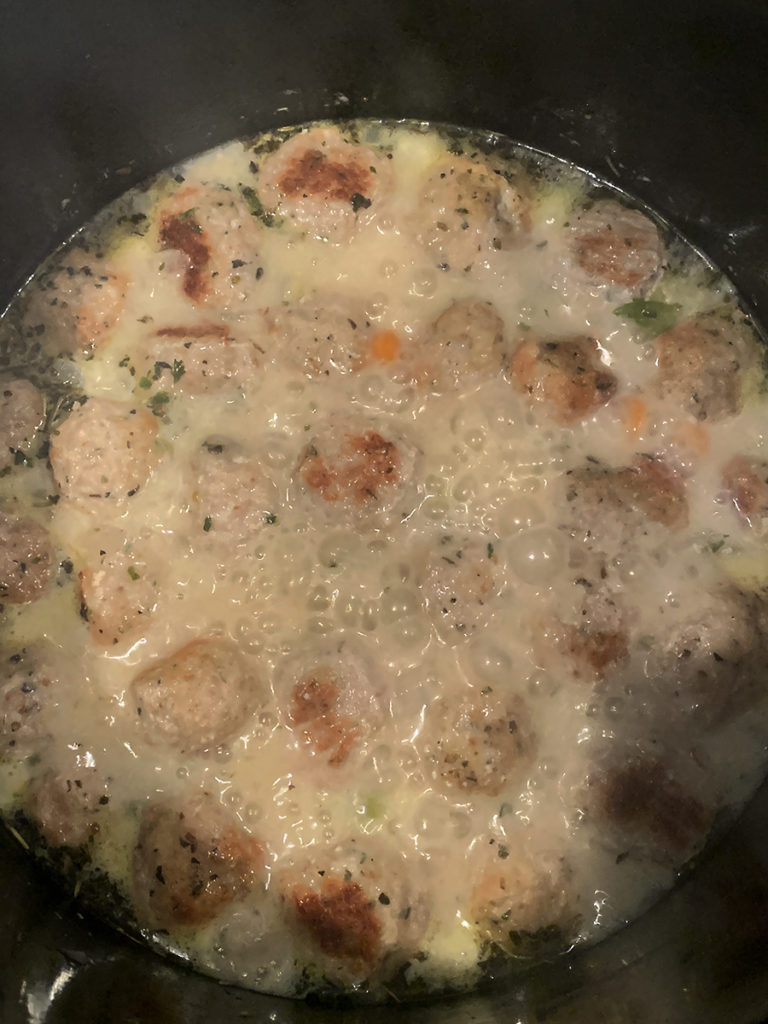
As you can see, your choice of ingredients can take this dish into a number of different flavorful directions, and any of them would be quite tasty and enjoyable!

For the Chicken Meatballs:
1 lb ground chicken
1 large egg
1/2 cup breadcrumbs
1/4 cup grated cheese (parmesan or pecorino romano)
1/4 teaspoon garlic powder
1 teaspoon Italian seasoning
1/2 teaspoon chopped parsley
1/2 teaspoon salt
1/4 teaspoon black pepper

Preheat oven to 400 degrees and line a baking sheet or baking dish with parchment paper. Combine all ingredients in a mixing bowl, mix well. Roll the mixture into 1/2 inch to 1 inch size meatballs, depending on your preference. Place the meatballs on the baking sheet or dish, lightly spray with cooking spray. Bake for 20-25 minutes or until the meatballs start to brown. Remove from oven, set aside.

For the Soup:
4 cups chicken broth (plus additional broth or water if necessary)
1 cup evaporated milk *
*(If you don’t have access to evaporated milk, you can use 3/4 cup whole milk plus 1/4 cup half and half, or either almond, soy or coconut milk. Or you can use 2 additional cups of broth if you do not want a creamy texture.)
2 tablespoons olive oil
1 tablespoon butter
2 medium carrots, finely chopped
2 stalks celery, finely chopped
1 large onion, finely chopped
2 cloves garlic, minced
1 tablespoon lemon zest
1 lemon, sliced (optional, for additional lemon flavor)
1 cup uncooked white rice
1 tablespoon fresh thyme**
1 tablespoon parsley**
** (You can substitute 1 tablespoon Italian seasoning and/or oregano if necessary)
Salt and pepper to taste

Heat the olive oil and butter in a large pot over medium heat. Once melted, add the carrots, celery, onion and garlic. Stir occasionally, let cook until fragrant and tender, about 3-4 minutes. Add lemon zest, stir together until you get a lemon fragrance, about 1 minute.

Add the chicken broth, evaporated milk (or whatever substitutes you decide on), lemon slices*, thyme and parsley. If you do not have thyme or parsley on hand, you can use a tablespoon of jarred Italian seasoning and/or oregano. Bring the soup mixture to a boil, stirring occasionally.
*The lemon slices are optional. The longer you keep the lemon slices in the soup, the more lemony the soup will taste. You can remove the lemon slices at any time, depending on your taste preference.

Add the chicken meatballs and uncooked rice to the boiling broth. If you prefer to add cooked rice, prepare it on its own and set aside, adding the rice during last 5 minutes of simmering the soup. Reduce heat to a simmer, continuing to stir occasionally. Let simmer for 20-25 minutes or until the added uncooked white rice is cooked (slightly longer if you are adding uncooked wild grain rice or other grains to the soup).

Season with salt and pepper. Serve immediately and enjoy!
Share

Game Day Taquitos

January 19, 2018 Appetizer, Entrees, Menu No Comments

Game time is here, and football fever is running rampant! Even if your beloved team didn’t make it to the playoffs, chances are that you will still be joining family and friends for fun food at a game day party.

As I’ve discussed in previous game day posts, the key to a successful party dish is to make it a quick hitter that is fun, tasty and easy to eat. The recipe that I’m sharing with you today tackles all of those requirements!

Taquitos are a Mexican dish that consists of rolled-up flour tortillas stuffed with a filling, and is crisp-fried. Think of it as a rolled-up taco. During one of our recent holiday gatherings, I decided to make my own version of taquitos, coming up with a few different filling options and choosing to bake the taquitos instead of frying them. Not only were they a big hit, they were also enjoyed by both adults and kids. Prep time (for the most part) was minimal, and the ingredients were tasty. Although the taquitos were served as a picky appetizer, they were filling enough and tasty enough to keep everyone satisfied and coming back for more. Hence, the perfect game day food!

The best part about taquitos is that you can get as creative as you wish with the fillings. While traditional fried taquitos use a flour tortilla, I found that the baked version works just as well with both flour and wheat tortilla shells. I’ve used both types of tortilla shells for my taquitos and and was happy with both versions. Listed below are a few of the fillings that I prepared, along with a few other filling suggestions that I think would work well. As always, I encourage you to get as creative as you wish.


STEP 1: THE FILLING

The key to a good taquito is the filling. So far, I have made two different types of taquito fillings: sautéed vegetables and chicken, cheddar and bacon. Both were able to be prepared ahead of time, and both worked well and were enjoyed by everyone.

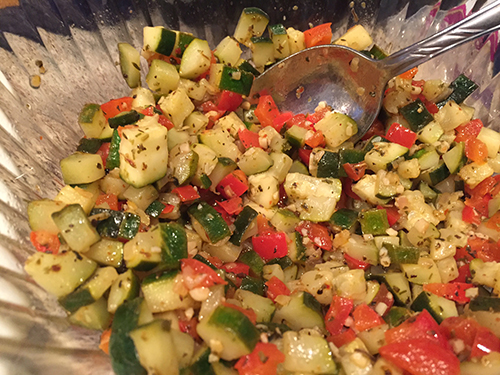
For the sautéed vegetable filling, you will need the following:

2 tablespoons olive oil
1/2 cup chopped onion
1 clove garlic, minced
1 zucchini, finely chopped
1 yellow squash, finely chopped
1 red pepper, finely chopped
1 tablespoon chopped Italian parsley
1 teaspoon oregano
1 teaspoon dill weed
salt and pepper to taste
shredded mozzarella or cheddar cheese

Heat oil in medium skillet or wok over medium-high heat until hot. Add bell pepper, onion and garlic; cook and stir 2-3 minutes or until crisp-tender.

Stir in zucchini and squash; cook and stir 5-7 minutes or until tender.

Stir in herbs, cook until thoroughly heated. Season with salt and pepper to taste. Set aside to cool slightly. You will top the vegetables with the shredded cheese when you assemble the taquitos.


For the chicken, cheddar and bacon filling, you will need the following:

1/2 lb cooked and seasoned chicken breast, chopped (Perdue Short Cuts works well for this)

8-ounce package of shredded cheddar cheese

4-6 slices of cooked bacon, cut into small pieces


Other filling suggestions:

• steak, peppers and provolone

• meatballs and mozzarella

• seasoned chicken with blue cheese

• pulled pork, roasted red peppers and broccoli rabe

• marinated shrimp and scallops

….honestly, you can go any number of directions!

Regardless of what filling you prefer to try, one suggestion that I would make is to not make your fillings too wet. If you think that your fillings would go well with a sauce (say a marinara or a barbecue sauce), I would suggest that you serve those sauces as a side for dipping. Incorporating the sauces into the filling may make the tortilla shells soft and mushy, and they may not bake properly.


STEP 2: THE ASSEMBLY

Preheat your oven to 400˚.

As I mentioned earlier, I have used both flour and whole wheat tortilla shells and was very happy with the results of both.

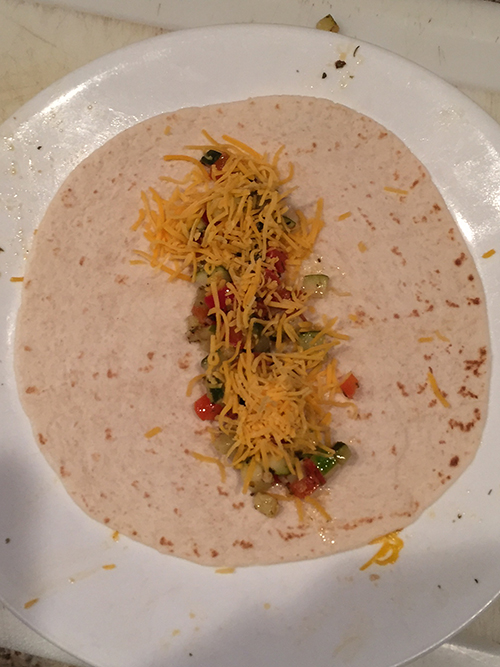
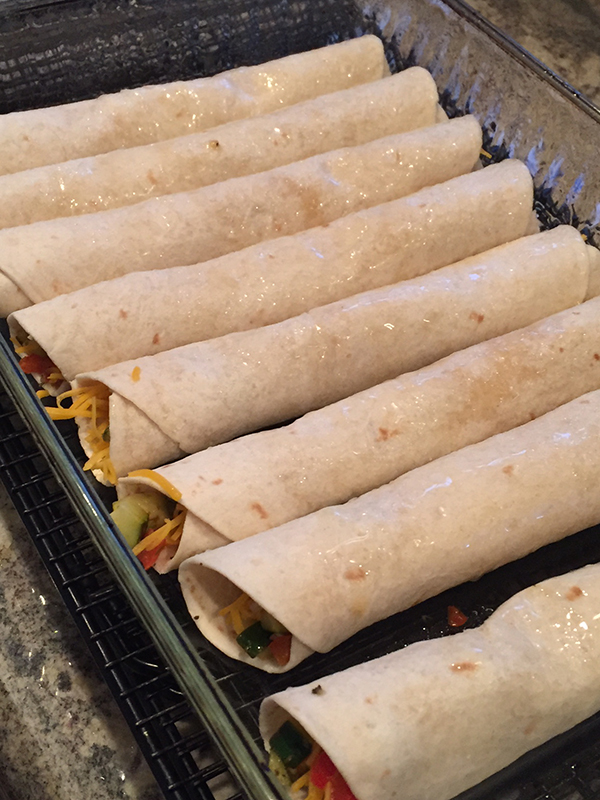
To assemble your taquitos, lay a tortilla shell out flat, and place a 1″ strip of your filling down the middle. Tightly roll up the tortilla shell, as if you were rolling up a cigar.

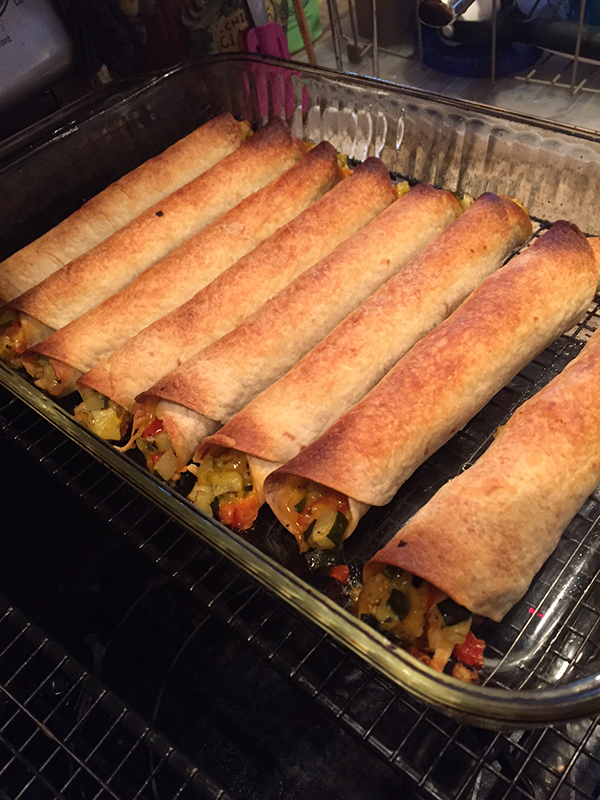
Place the rolled tortilla shells seam side down into a lightly sprayed 9″ x 12″ baking dish. Medium-sized tortilla shells will work the best with a 9″ x 12″ baking dish. If you have larger sized tortilla shells, you can trim the rolled shells to fit into the pan. You will fit about 8 rolled shells into the pan.

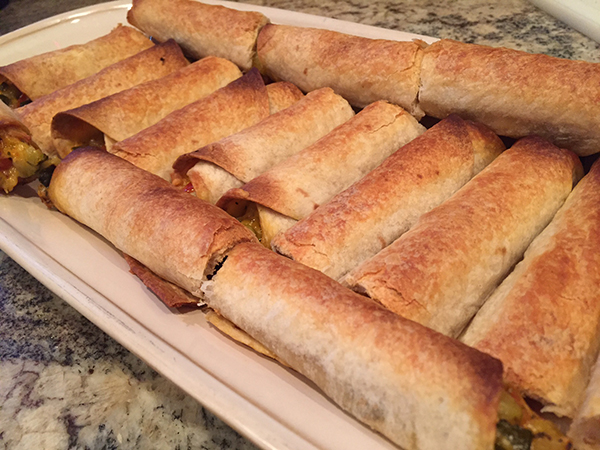
Lightly spray the top of the shells. Place the dish, uncovered, into the oven. Bake for 20-25 minutes, or until the shells start to brown and crisp. Remove from oven, let cool for a few minutes. Remove from baking dish and cut the baked taquitos in half. Serve and enjoy!

Share

Chicken Cutlet Roll-Ups

September 15, 2017 Entrees, Menu No Comments

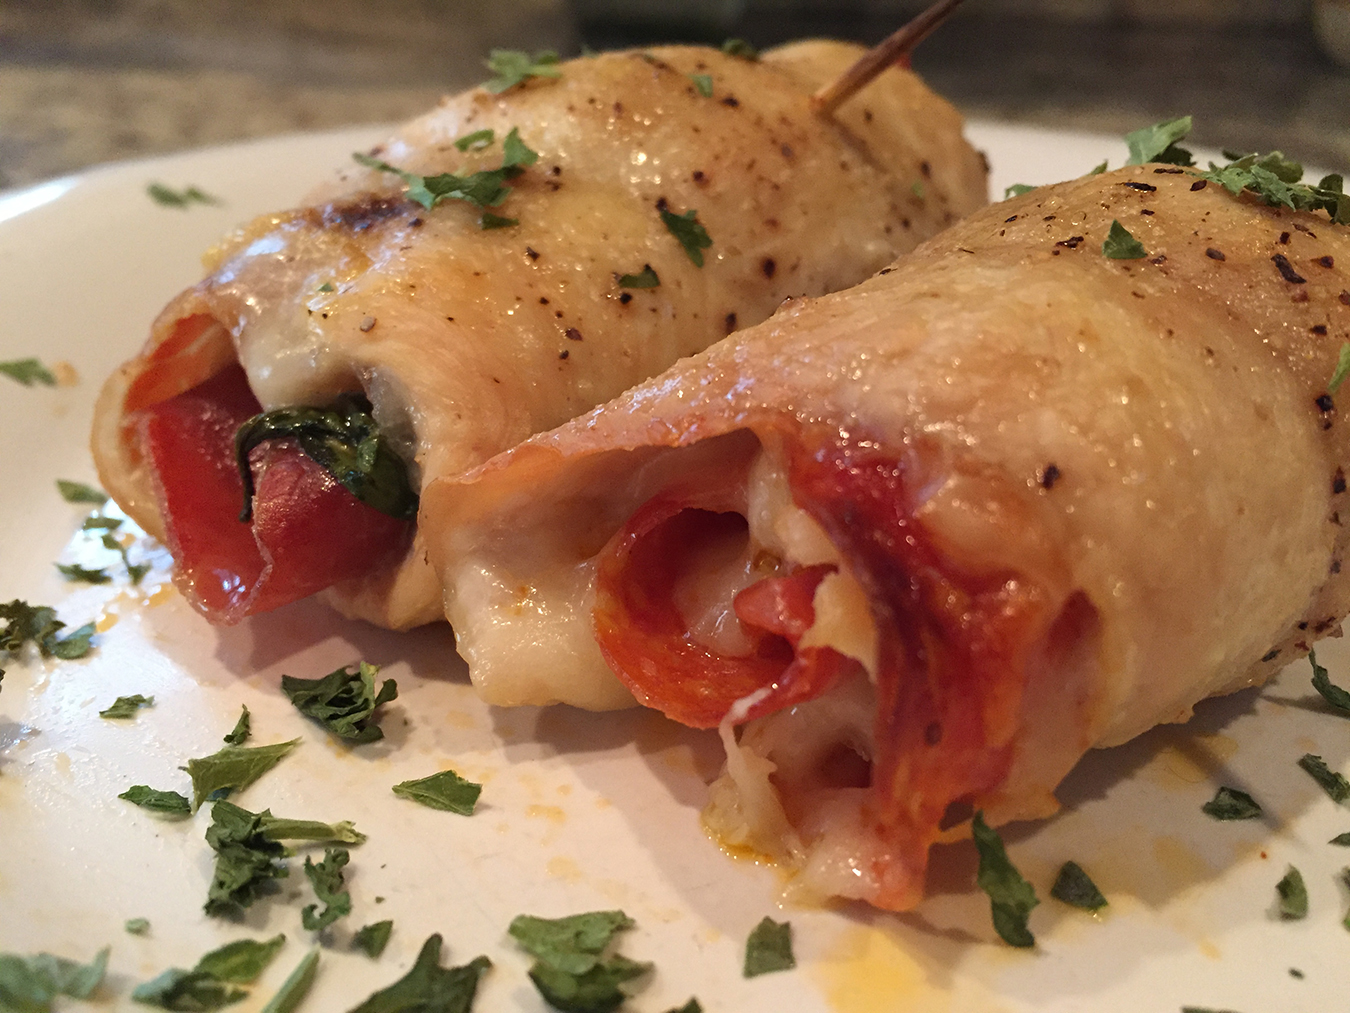
Chicken cutlets are a staple in just about every household. By adding just a bit of seasoning and a few everyday ingredients, this recipe takes chicken cutlets to a whole new level. The key to this recipe is to use thin sliced chicken cutlets. You want the cutlets to be easy to roll and fold. Instead of giving specific measurements, I am just going to share with you the basic steps that I take to make four to six roll-ups. You can adjust the filling ingredients to your liking!


Step 1

Lightly brush both sides of the cutlets with olive oil. Season both sides with a little salt, pepper and garlic powder.


Step 2

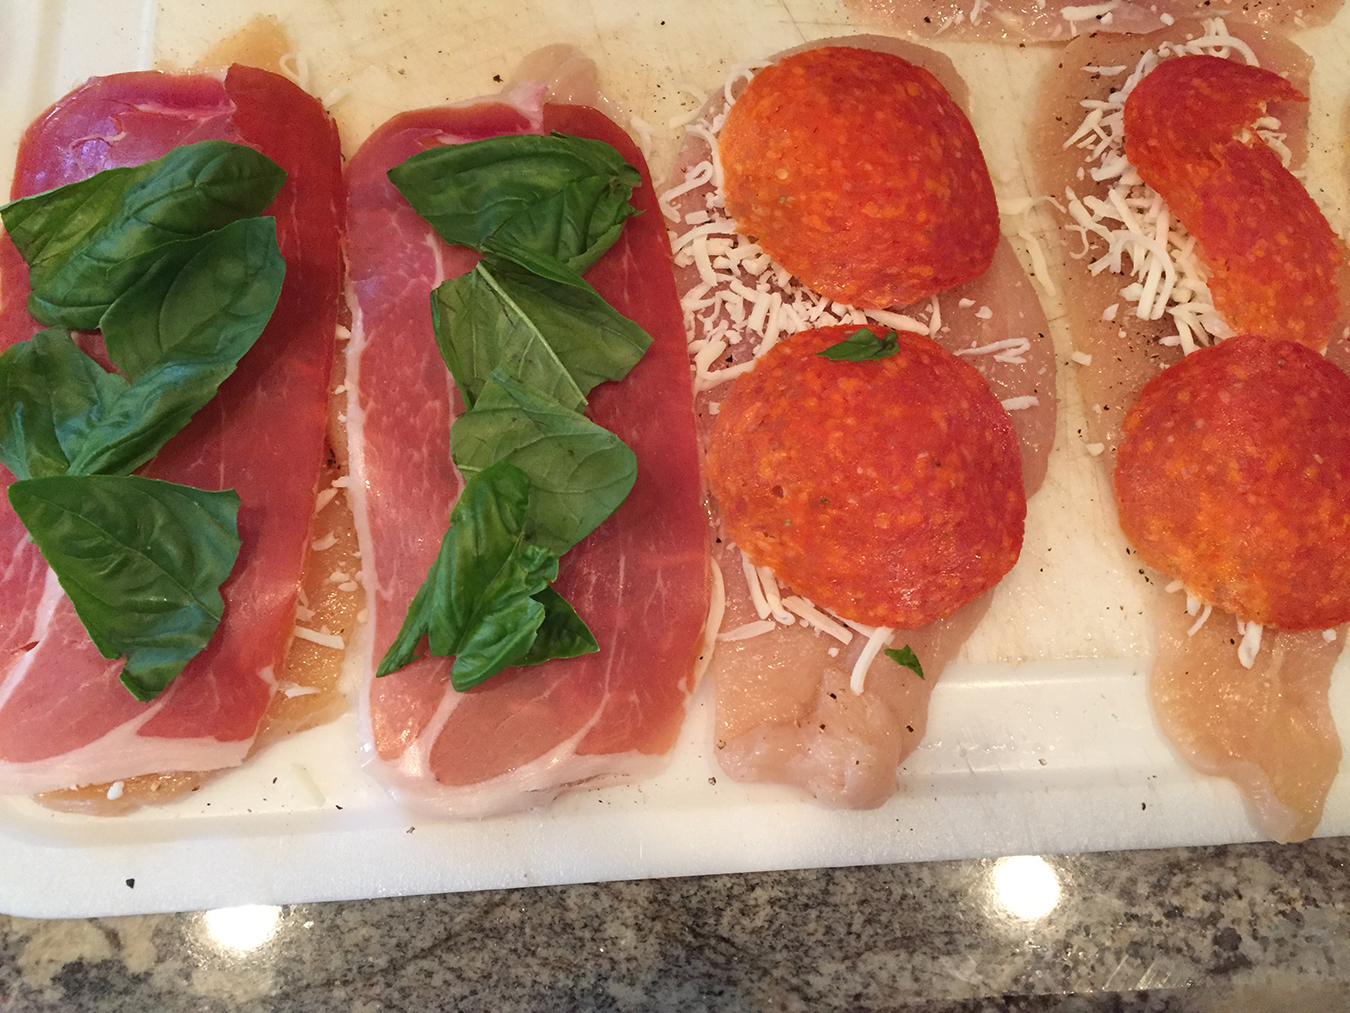
Place in single layers the filling ingredients that you choose.
Here are just a few tasty suggestions:

  • prosciutto, provolone and fresh basil
  • pepperoni and mozzarella
  • chopped artichoke hearts and tomatoes
  • chopped olive salad
  • sauteed mushrooms
  • crab meat


Step 3

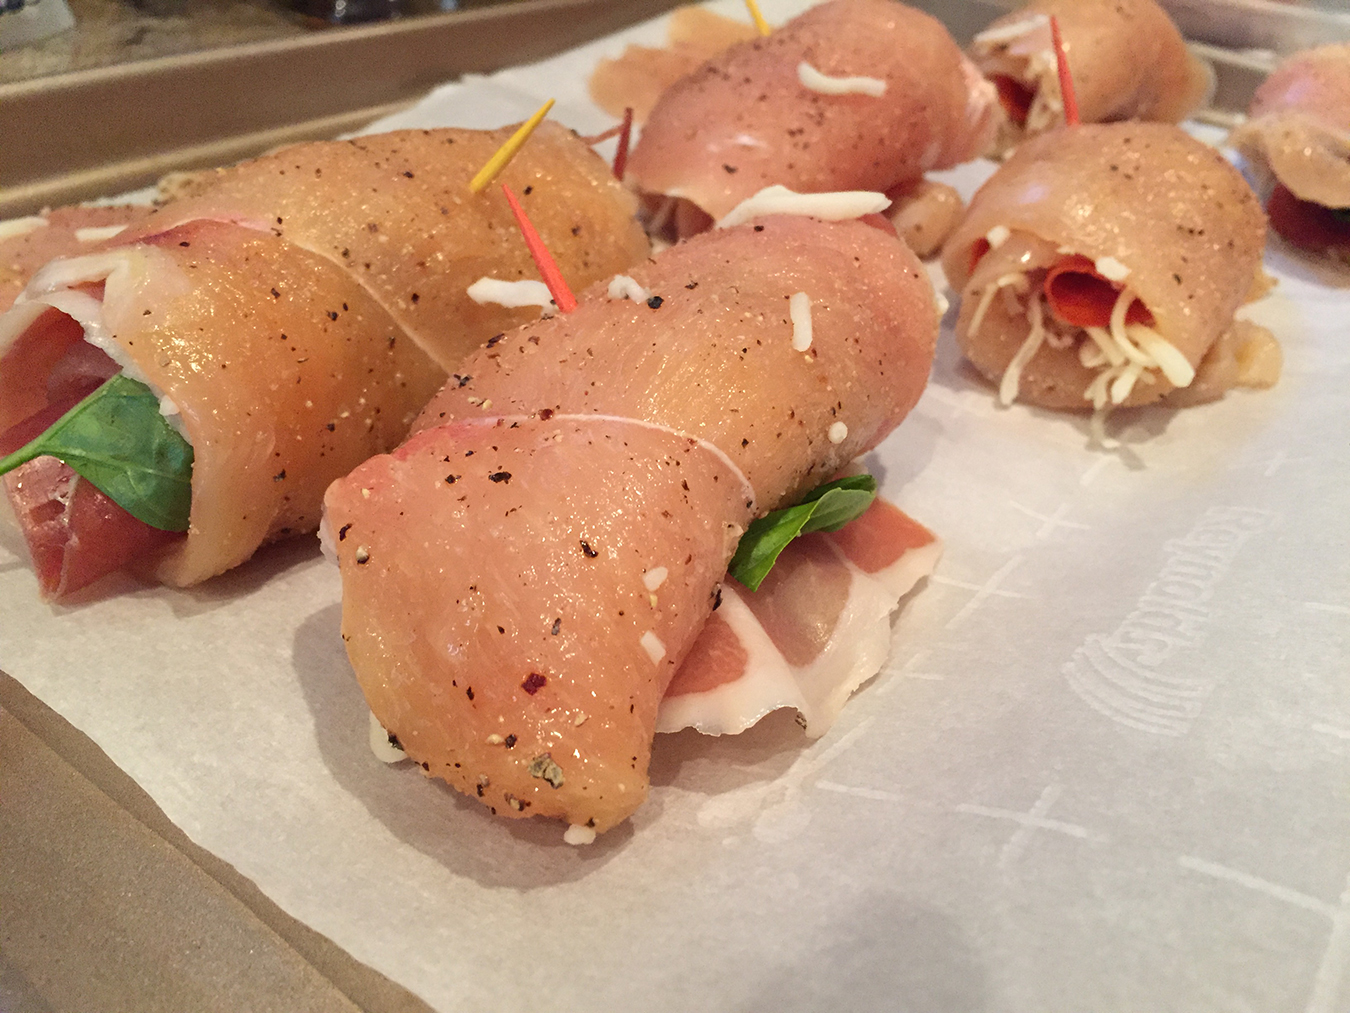
Carefully roll up the cutlets, and either tie them with butcher string or secure them with a tooth pick.


Step 4

Place the roll-ups on a baking tray lined with parchment paper. Bake at 350˚ for 35-40 minutes, until chicken is done.

Share

Grilled Chicken Italiano

June 30, 2015 Entrees, Menu No Comments

Growing up in South Philadelphia, I have enjoyed more than my share of delicious and delectable sandwiches. While cheesesteaks, hoagies and roast pork sandwiches rank among highest on most Philadelphians’ lists, my all time favorite ‘sang-weech’ is the classic Chicken Italiano. Seasoned chicken breast, broccoli rabe, prosciutto and provolone packed in a crispy Italian roll…what is there not to love? Now I do realize that there are different variations of a Chicken Italiano, using other ingredients such as peppers, mozzarella and sun dried tomatoes. But the prosciutto, provolone and rabe combination is the version that I fell in love with. For this post, I would like to share with you my grilled version of this amazing combination….a perfect dish for any summer cook-out!

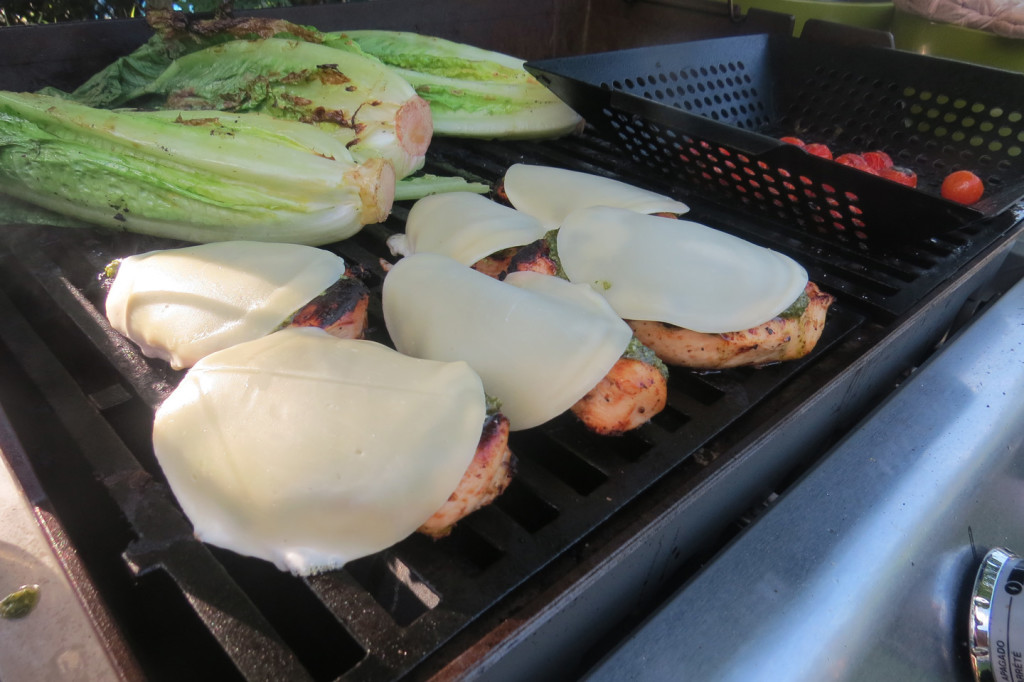
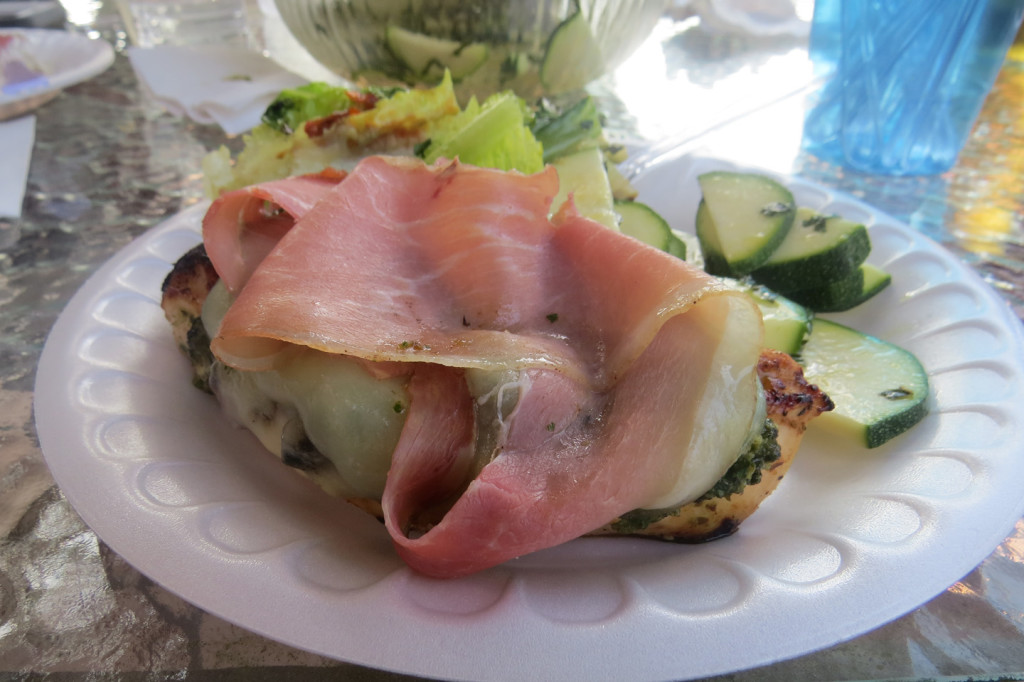
This grilled version does differ just a bit from the classic sandwich. First, while broccoli rabe is one of my all-time favorite greens, I decided instead to use a home made basil-mint pesto. My garden is overloaded with fresh basil and mint, so I figured it would be a great opportunity to put both to good use. Of course, you can stick with the traditional broccoli rabe if you prefer. I also like to prepare and serve the chicken breasts whole. You can cut the chicken breasts into smaller pieces to serve in a sandwich if you like, but I find that cooking and serving the chicken breasts whole allows for prosciutto, provolone and pesto (or rabe) to melt evenly on top.

You’ll want to marinate the chicken breasts for a good two to four hours before grilling. You can find a good, basic lemon and garlic marinade by clicking here. You can also used a bottled marinade of your choice, but I would stick to a basic garlic, lemon or white wine flavored marinade. There are too many good tastes happening with this dish, so you don’t want to overpower the chicken with an strong-flavored marinade.

Grilled Chicken Italiano

4-6 boneless and skinless chicken breasts
4-6 slices prosciutto
4-6 slices provolone cheese
*Basic lemon-garlic marinade (see recipe below) or 1 bottle marinade (any combination of garlic, lemon and white wine will work)
**Fresh basil-mint pesto (see recipe below)

Pierce chicken breasts with a fork to allow marinade to soak in. Place chicken breasts in a plastic bag, pour marinade into bag, making sure that all of the chicken breasts are well coated. Refrigerate for two to four hours.

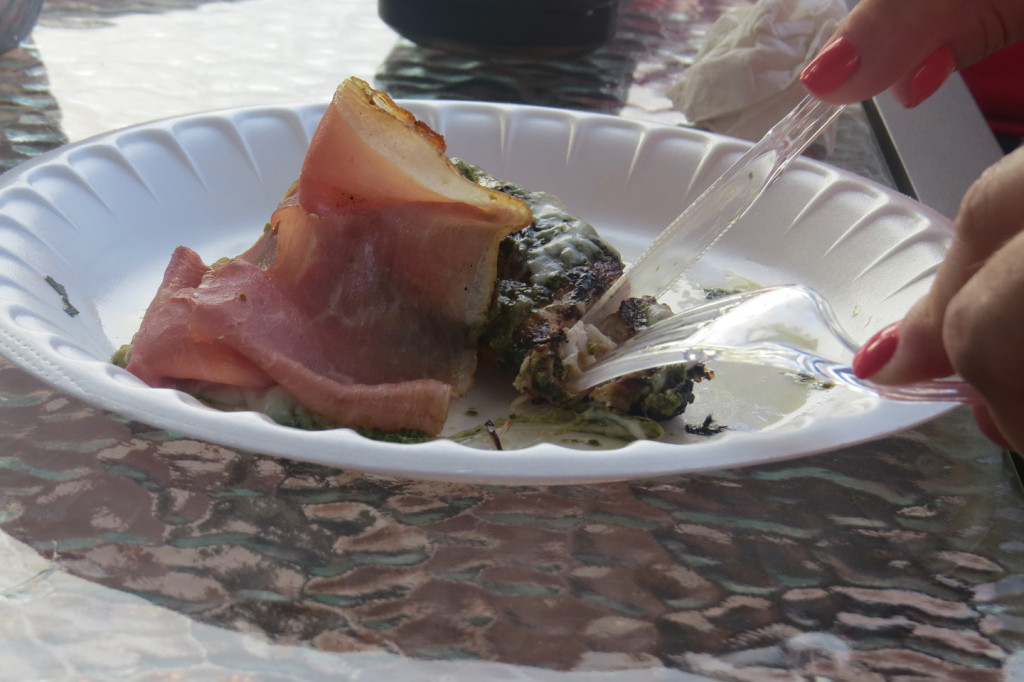
Pre-heat your grill to high. Make sure that your grill grates are brushed with oil to avoid sticking. Reduce heat to medium-high, and place the chicken on the grill, discarding the bag with the used marinade. Keep lid closed. Turn chicken occasionally, until browned and done. Top the chicken breasts with a dollop of the pesto, a slice of provolone and a slice of prosciutto. Allow to heat for another few minutes until the cheese starts to melt and the prosciutto starts to slightly crisp. Remove from grill, serve and enjoy!

IMG_5776

IMG_5794

IMG_5786

*Lemon-Garlic Marinade
Adapted from food.com

2 cloves garlic, minced
4 tablespoons olive oil
2 tablespoons chopped fresh parsley
3 tablespoons lemon juice, fresh preferred
1⁄8 teaspoon pepper

Combine all ingredients together to pour over chicken.

Note – this recipe’s measurements are for 1-1.5 lbs of chicken breasts. You may need to increase the ingredients for the amount of chicken breasts that you are making.

**Fresh Basil-Mint Pesto
Adapted from simplyrecipes.com

1 cup fresh basil leaves, packed
1 cup fresh mint leaves, packed
1/2 cup freshly grated Parmesan-Reggiano or Romano cheese
1/2 cup extra virgin olive oil
1/3 cup pine nuts or walnuts
3 medium sized garlic cloves, minced
Salt and freshly ground black pepper to taste

Combine the basil and mint with the pine nuts, pulse a few times in a food processor. (If you are using walnuts instead of pine nuts and they are not already chopped, pulse them a few times first, before adding the basil.) Add the garlic, pulse a few times more.

Slowly add the olive oil in a constant stream while the food processor is on. Stop to scrape down the sides of the food processor with a rubber spatula. Add the grated cheese and pulse again until blended. Add a pinch of salt and freshly ground black pepper to taste.

Use immediately, or refrigerate in a sealed container for up to a week.
Makes 1 cup.

Share

Recent Comments

Archives

powered by
Socialbar