Home » parmesan » Recent Articles:

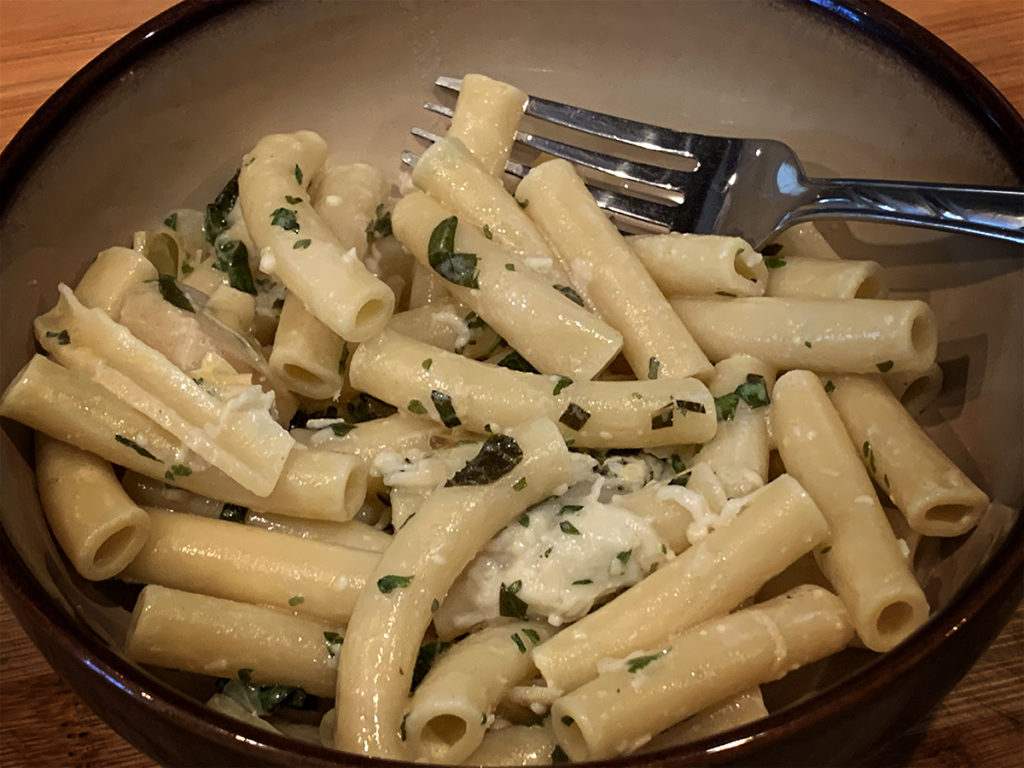
Ziti with Lemon Herb Parmesan Sauce
July 24, 2021 Menu No Comments

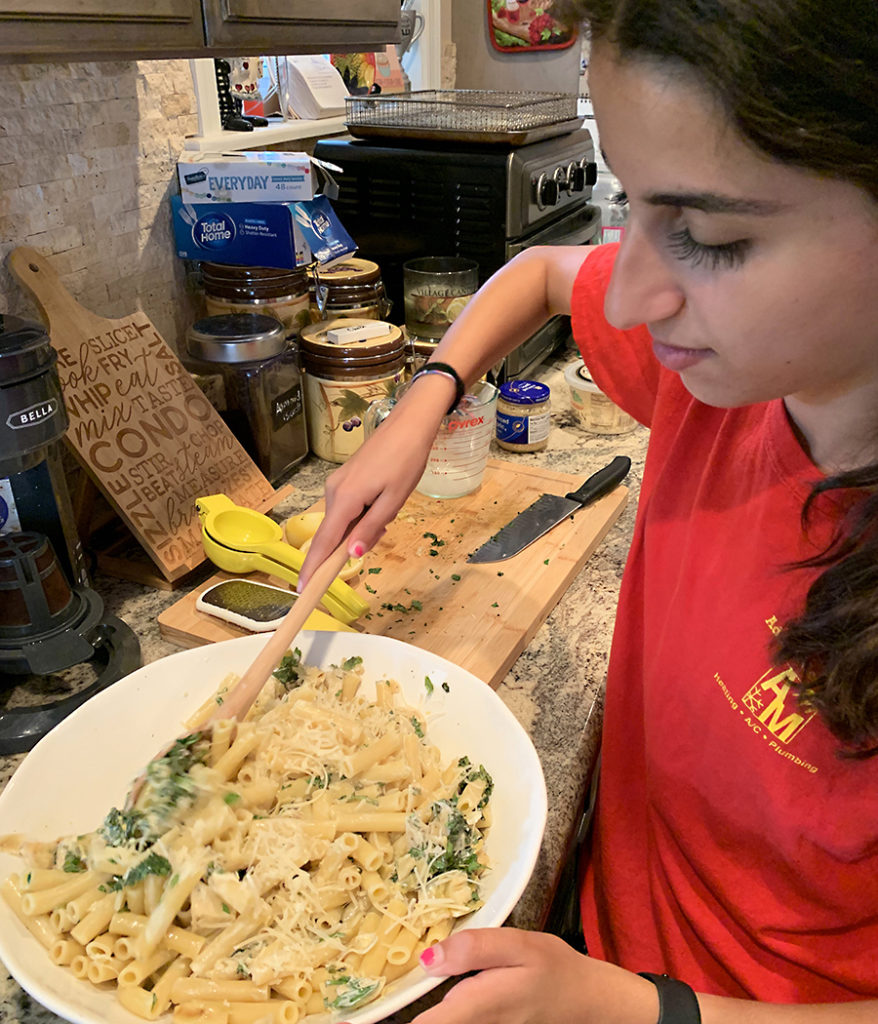
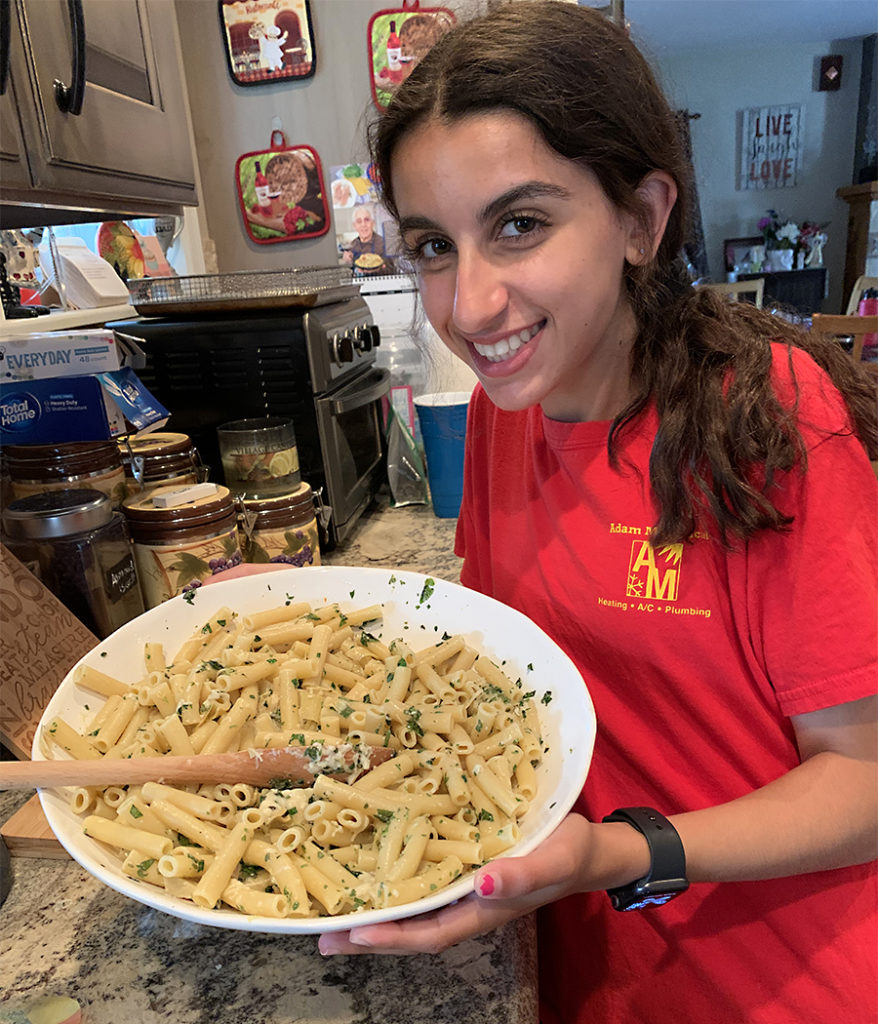
I am very excited to share this recipe with you because it is one that my daughter Jules and I collaborated on from start to finish. Jules recently came across a recipe on TikTok (where else) that has you baking uncooked pasta and chicken broth in a baking dish until the pasta is done, then adding chopped herbs, lemon zest and juice, shredded and grated parmesan cheese and heavy cream, stirring it together until combined. This all sounds delicious, but like many other TikTok recipes, there were no measurements, no instructions, and I honestly don’t even know if pasta would cook properly in the oven.

This did, however, remind me of another recipe that I recently tried and absolutely loved. It was made by celebrity chef Geoffrey Zakarian on the tv show, The Kitchen. The main differences were that the pasta was boiled traditionally in salted water, and he used strained greek yogurt and crumbled feta in place of the heavy cream. The pasta water was reserved and when added to the ingredients, it made a beautiful lemony-herb cream sauce. The feta and greek yogurt kept the fat content down, and I have to say this recipe was so much better than that other pasta feta dish that everyone keeps raving about.

What Jules and I decided to do was to put measurements to the recipe that she found, but cook it in the style that Geoffrey Zakarian did, utilizing the salted pasta water to create a sauce. To stay as true to the recipe as possible, I did add a few teaspoons of low sodium chicken bouillon to the boiling salted water before adding the pasta. I don’t know if this step is absolutely necessary, as the starchy and salty pasta water will give you plenty of flavor when mixed with the other ingredients. That said, the bouillon does give additional flavor, and if you choose to do this, be sure to either use low sodium bouillon or cut back on the salt that you add to the water if you don’t have low sodium bouillon.

I also kept the heavy cream measurements to 1/3 cup. I’m not a huge fan of heavy cream sauces, but if you prefer you can add more to your liking.

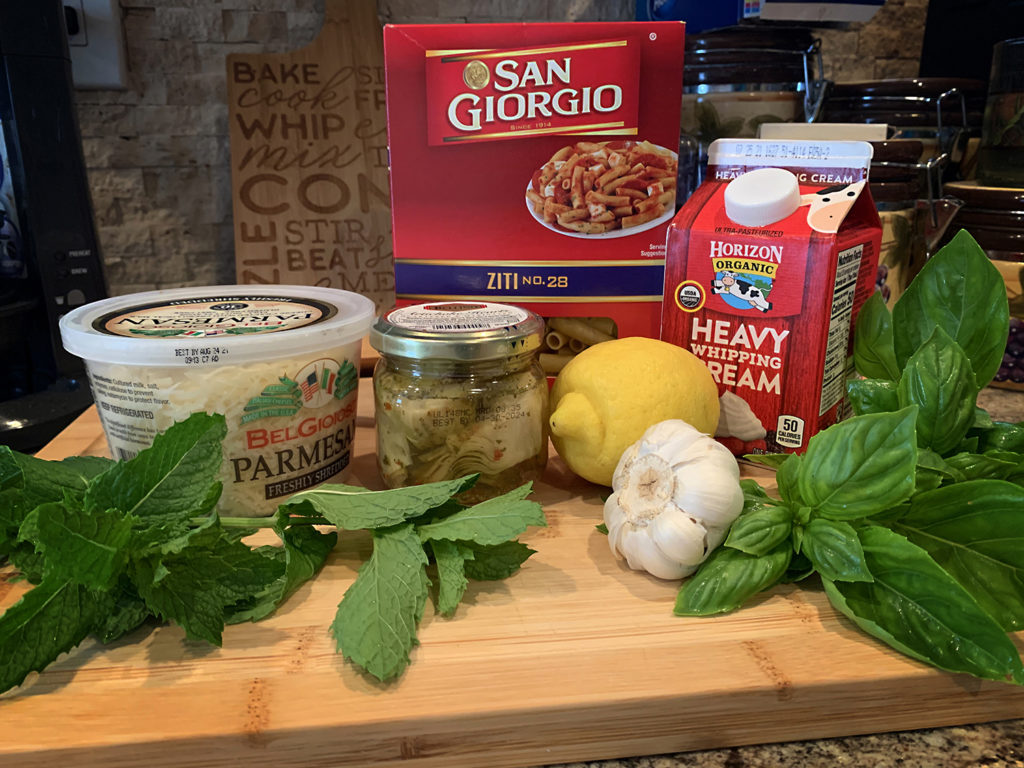
The TikTok version used heaping scoops of both grated and shredded parmesan cheese. Of the two, I feel that the grated parmesan is the more necessary. Not only does it give the dish that nutty and bold parmesan taste, it also helps thicken up the sauce. The shredded parmesan will melt into the dish, similar to a shredded mozzarella. It will be more clumpy and less stringy than mozzarella, but it does make for a nice addition. We decided to use 1/2 cup of each, but I would definitely use at least 1/2 cup of the grated. We rounded off the dish with some fresh chopped mint, basil and parsley from the garden, and as a bonus we threw in a small jar of chopped artichoke hearts.

This is a very flavorful, filling and easy to make pasta dish that I highly recommend, especially for a quick weekday dinner that will be enjoyed by all!

Ziti with Lemon Herb Parmesan Sauce

1 box uncooked ziti (or your choice of pasta)
2 teaspoons (or two cubes) low sodium chicken bouillon (if low sodium is not an option, cut back on salt added to water)
2 cloves garlic, minced
zest plus juice of one lemon
1/3 cup heavy cream (you can add more if you desire a thicker sauce)
1/2 cup grated parmesan
1/2 cup shredded parmesan (optional, but suggested)
1/4 cup fresh chopped basil
1/4 cup fresh chopped mint
1/4 cup fresh chopped parsley
1 small jar chopped artichoke hearts (optional)
salt and pepper
1/2 cup reserved pasta water

Boil the pasta in a large pot of salted boiling water (with the added bouillon) until the pasta is al dente, about 11 minutes. Stir occasionally. When the pasta is done, reserve about 1/2 cup or so of the pasta water. Drain the pasta (but do not rinse it) and pour it directly into a large serving bowl. Add the lemon zest and juice, garlic, heavy cream, grated parmesan cheese, chopped basil and mint, and artichoke hearts. Add 1/4 cup pasta water. Stir ingredients together, adding the additional pasta water if necessary (and to your liking). Add the shredded parmesan cheese, stir together. Season to taste with additional salt and pepper. Top with chopped parsley. Serve and enjoy!

Share

Grilled Garlic Parmesan Cauliflower

August 5, 2015 Appetizer, Entrees, Menu No Comments

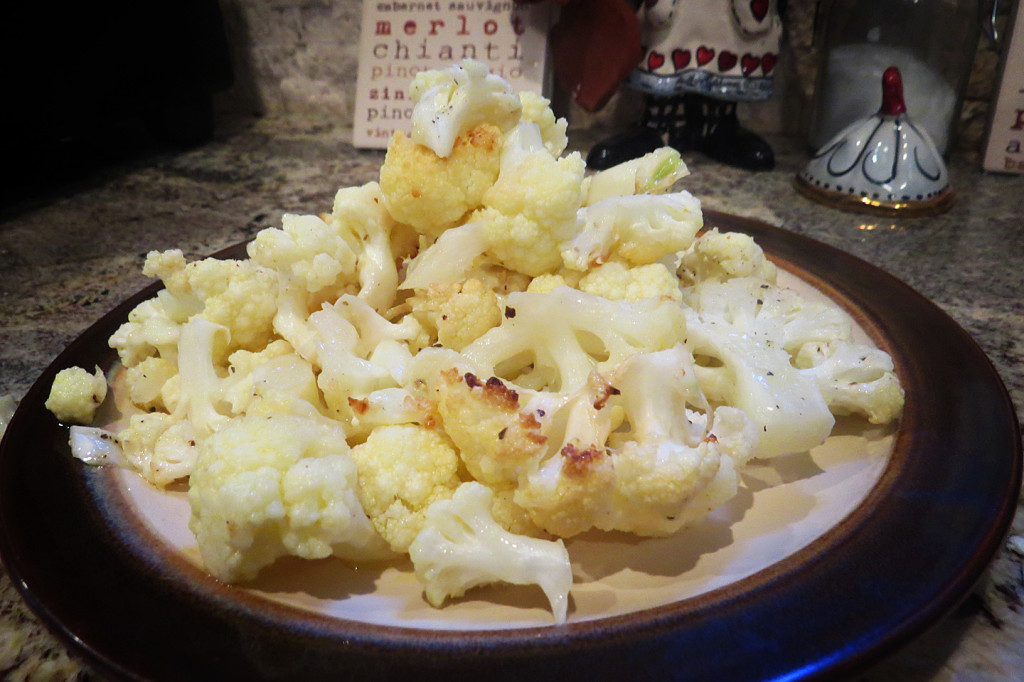
Cauliflower, in my opinion, is a vegetable that doesn’t get due respect. Not that cauliflower has a bad rap…it just simply seems to be ignored. Aside from a store-bought veggie tray, cauliflower doesn’t make many other appearances. Even when you do spot it on a party plate, it is usually overshadowed by the carrots, peppers, cucumbers and broccoli. As a vegetable lover, I find this to be a real shame. Cauliflower is one of the healthiest vegetables that you could enjoy. A cousin to cabbage, kale and broccoli, cauliflower is packed with nutrients and antioxidants, along with many anti-inflamitory, cardiovascular and digestive benefits.

Recently, I was introduced to a delicious cauliflower pizza, which was a white brick-oven pizza topped with sautéed cauliflower. The pizza itself was tremendous, but the cauliflower was definitely the shining star. Because I love grilling up veggies during these summer months, the pizza encouraged me to give cauliflower its due time on my grill. Many grilled cauliflower recipes that I found while doing my research had you slicing the cauliflower head into thick, steak-like wedges. While this sounded delicious, I wanted to take advantage of the softer, sautéed taste and texture. I was afraid that following the grilled wedge version would have given more of a charred taste. Enjoyable, no doubt…but again, not what I was aiming for.

What I decided to do was divide the head into individual florets, discarding the thicker stem portions. I then made a marinade by mixing some olive oil, parmesan cheese, garlic powder, and some salt and pepper (I love the taste of black pepper with cauliflower). I mixed the marinade with the cauliflower, making sure that the florets were evenly coated. I then wrapped the florets in an aluminum foil pouch and set it on my grill, over indirect heat. After about 35-40 minutes, the cauliflower was done, and cooked to my exact expectations. Perfect! The marinade made for the perfect flavor, and softened up the cauliflower just enough (cauliflower, in my opinion, is best when partially cooked, instead of fully cooked and mushy). The heat from the grill did brown the florets slightly, which gave a nice, yet subtle grilled taste. Because my grill top was already packed with other items, the only indirect area that I had available was my upper rack. Had there been more room on the grill, I would have found an area where I could have closed off one burner to avoid charring. But it’s nice to know that the upper rack serves a good purpose with this dish. No doubt, cauliflower will become a regular item on my grill!

Grilled Garlic Parmesan Cauliflower

1 cauliflower head, chopped into individual florets, discarding thick stems
1/4 cup olive oil
2 tspn parmesan cheese
1/2 tspn garlic powder
salt and pepper

Preheat your grill to medium-high heat (about 400˚). Designate an indirect heating area, where the flames will not come in direct contact with the cauliflower. An upper rack works well for this. Mix the oil, parmesan cheese and garlic powder. Place the chopped cauliflower in a bowl and add the oil mixture. Stir to evenly coat the florets, adding additional oil if needed. Add some salt and pepper, stir again. Tear off a piece of aluminum foil large enough to hold the florets. Pour the florets onto the foil, then carefully  fold and wrap the foil to make a loose pouch, open side on top. Place the pouch on your indirect heating area, close the lid and let cook for 35-40 minutes, checking occasionally. When the cauliflower starts to slightly char, carefully remove from grill. Let sit for a few minutes before opening the pouch. Carefully open the pouch, avoiding getting burned but the released steam. Plate it, serve it and enjoy!

cauliflower1

Share

Grilled Parmesan Basil Cherry Tomatoes

May 21, 2014 Appetizer, Menu, Salads No Comments

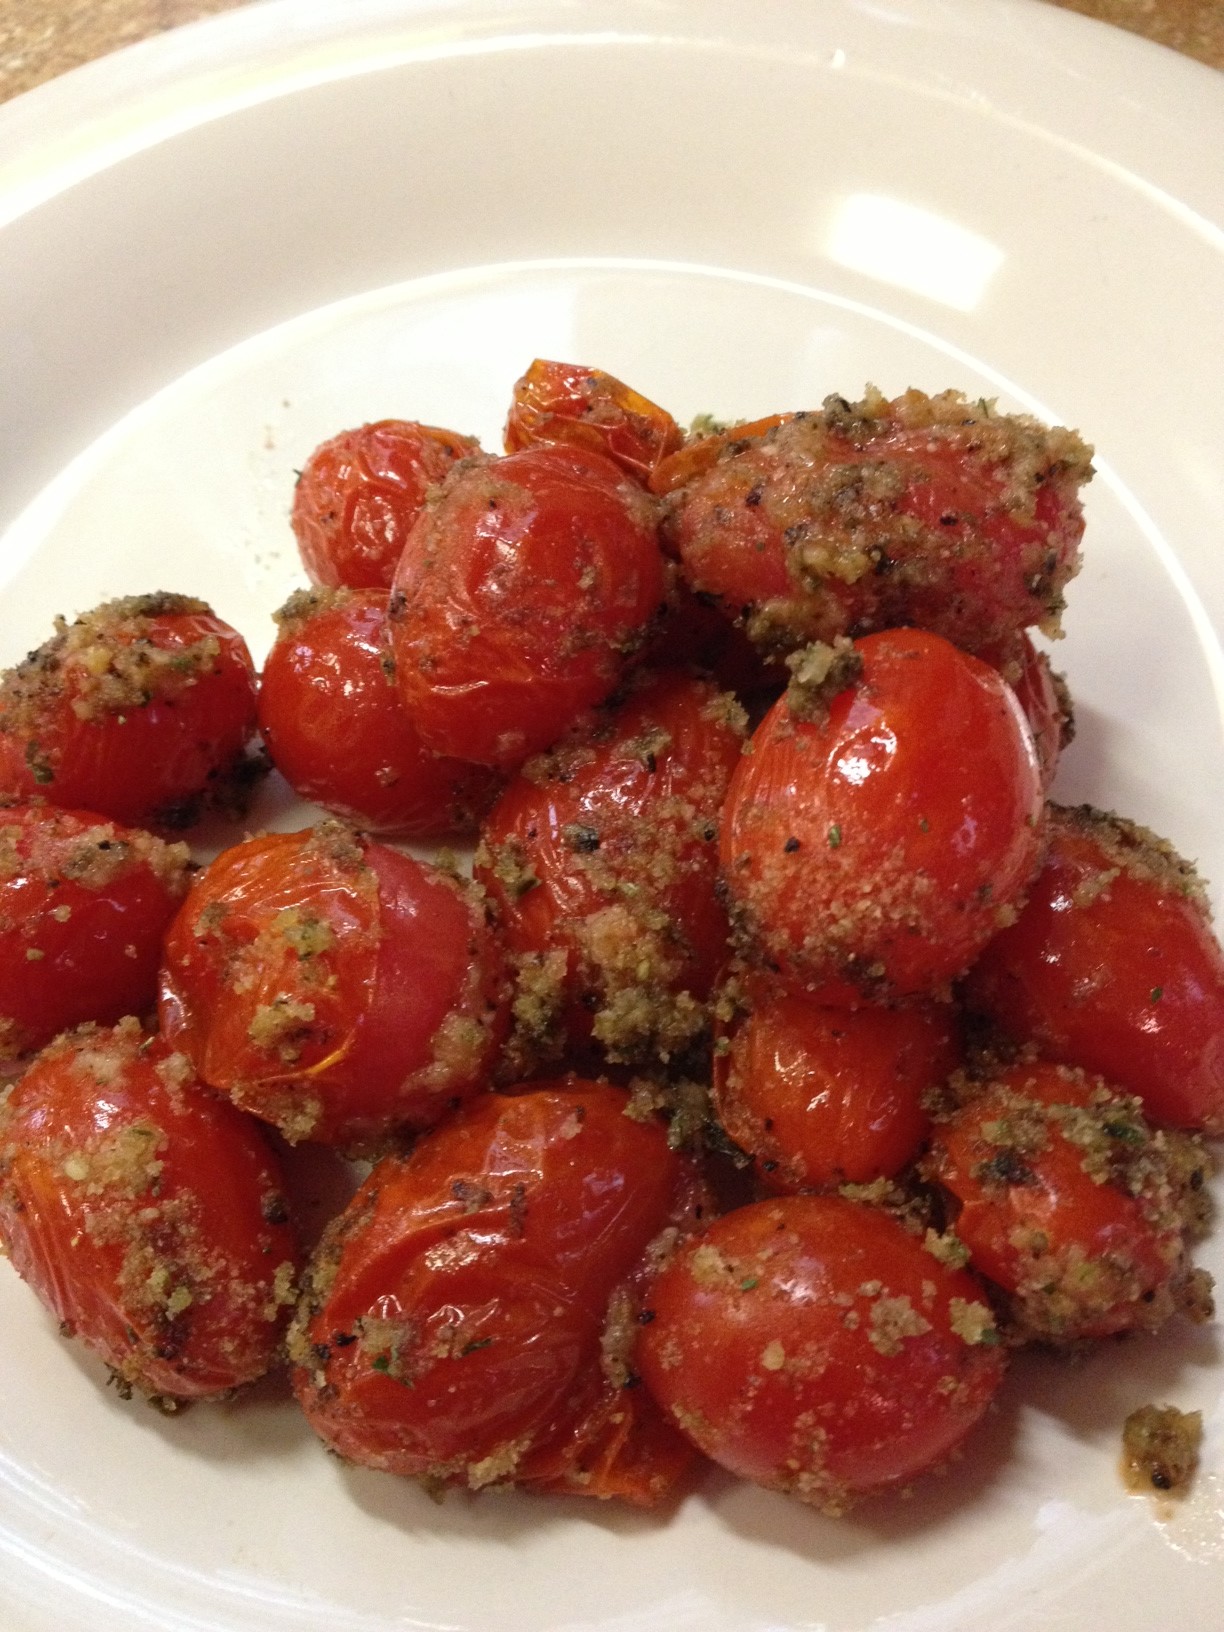
Cherry tomatoes and grape tomatoes are a fun and versatile fruit/vegetable (whichever you prefer) that I enjoy all year round, especially during the summer season. Whether mixed in a salad, or popped as a quick snack, their juicy flavor always brings a smile to my face. For this recipe I added a little extra complementary taste and texture which really added a nice, yet subtle complexity and made for a beautiful summer side dish. You can prepare this dish either on a grill (using a grill basket) or in an oven. The tomatoes cook quickly using both methods, but I prefer the slightly charred taste of being cooked over an open flame. Whichever method you prefer, you’ll be sure to enjoy these tasty and juicy treats.


Grilled Parmesan Basil Cherry Tomatoes

Ingredients
1 pint cherry or grape tomatoes
1/2 cup breadcrumbs
1/2 tspn garlic powder
1 tspn chopped basil
1 tbspn parmesan cheese
pinch of salt
olive oil

Directions
Mix all dry ingredients in a bowl. In a separate bowl, lightly drizzle the tomatoes with olive oil so that they are all evenly coated. Roll the tomatoes in breadcrumb mixture. The breading may not coat evenly but rather clumpy. This is fine, as the breading will adhere to the tomatoes when cooked.

Grilled – Pour the tomatoes into a grilling basket. Place the basket on an indirect heated portion of a hot grill. Close the lid and let cook for about 10 minutes, until the tomatoes start to shrink.

Oven Roasted – Heat oven to 400˚. Place tomatoes on a cooking sheet. Roast until tomatoes start to shrink and the skin starts to shrivel, approximately 10 minutes.

 Tomatoes1


Share

Baked Parmesan Wonton Chips

March 30, 2014 Appetizer, Menu No Comments

If you’re a reader of my blog, a friend of mine on Facebook, or have recently been at a dinner party with me, you’ll know that I’ve been experimenting a lot lately with appetizers that use egg roll and wonton wrappers. These recipes have given me lots of creative energy and inspiration. They’ve also left me with an over-abundance of unused wonton wrappers sitting in my fridge.

We recently put the extra wrappers to good use as we had a little fun in the kitchen with the kids, making batches of baked wontons. The recipe is very simple and easy, and could be found on countless food sites. You place the wrappers on a cookie sheet, either whole or cut in half to make a traditional tortilla chip shape, and you bake ’em. Done.

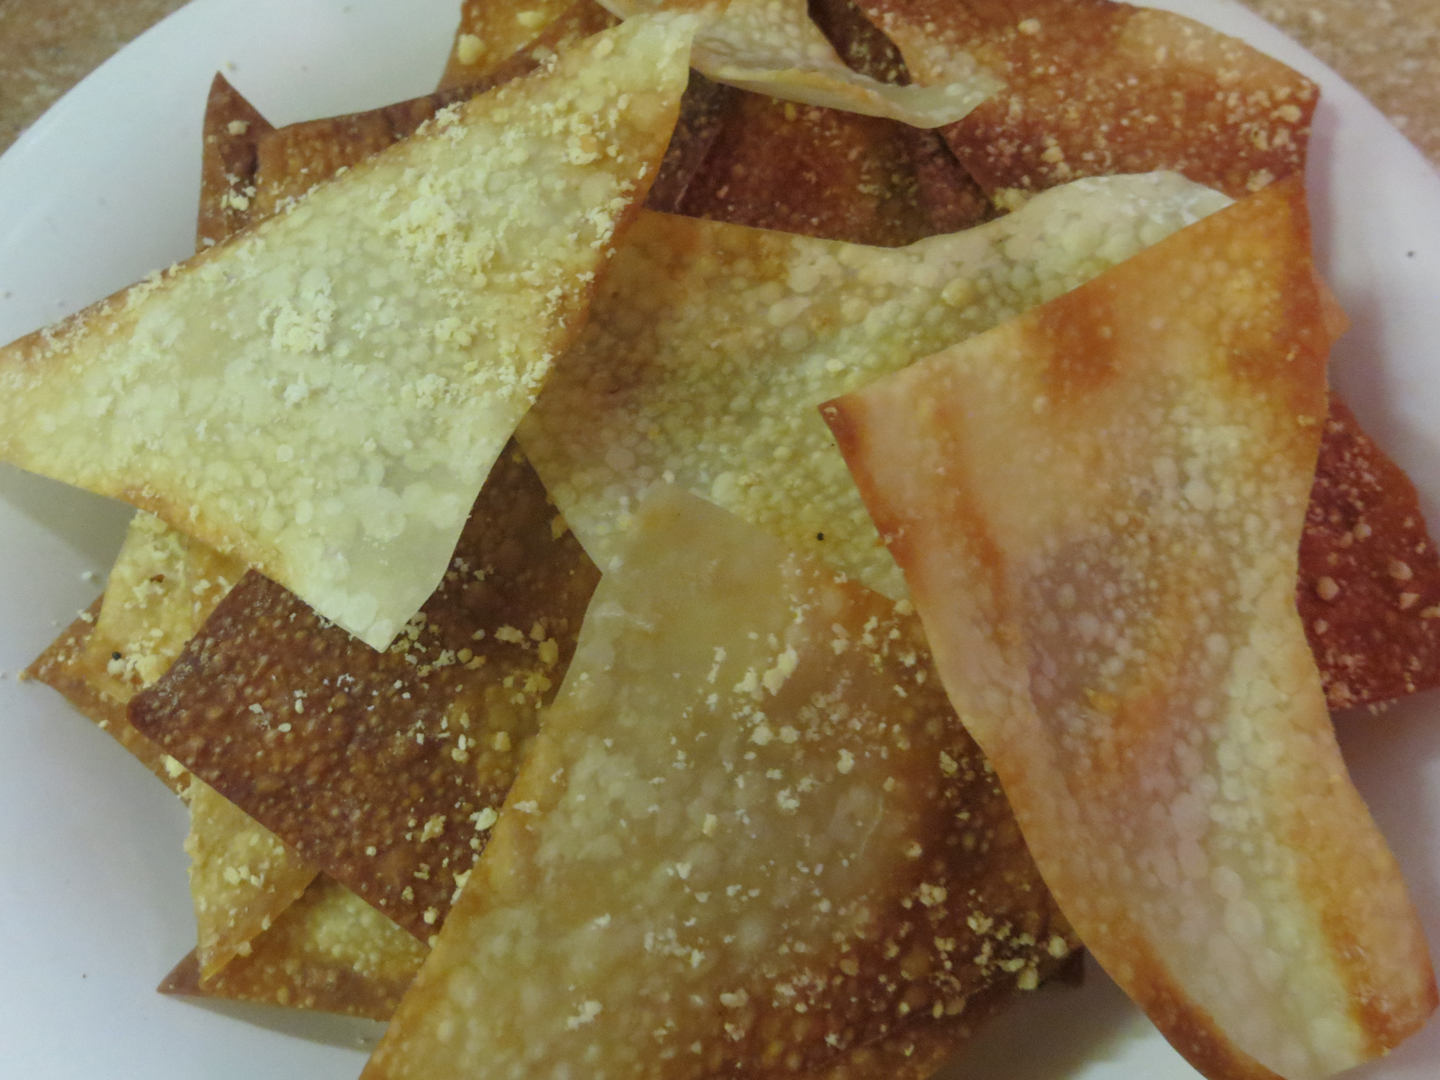
Baked wontons can be served plain, without any seasoning. The chips will have a light, crispy taste to them that would go well with any number of dips. To kick our chip flavor up a bit, we sprinkled them with a bit of parmesan cheese before baking them…and they were a huge hit. There was just enough cheesy zest there to really give a nice flavor to the chip.

You can go all kinds of directions with seasoning for wonton chips – anywhere from barbecue or ranch seasoning to Italian spices to cinnamon. But I would suggest to avoid salt. There is enough flavor in the wonton wrappers where just a little bit of salt may be too much. Baking without seasoning does not require any cooking spray. But if you do decide to add seasoning to your chips, be sure to spray them prior to seasoning and baking. Spraying the chips will also make for a slightly crispier chip, which we all preferred in my house.

Now chip away!

Baked Parmesan Wonton Chips

1 package wonton wrappers (found in the produce section of your grocery store)
grated parmesan cheese
cooking spray

Preheat oven to 400˚. Place individual wrappers, either whole or cut in half diagonally, on a lightly greased cookie sheet. Lightly spray the top of the chips, then lightly dust the chips with grated parmesan. Bake for 5 minutes. Remove from oven, let cool for a few minutes.

Serve and enjoy.

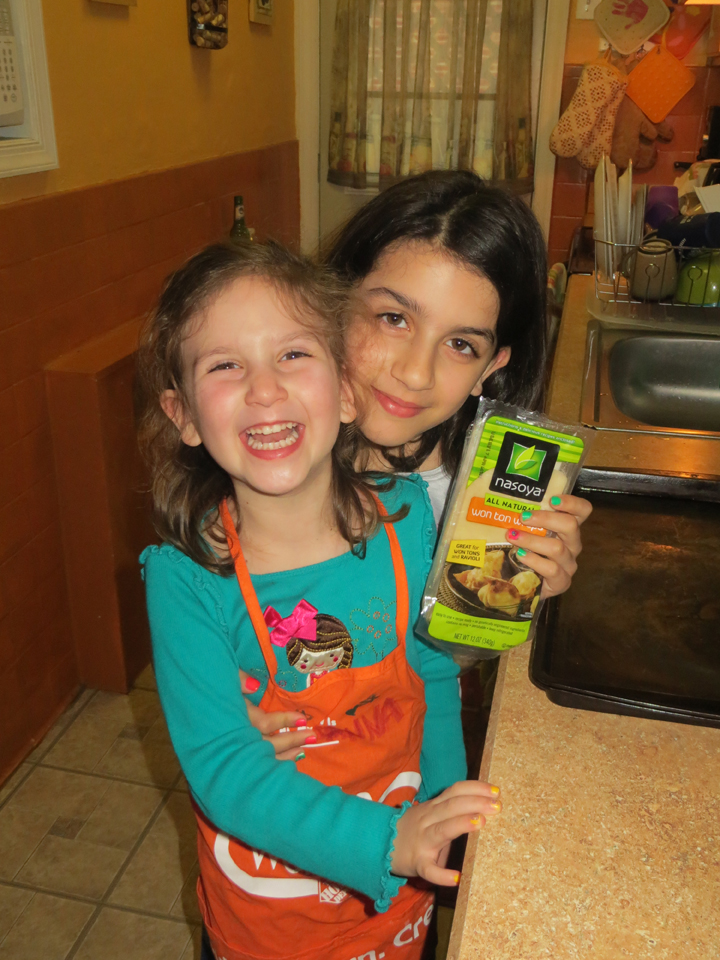
Ava and Jules with the wonton wrappers.

Ava and Jules with the wonton wrappers.

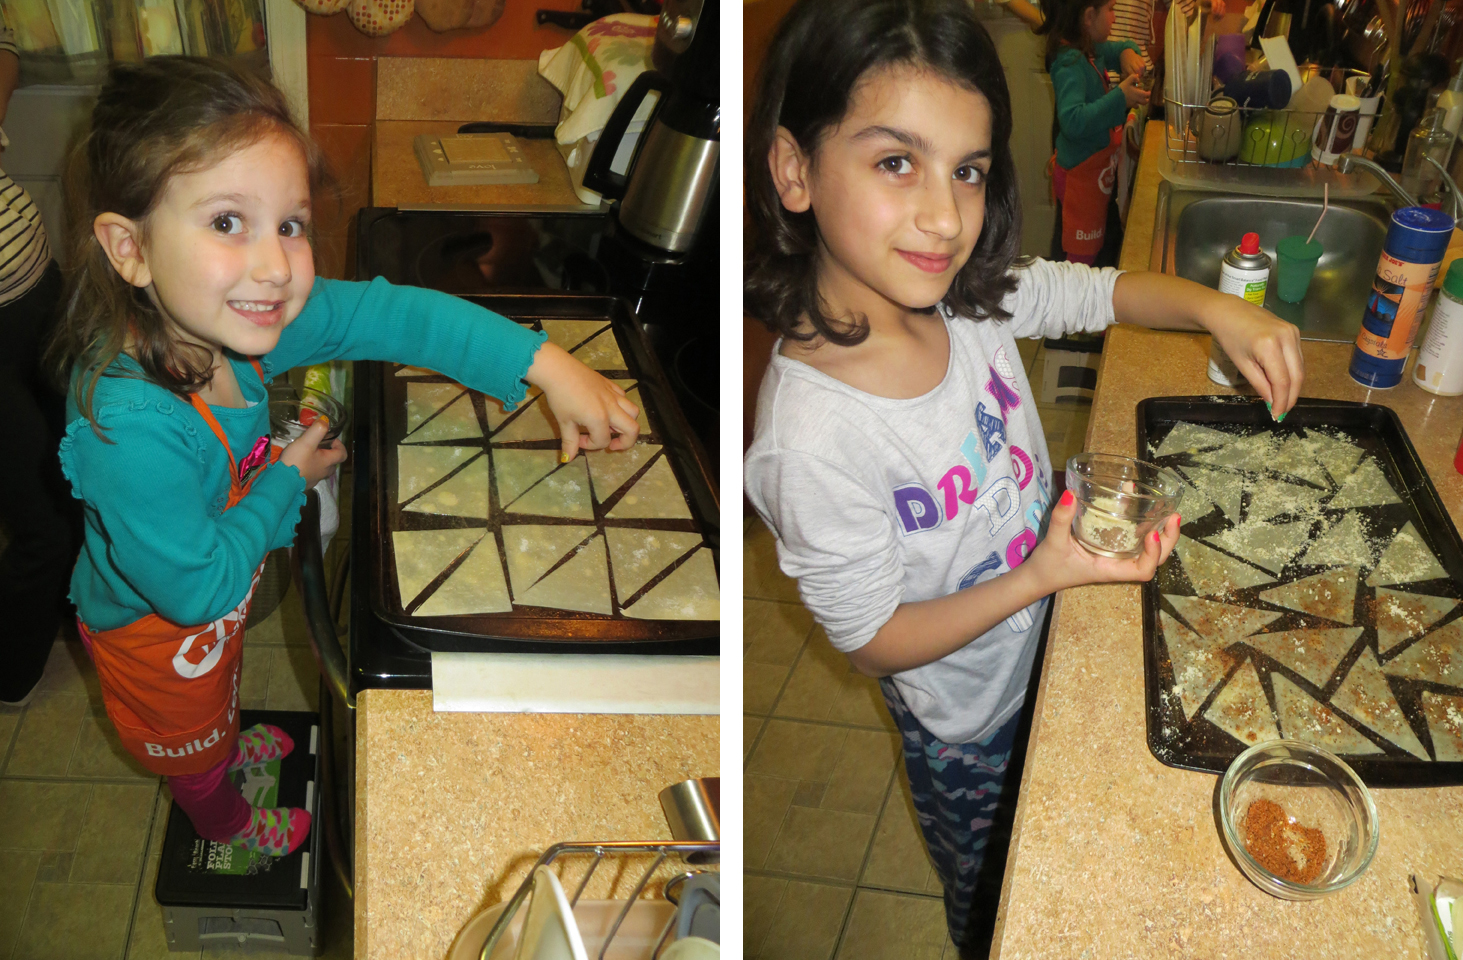
Seasoning the chips.

Seasoning the chips.

wonton1


Share

Recent Comments

Archives

powered by
Socialbar