Home » peppers » Recent Articles:

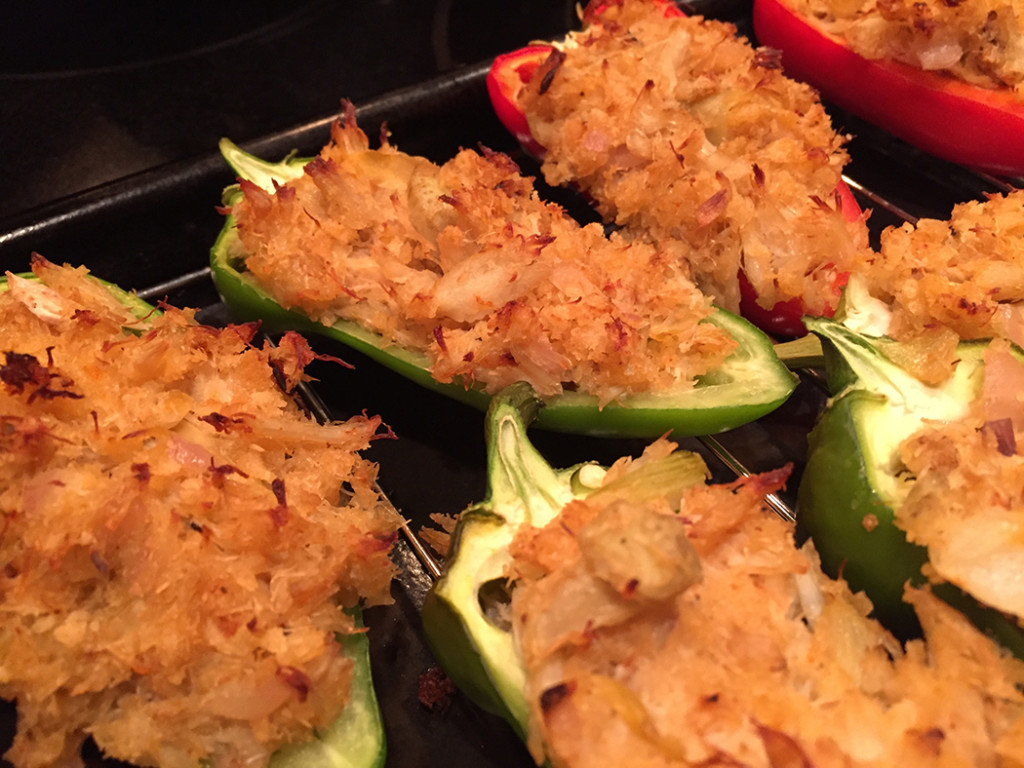
Crab-stuffed Bell Peppers

September 14, 2016 Menu No Comments

When I first started preparing this dish, my intentions were to follow an old recipe of mine, which included mixing diced peppers with the remaining ingredients to make a warm crab salad. I’ve done this before and served it with crackers or over pasta. But the home-grown peppers that I had on hand looked so damn pretty, that I decided instead to stuff and bake the peppers. It was a delicious choice to make! Either method would work well, but if you have a handful of peppers ready to be used, give this stuffed version a try. It is a hearty and tasty dish for sure!

Note – the peppers that I used were mini bells, mini gypsy and sweet reds. You can use whatever variety of pepper you prefer.


Crab-stuffed Bell Peppers

16 oz canned crab claw meat
2 tbspn butter
1 large shallot, chopped
juice of 1 lemon
2 tbspn white wine
6 oz chopped artichoke hearts
1 cup breadcrumbs
olive oil
3 large or 5 small bell peppers, cut in half lengthwise and cleaned
(if you decide to mix the diced peppers with the remaining ingredients, one large bell pepper will be all you need).

Preheat oven to 400˚. Melt butter in a large pan over medium heat. Add chopped shallot, sauté until soft.  Add crab meat, lemon juice, wine and chopped artichoke hearts. Stir. Add 1 cup breadcrumbs plus tablespoon of olive oil. Stir until breadcrumbs are fully incorporated. You can add additional olive oil if needed. Heat until warmed.

Fill each pepper half with the crab filling. Place the peppers on a baking sheet or in a baking dish. Bake for 30-35 minutes, or until peppers are tender.

Serve warm.

crab1

Share

Grilled Mediterranean Stuffed Peppers

April 28, 2016 Appetizer No Comments

I first made this recipe as an appetizer for our family’s Easter dinner. I had wanted to somehow get lamb onto the holiday menu, and decided that ground lamb would be the easiest solution. After seasoning and browning the lamb with classic Mediterranean flavors (mint, thyme, rosemary, Italian seasoning and feta cheese), I used the mixture as a stuffing for miniature sweet peppers. The stuffed peppers were baked and were a huge hit, but I knew that they would be even better grilled.

After getting my grill up and running this past weekend, I wasted no time firing up the stuffed peppers over an open flame. The peppers softened and blistered beautifully, making this dish even better than the first go! You can substitute the ground lamb with ground beef, turkey or sausage if you wish. But if you are looking for a true Mediterranean flavor, give the ground lamb a try. It makes for a perfect outdoor grilled appetizer.


Grilled Mediterranean Stuffed Peppers

8 oz ground lamb (you can substitute other ground meats if you wish)
2 shallots, finely chopped
1 clove garlic, minced
1 tbspn olive oil
2 tsp fresh mint, finely chopped
1 tspn fresh thyme
1 tspn rosemary, finely chopped (I prefer to use ground rosemary)
1/2 tsp Italian seasoning
Salt and pepper to taste
1/2 cup crumbled feta (plain or flavored variety will work well)
1 dozen miniature sweet bell peppers

Heat olive oil in a large frying pan over medium heat. Add shallots, stir. Cook until softened and fragrant, about 3-5 minutes. Add garlic, stir. Cook for 1 minute. Add ground lamb, mint, thyme, rosemary and Italian seasoning. Stir together. Cook until the lamb is fully browned, stirring occasionally. Once browned, drain excess oil, place ground meat into a bowl. Season to taste with salt and pepper. Stir in feta cheese. Set aside to cool.

Slice off the top of the peppers, remove seeds and stems. Once the ground lamb is cooled, stuff each pepper with the stuffing mixture. Be sure to pack each pepper tightly.

Preheat your grill, making sure to lightly oil the grates. Once heated, carefully lay each pepper onto the grate over direct heat. Cook for about 15-20 minutes, carefully flipping occasionally, so that the peppers are evenly cooked on each side. Once the peppers are softened and slightly blistered, carefully remove and plate.

Serve immediately.

peppers2

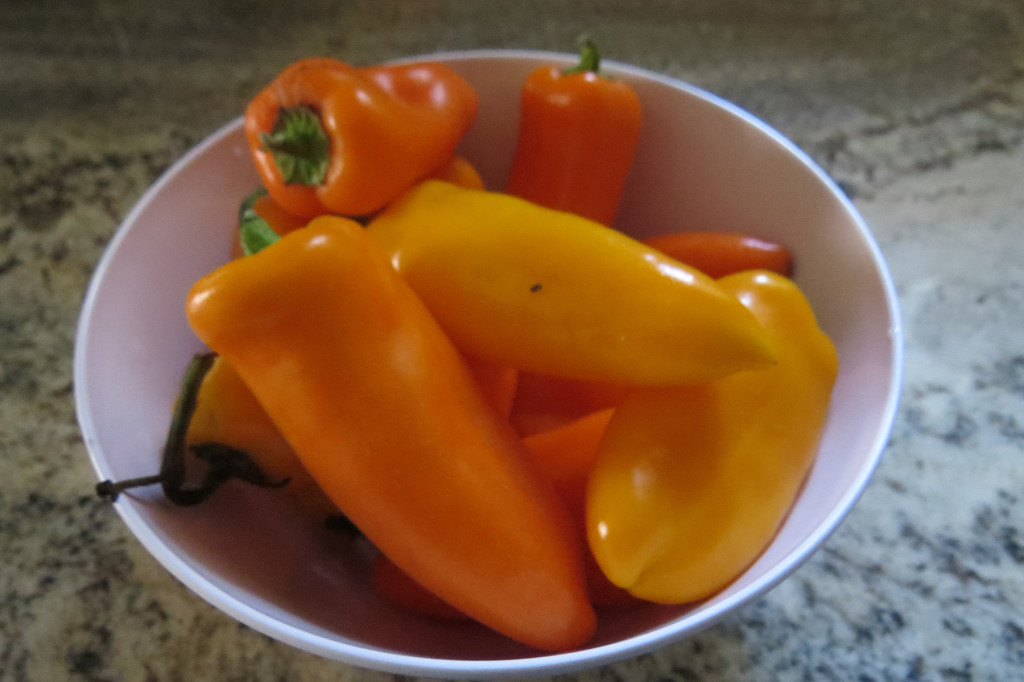
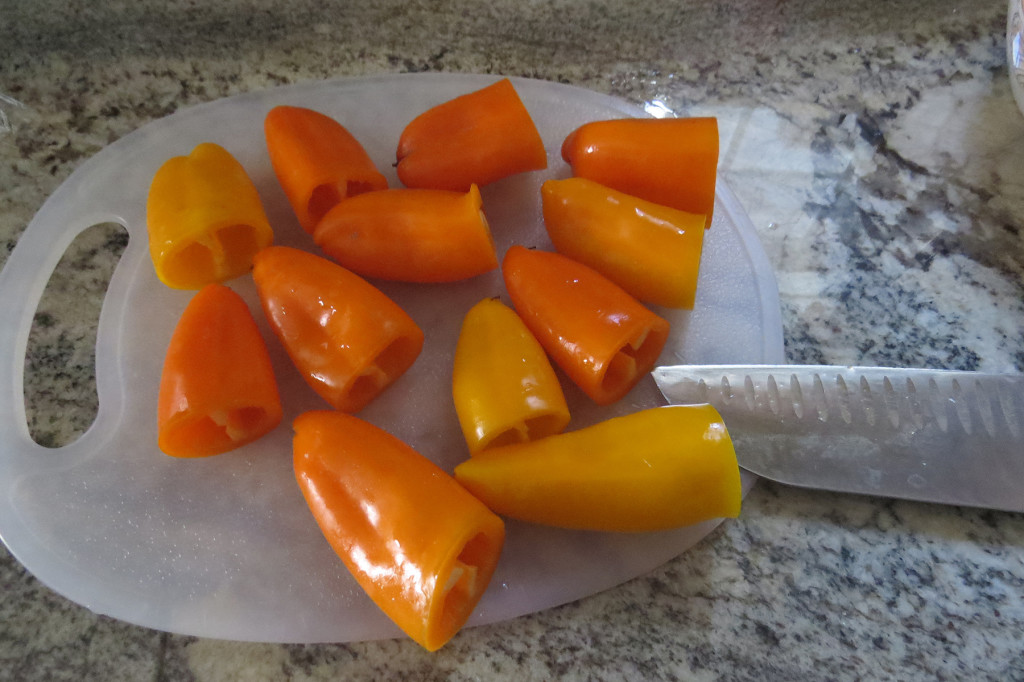
Multi-colored mini sweet bell peppers.


peppers1

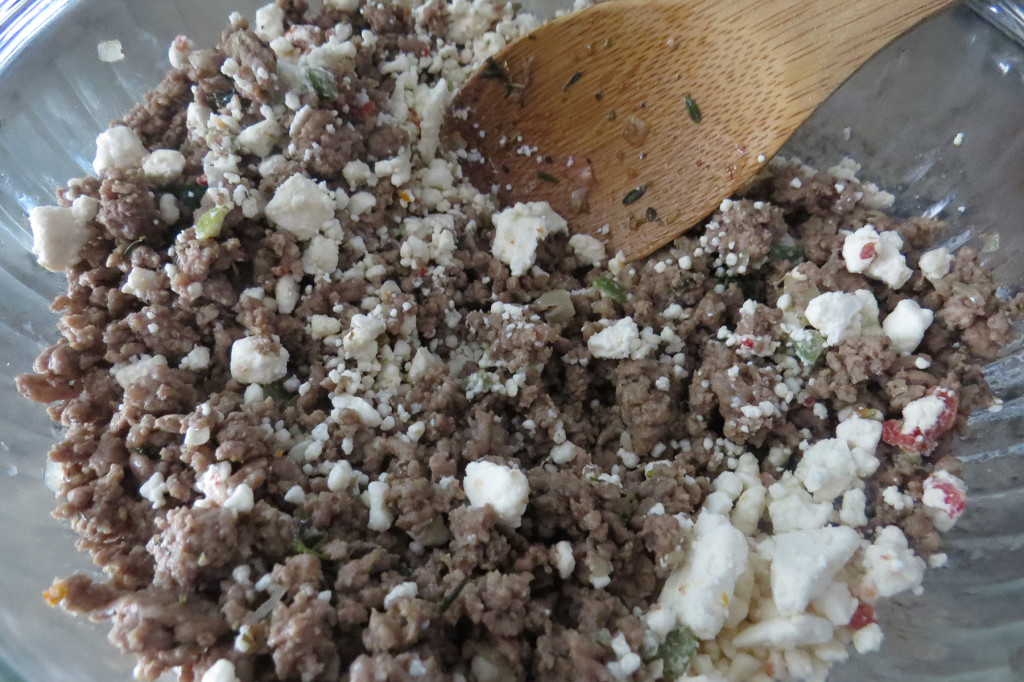
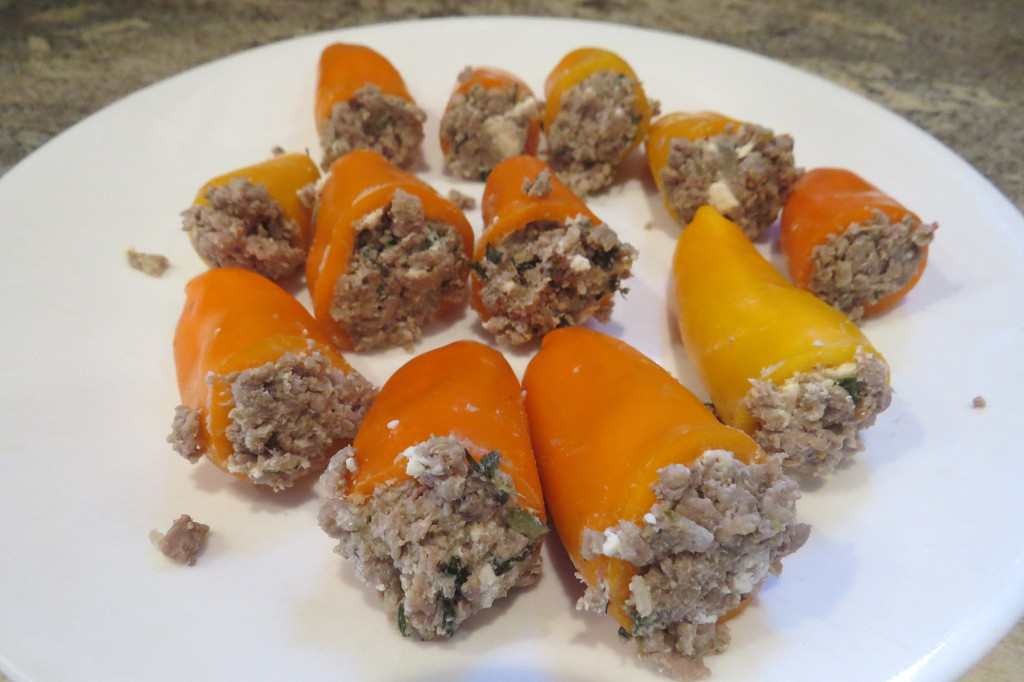
The cooked ground lamb, mixed with feta cheese.


peppers3

Prepping the peppers.


peppers4

Stuffing the peppers. Be sure to pack them tight.


peppers5

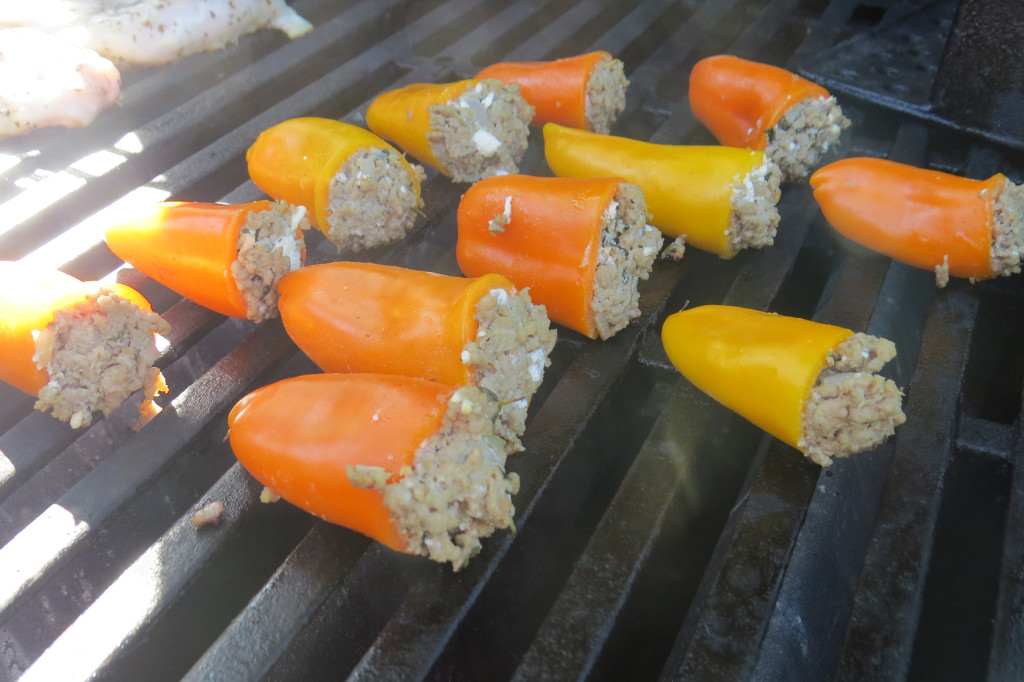
Cook the peppers over direct heat, until the peppers are softened and blistered.


peppers6

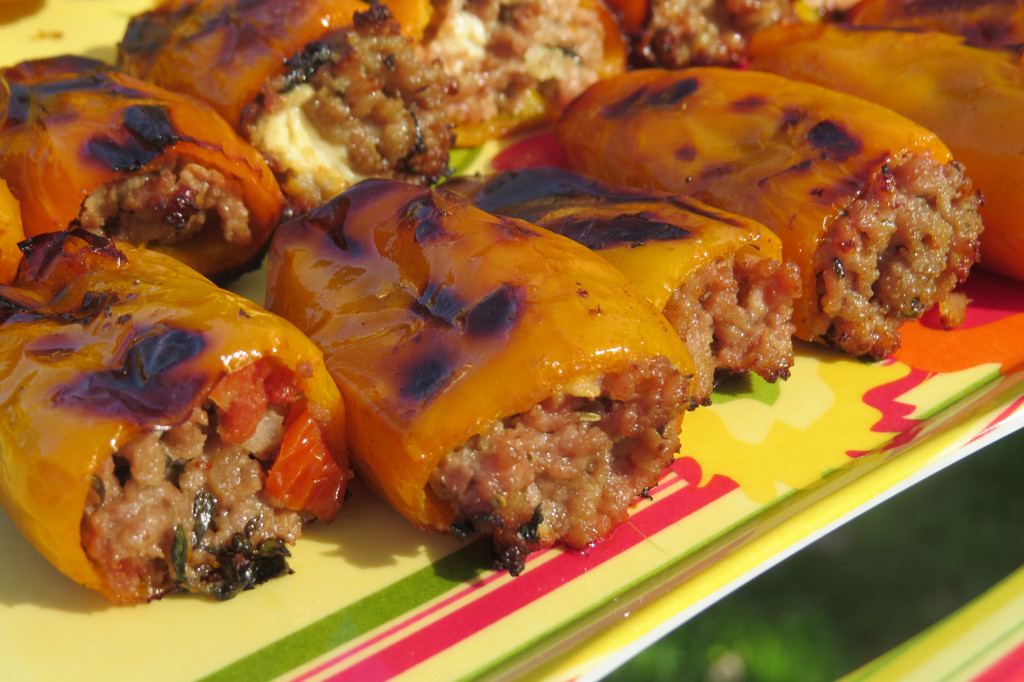
Ready to serve!

If you choose to bake the stuffed peppers instead of grilling, simply place the peppers on a baking sheet into an oven at 350˚ for 20-25 minutes, until peppers are softened.

Share

Mini Timbale

March 11, 2016 Entrees, Menu No Comments

In my last post, I shared with you my updated spin on the classic sausage and peppers, with the addition of rice and seasoned tomato sauce. Today’s post will put that recipe to excellent use, by using it as a stuffing inside of a timbale! For those of you not familiar with timbale, it is a dish that is prepared in a round pan (most often a spring form pan for a large size), that is lined with thin layers of eggplant, then filled with a mixture usually made up of a pasta base. The timbale is baked, then presented whole, which looks like a timbale drum, then is sliced and served. If you are a long-time reader of my food blog, you may recall my less-than-successful attempt a few years back at making timbale for my Mom’s birthday (click here for The Trials of Timbale).

After a few years, I felt that it was time to once again give it a go at making timbale. Learning from my previous mistakes, I decided this time to make individual servings in ramekin dishes to help keep everything contained and not have it fall apart all over my kitchen counter. Because I was planning to use a much smaller container, I thought that it may not allow for much room for a pasta filling. This is why I opted instead for the sausage, peppers and rice filling. By adding the sauce to the filling, it would allow the ingredients to hold together as I packed it into each serving dish. Unlike my last attempt, I was also very careful not to use too much oil when preparing the eggplant slices. Adding oil to eggplant, especially when baking it, can be very deceiving. The eggplant has a tendency to soak up liquids like it were a sponge, but then it releases them as it cooks. My previous attempt failed because I used too much oil on my eggplants, which did not allow it to hold together once removed from the pan.
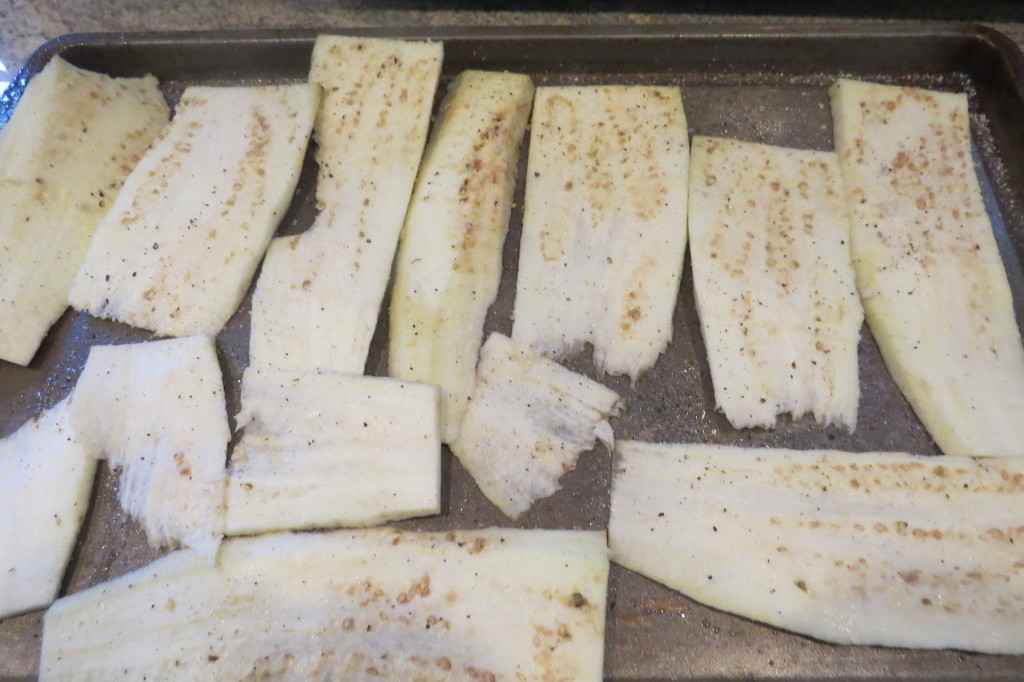
Thinly sliced seasoned eggplant on a lightly oiled baking sheet, baked at 350˚ for 5-10 minutes until softened.

Thinly sliced seasoned eggplant on a lightly oiled baking sheet, baked at 350˚ for 5-10 minutes until softened.

I started off by thinly slicing one large eggplant length-wise. I lightly sprayed a large baking sheet, and placed the slices on the sheet, lightly seasoning them with salt and pepper. I placed them in the oven at 350˚ for about 5-7 minutes…just long enough to make the slices pliable but not to where they would fall apart. Already I was off to a much better start! This left me with enough slices to line two single-serve ramekin dishes. Unlike a full size timbale, I opted to not add enough eggplant to enclose the filling. While this step is necessary with a full size, I felt that it would work fine with the smaller size, and especially with the tighter packed filling that I was planning to use. If you opt to use a pasta filling, be sure to account for more eggplant. I also suggest preparing the eggplant ahead of time and storing it in the refrigerator. The slices will stay soft enough to work with, but will not fall apart.
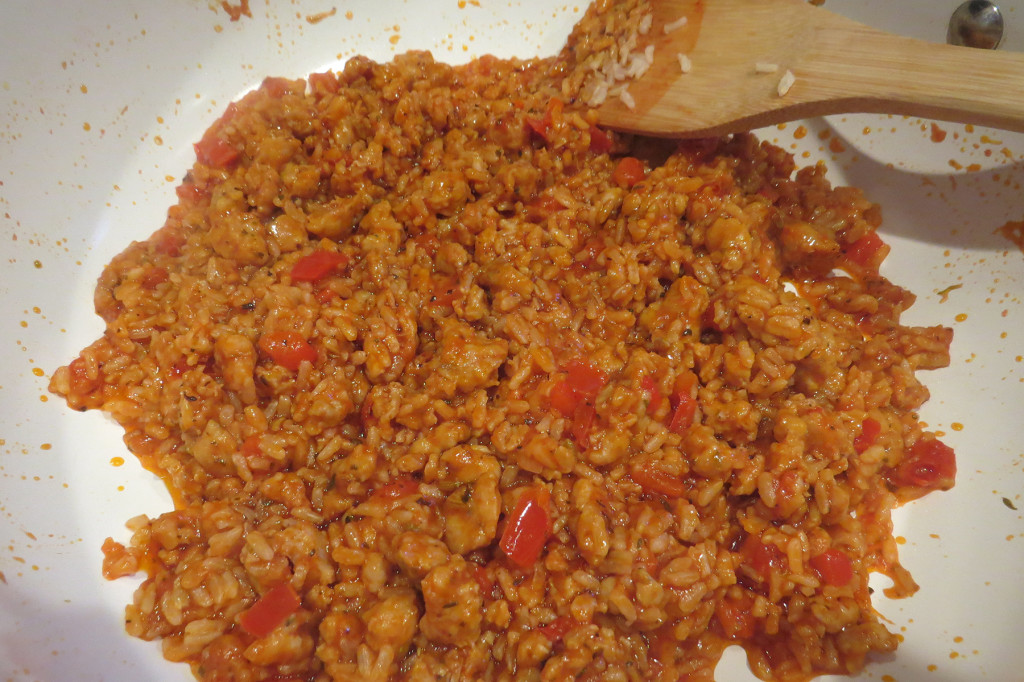
My sausage, peppers, rice and tomato sauce filling.

My sausage, peppers, rice and tomato sauce filling.

As I prepared my filling (you can click here for the recipe), I once again preheated the oven to 375˚. I lightly sprayed the ramekin dishes before lining them with the sliced eggplant. Although some pieces of eggplant were longer and larger than others, I put all of the slices to good use, making sure that the entire dish was lined. If you want to fully enclose you timbale, be sure to use larger slices off eggplant and have them overlap the edges of the pan, then simply fold over once the dish is filled. But again, because my filing was more compact that a pasta filling, I went with not completely enclosing the dish.
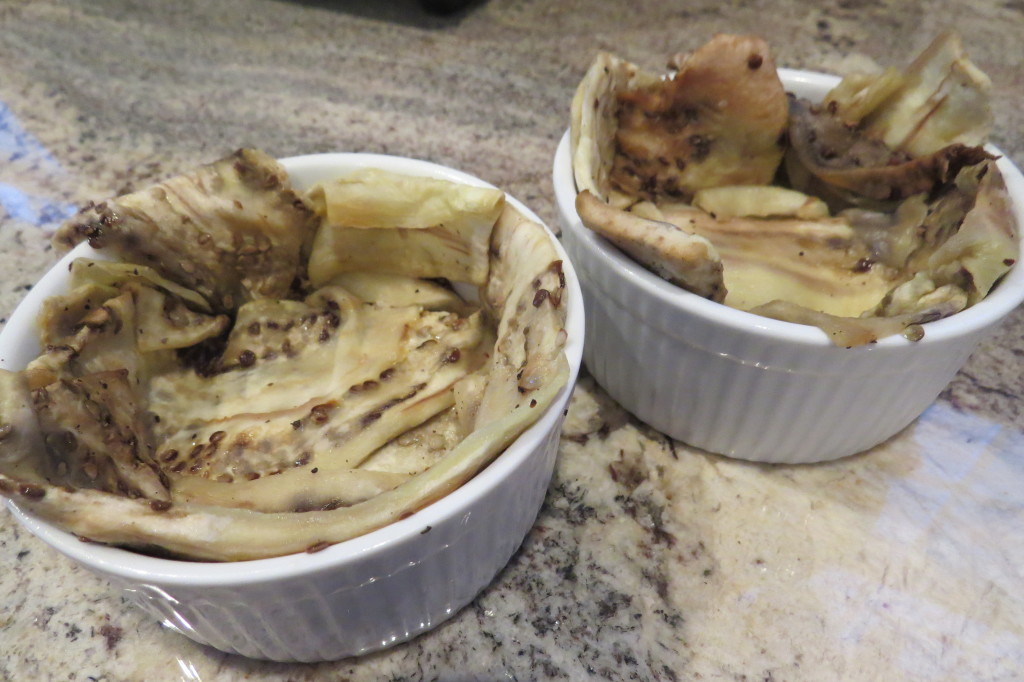
Ramekin dishes liked with the eggplant slices.

Ramekin dishes lined with the eggplant slices.
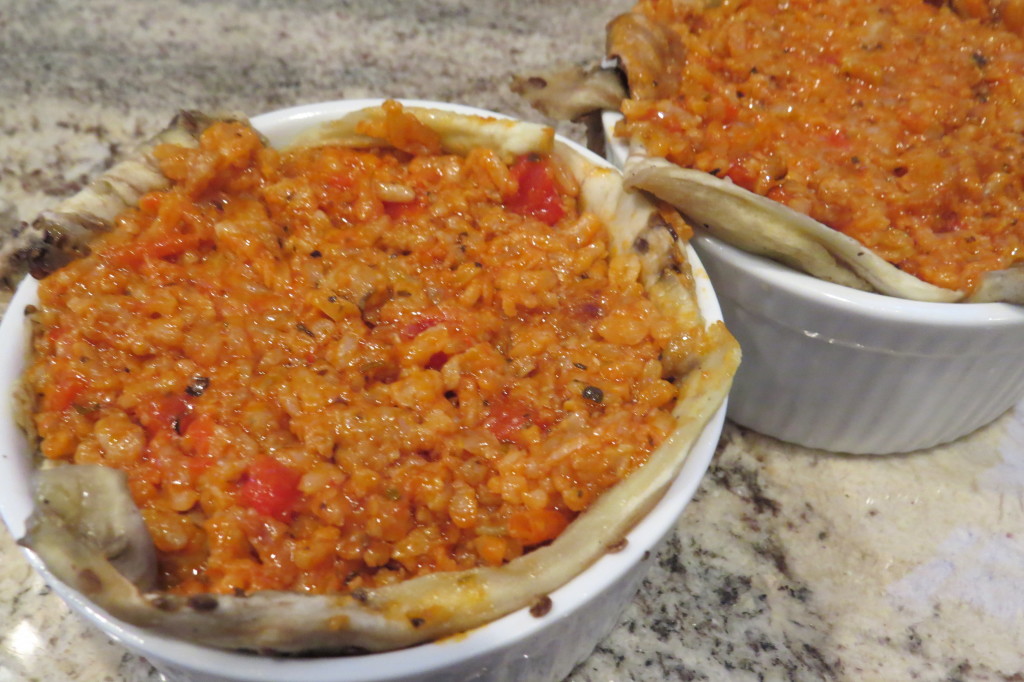
 

Tightly packing the ramekins with the filling.

Tightly packing the ramekins with the filling.

Once all of the filling was tightly packed into the ramekins, I placed them into the oven for about 30 minutes, until the outer edge of the eggplants started to brown and slightly crisp. I removed them from the oven, let them cool for a few minutes and very carefully ran a paring knife around the inner edges to separate the timbale from the dish. With a careful flip onto the dish and a few light taps, the timbale fell perfectly onto the dish. I quickly hit them with a drizzle of olive oil and some fresh herbs…and it was a thing of beauty! After years of disappointment, I had finally achieved making timbale. Not only did it look elegant, it tasted just as wonderful. It was a spectacular dish, put together with just a few simple ingredients. But a little bit of extra love took it a long way.
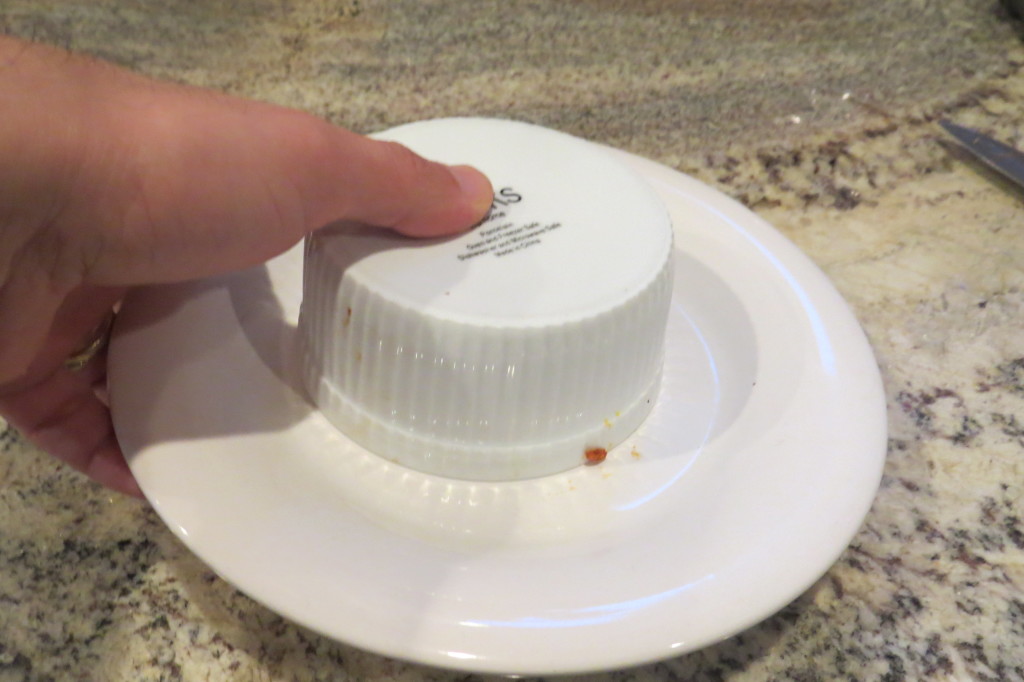
Carefully flipping the timbale onto the dish.
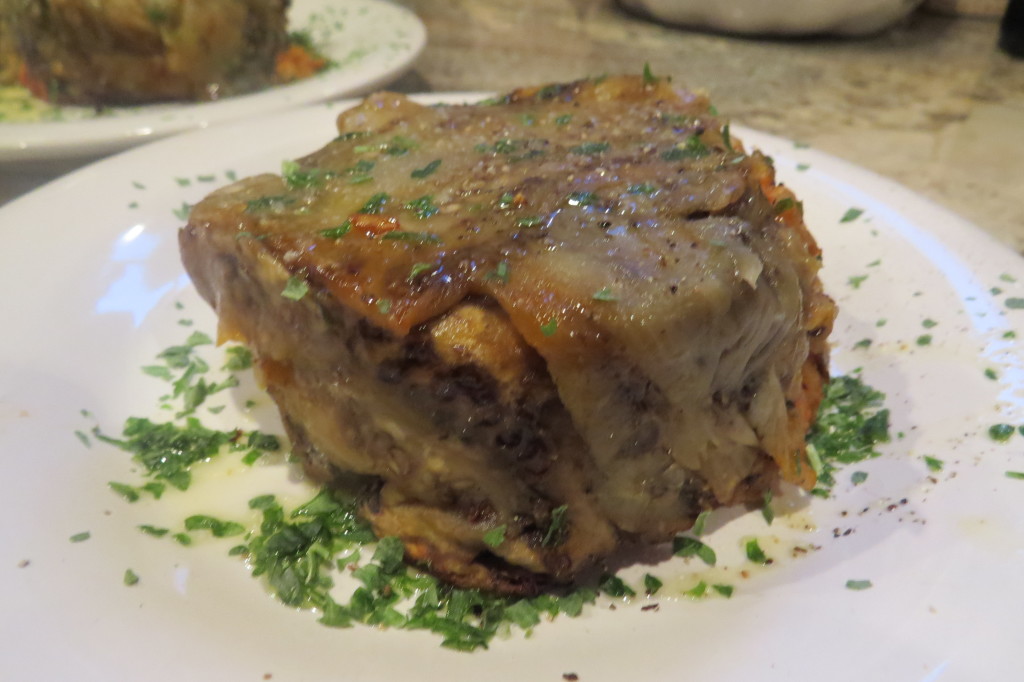
Carefully flipping the timbale onto the dish.


Drizzled with olive oil and topped with fresh herbs.

Drizzled with olive oil and topped with fresh herbs.

Regarding the filling – you can get as creative as you like. Pasta, ricotta cheese, various meats, shrimp or even vegetables would make for excellent fillings. You can also top it however you like once it is removed from the baking dish. A nice slice of mozzarella, some fresh tomatoes and basil…the options are endless!
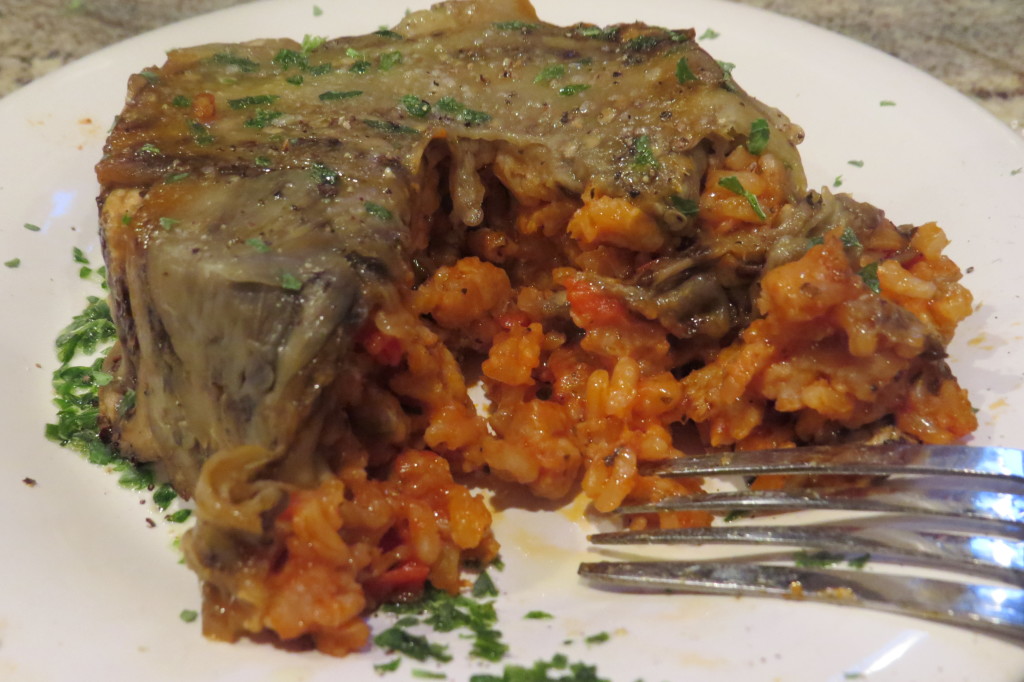
IMG_6770

Perfection!

So there you have my triumphant return to attempting timbale, and I hope it inspires you to give this creative, impressive and filling dish a try!
Share

Sausage, Peppers and Rice

March 1, 2016 Entrees, Menu No Comments

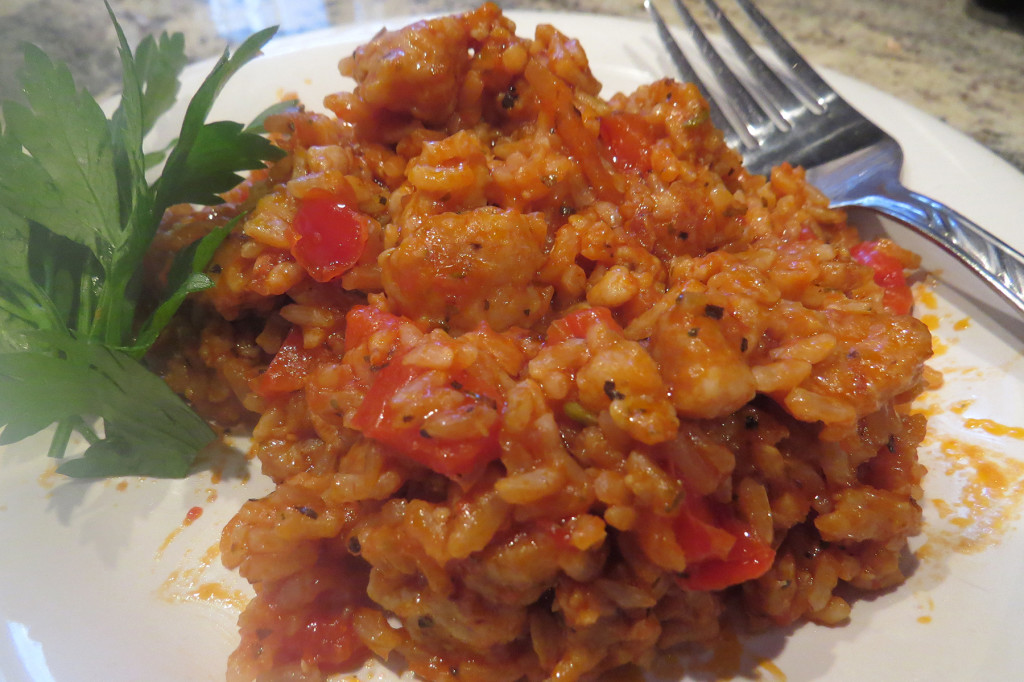
Sausage and peppers is comfort food at its best. Whether served as a quick sandwich or plated as a meal, there is nothing quite like this classic combination. Today’s recipe takes these two ingredients to a new level by adding rice, tomato sauce and smoked cheddar. Prep time and cooking time are both fairly quick, so this makes for a great weekday meal. And while it no doubt serves well on its own, it makes for an even better filling for another fantastic dish that I’ll be sharing with you in my next post.

My wife and I are both big fans of chicken sausage, which is what I used while preparing this dish. Of course, you can use whatever type of sausage that you prefer. And while I highly recommend a smoked cheddar for this dish, the choice of cheese again is up to you. Regardless of what ingredients you choose to use, you can bet that this dish will be a hit.


Sausage, Peppers and Rice

Serves 4

1 lb ground chicken sausage (or your preference), removed from casing
1 red bell pepper, cut into 1″ pieces
1 shallot, finely chopped
2 tbspn olive oil
1 8oz can tomato sauce
1 tsp Italian seasoning
1/4 cup shredded smoked cheddar (or your choice of cheese)
salt and pepper
2 servings of cooked rice (white or brown)

Start by preparing the rice according to the package directions (microwaving it will work fine for this dish). Heat oil in a pan over medium heat. Add the chopped peppers and shallot, cook until crisp tender. Add the ground sausage, stir. Cook until the sausage is fully browned, continuing to stir (this will help break up the sausage as it cooks). Once the sausage is fully browned, add the can of tomato sauce. Add the Italian seasoning, stir together. Let simmer for 10 minutes, until thoroughly heated. Add the cooked rice, stir together. Season with salt and pepper. Add the shredded cheese, stir. Serve and enjoy.

sausage1

sausage2

In my next post, I’ll show you how to incorporate this recipe into an amazing new eggplant dish!

Share

Recent Comments

Archives

powered by
Socialbar