Home » vegetables » Recent Articles:

Cookin’ with the Gluten-Free Paisan: Ratatouille Pizza

September 6, 2018 Menu 1 Comment

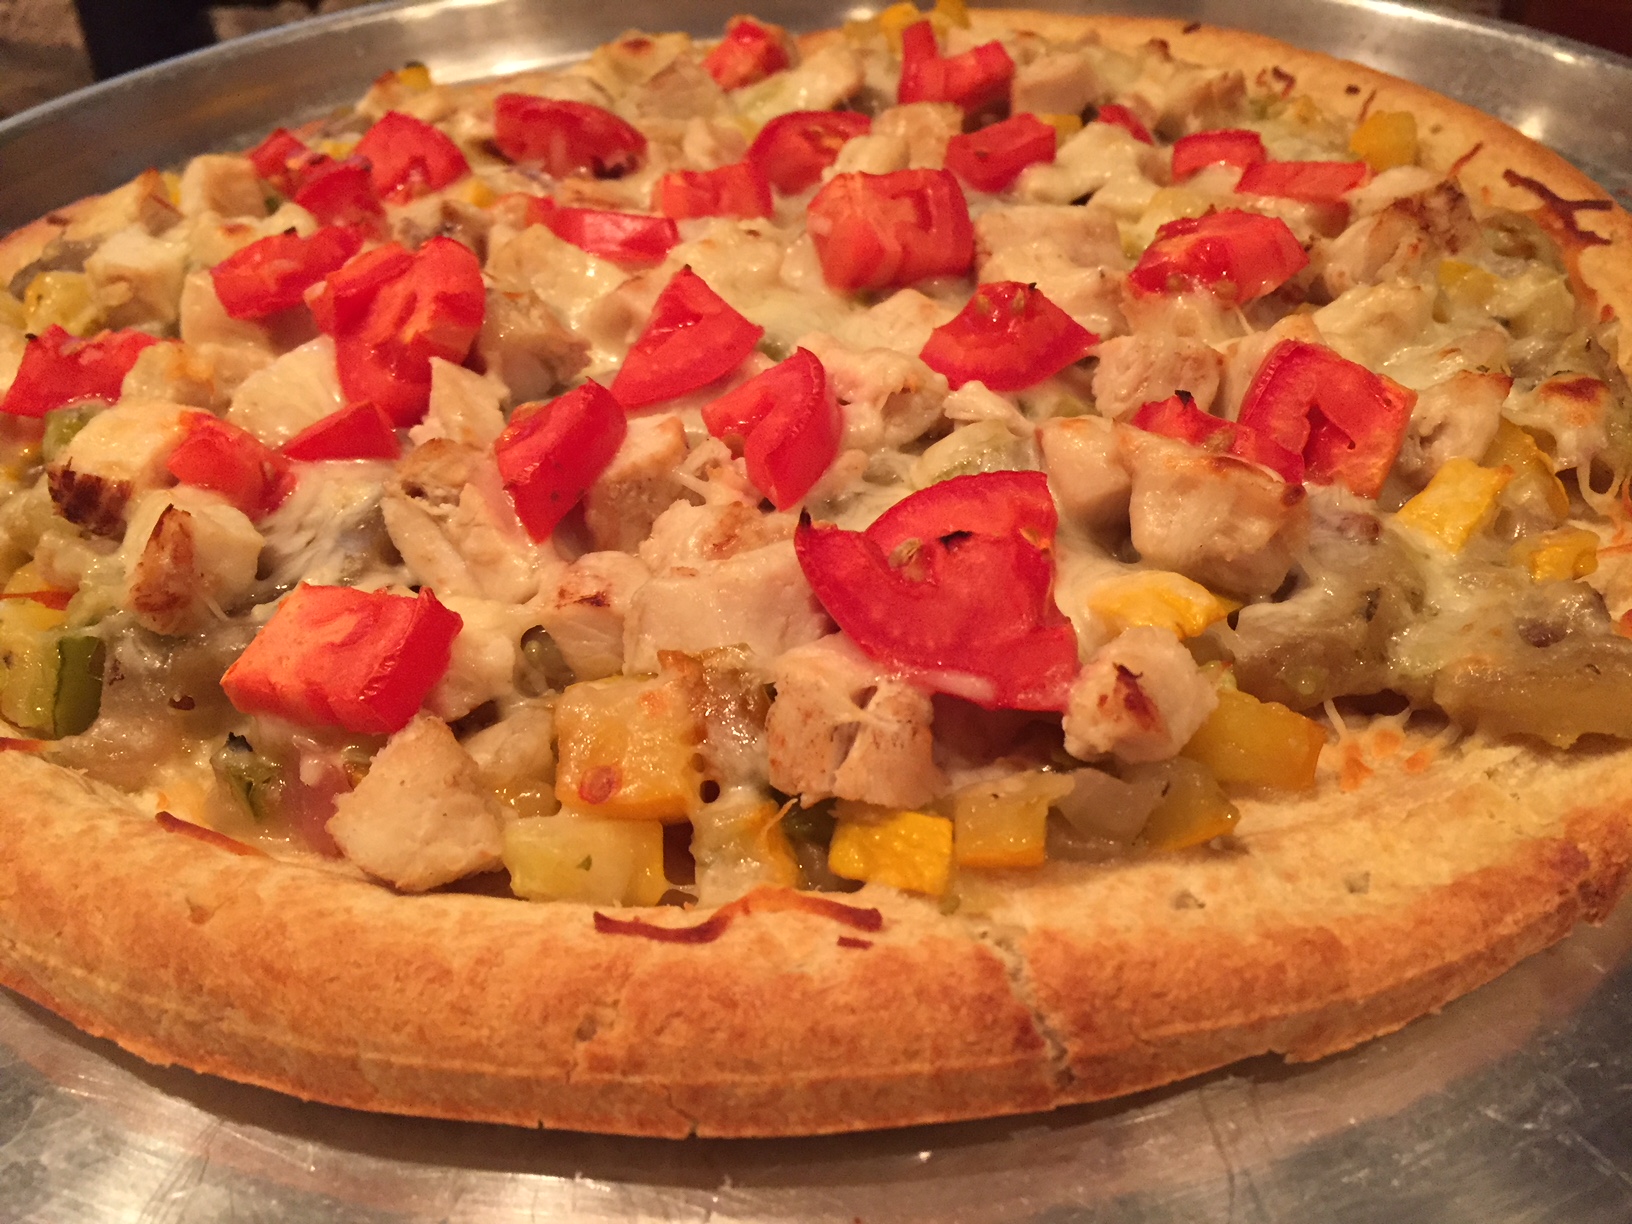
I’m very happy to share with you my first collaborative recipe with my good friend, Mike DeStefano (aka The Gluten-Free Paisan). This is one of Mike’s favorite recipes that he and his wife often make….and with a combination of simmered fresh seasonal vegetables, tasty chicken breast and a mouth watering pizza crust, how could you go wrong?

Now, if you are at all familiar with the gluten-free diet, you may be wondering just how in the world could a pizza recipe that sounds so satisfying and flavorful as this be gluten-free? [The original recipe, which wasn’t gluten-free, was first published in Cooking Light]. The first, and most obvious substitute to make this recipe gluten-free would be the crust. Of course, you can use a traditional pizza crust (as I did) for this recipe. But if you are following a gluten-free diet, there are alternative pizza crust options available. You can find a number of gluten-free pizza crusts in the health food section of your grocery store. Common brands that you may find are Mama Mary’s, Smart Flour Foods, and Udi’s. Another popular pizza crust alternative is a cauliflower crust. These may also be available in the frozen food area of your grocery store’s health section. Of course, you can also find a number of recipes online for gluten-free pizza dough or cauliflower crusts, but it may take a little time to find a recipe that is easy to work with or has the taste and texture that you are hoping to achieve. So, if you are just starting to experiment with home made gluten-free doughs, the store bought version may be your best bet for now. But again, if you are not on a gluten-free diet or are not interested in a cauliflower pizza crust, then a traditional crust will do just fine.

Because Mike now follows both a gluten-free and Autoimmune Protocol (AIP) diet, he also made some necessary and tasty adjustments to the toppings so that both he and his wife could enjoy this delicious recipe without any concerns of dietary reaction or inflammation. Early on in his experimenting, Mike decided to leave off the tomatoes and eggplant (to avoid inflammation) and cheese (to cut back on dairy). There were plenty of other delicious flavors happening on this pizza, so the missing ingredients didn’t make the pizza any less enjoyable. Today, he has reintroduced tomatoes and eggplant back into his diet, which shows how patience and determination play into the AIP diet. Go Mike!

I had continued to make some further updates to the recipe, substituting certain toppings that may not be my personal favorite. We both thought it would be fun to not only compare notes both before and after, but to also share the results with the Cucina Domenico readers. Below you will find the original recipe, with ingredients marked with an asterisk (*) to indicate the adjustments that both Mike and I have made to suit our individual tastes.  Like all other recipes that have been shared on my food blog, we both encourage you to take this recipe and feel free to adjust it to your own liking.

(Although we didn’t get to actually work together in the same kitchen this time around, we did go back and forth sharing thoughts and ideas both before and after making this dish. I can only imagine the culinary magic that both Mike and I will make and share with you when we both get together in the kitchen, hopefully soon.)


RATATOUILLE PIZZA
Originally published in Cooking Light

1 teaspoon olive oil
1 red bell pepper, cut into 1/4-inch strips
1/2 small red onion, thinly sliced
1/4 teaspoon dried Italian seasoning
1/4 teaspoon salt
3 tablespoons finely chopped fresh flat-leaf parsley
Cooking spray

*1 Japanese eggplant, halved lengthwise and cut into 1/4-inch thick slices
1 cup (4 ounces) shredded reduced-fat pizza blend cheese
3 plum tomatoes, cut into 1/4-inch thick slices

**1 cup sliced mushrooms

***4 garlic cloves, minced
1 cup chopped skinless, boneless rotisserie cooked chicken breast (about 6 ounces)

****1 (10-ounce) Italian thin crispy pizza (such as Boboli)

Preheat oven to 375˚.

Heat a large nonstick skillet over medium-high heat. Add oil to pan. Add eggplant, bell pepper and onion; sauté 3 minutes or until eggplant begins to soften. Reduce heat to medium. Add mushrooms; cook 3 minutes, stirring frequently. Add Italian seasoning, salt and garlic; cook 1 minute, stirring mixture constantly. Remove from heat.

Place crust on a baking sheet or a pizza stone (pizza stone is recommended). Spread vegetable mixture evenly over crust, leaving a 1/2-inch border. Arrange chicken over vegetable mixture; sprinkle evenly with cheese. Arrange tomato slices over cheese, and lightly coat with cooking spray. Bake at 375˚ for 25 minutes or until cheese is bubbly and tomatoes are softened.

Slice, serve and enjoy!
 

Mike and Dom’s Adjustments

*  Because Mike is following both the gluten-free and AIP diet, he has slowly had to work on reintroducing eggplant and tomatoes – which are two key food sources that can cause inflammation – back into his diet. He is also watching his dairy intake. If you are currently adjusting to an AIP diet, the eggplant and tomatoes can be left out without making this pizza taste any less flavorful or satisfying. There are still plenty of tasty ingredients, so the absence of the eggplant, tomatoes and cheese make for a minimal change.

** Dom is not a fan of mushrooms, so he replaced the mushrooms with diced yellow squash. This made for a great substitute, and could be added along with the mushrooms if you prefer both.

*** Dom really likes garlic. Mike LOVES garlic. While Dom went with four healthy size garlic cloves, Mike went all in and kicked it up to five cloves. Adjust the garlic to your taste and preference.

For the chicken, Dom went with cubed and Mike went with shredded. Apparently both were off the hook!

**** The pizza crust is open to your taste and preference. While a store bought shell will do the trick, feel free to use your own home made crust recipe. However, be sure not to go too thin while rolling out the crust, as the toppings are a bit heavy. If you are looking for a gluten-free option, you can find fresh or frozen gluten-free crusts from Smart Flour Foods, Udi’s or Mama Mary’s. Frozen cauliflower crusts are also available, or you can even experiment with making your own cauliflower crust or home made gluten-free pizza dough using  cassava flour (various recipes are available online).

Share

Game Day Taquitos

January 19, 2018 Appetizer, Entrees, Menu No Comments

Game time is here, and football fever is running rampant! Even if your beloved team didn’t make it to the playoffs, chances are that you will still be joining family and friends for fun food at a game day party.

As I’ve discussed in previous game day posts, the key to a successful party dish is to make it a quick hitter that is fun, tasty and easy to eat. The recipe that I’m sharing with you today tackles all of those requirements!

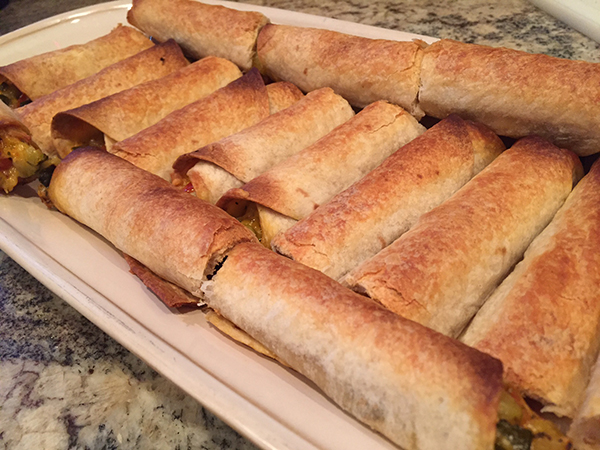
Taquitos are a Mexican dish that consists of rolled-up flour tortillas stuffed with a filling, and is crisp-fried. Think of it as a rolled-up taco. During one of our recent holiday gatherings, I decided to make my own version of taquitos, coming up with a few different filling options and choosing to bake the taquitos instead of frying them. Not only were they a big hit, they were also enjoyed by both adults and kids. Prep time (for the most part) was minimal, and the ingredients were tasty. Although the taquitos were served as a picky appetizer, they were filling enough and tasty enough to keep everyone satisfied and coming back for more. Hence, the perfect game day food!

The best part about taquitos is that you can get as creative as you wish with the fillings. While traditional fried taquitos use a flour tortilla, I found that the baked version works just as well with both flour and wheat tortilla shells. I’ve used both types of tortilla shells for my taquitos and and was happy with both versions. Listed below are a few of the fillings that I prepared, along with a few other filling suggestions that I think would work well. As always, I encourage you to get as creative as you wish.


STEP 1: THE FILLING

The key to a good taquito is the filling. So far, I have made two different types of taquito fillings: sautéed vegetables and chicken, cheddar and bacon. Both were able to be prepared ahead of time, and both worked well and were enjoyed by everyone.

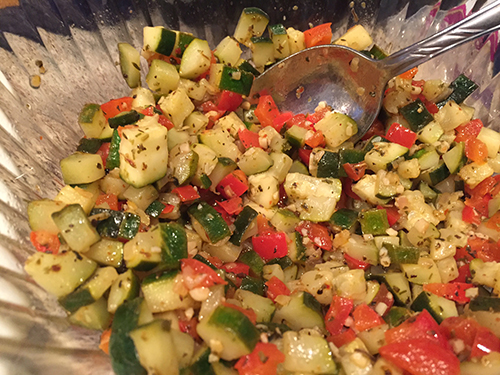
For the sautéed vegetable filling, you will need the following:

2 tablespoons olive oil
1/2 cup chopped onion
1 clove garlic, minced
1 zucchini, finely chopped
1 yellow squash, finely chopped
1 red pepper, finely chopped
1 tablespoon chopped Italian parsley
1 teaspoon oregano
1 teaspoon dill weed
salt and pepper to taste
shredded mozzarella or cheddar cheese

Heat oil in medium skillet or wok over medium-high heat until hot. Add bell pepper, onion and garlic; cook and stir 2-3 minutes or until crisp-tender.

Stir in zucchini and squash; cook and stir 5-7 minutes or until tender.

Stir in herbs, cook until thoroughly heated. Season with salt and pepper to taste. Set aside to cool slightly. You will top the vegetables with the shredded cheese when you assemble the taquitos.


For the chicken, cheddar and bacon filling, you will need the following:

1/2 lb cooked and seasoned chicken breast, chopped (Perdue Short Cuts works well for this)

8-ounce package of shredded cheddar cheese

4-6 slices of cooked bacon, cut into small pieces


Other filling suggestions:

• steak, peppers and provolone

• meatballs and mozzarella

• seasoned chicken with blue cheese

• pulled pork, roasted red peppers and broccoli rabe

• marinated shrimp and scallops

….honestly, you can go any number of directions!

Regardless of what filling you prefer to try, one suggestion that I would make is to not make your fillings too wet. If you think that your fillings would go well with a sauce (say a marinara or a barbecue sauce), I would suggest that you serve those sauces as a side for dipping. Incorporating the sauces into the filling may make the tortilla shells soft and mushy, and they may not bake properly.


STEP 2: THE ASSEMBLY

Preheat your oven to 400˚.

As I mentioned earlier, I have used both flour and whole wheat tortilla shells and was very happy with the results of both.

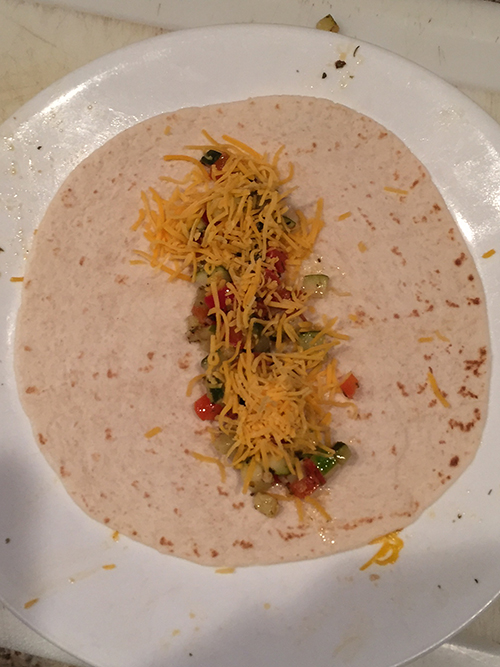
To assemble your taquitos, lay a tortilla shell out flat, and place a 1″ strip of your filling down the middle. Tightly roll up the tortilla shell, as if you were rolling up a cigar.

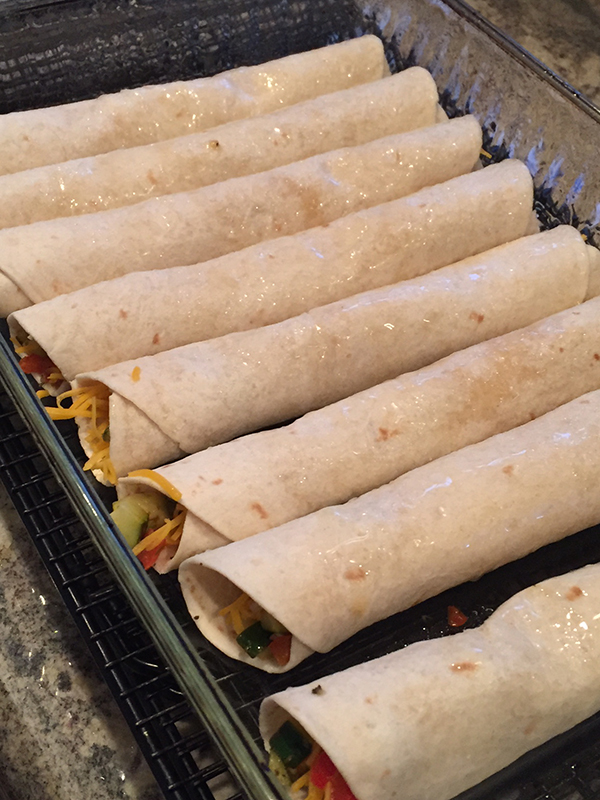
Place the rolled tortilla shells seam side down into a lightly sprayed 9″ x 12″ baking dish. Medium-sized tortilla shells will work the best with a 9″ x 12″ baking dish. If you have larger sized tortilla shells, you can trim the rolled shells to fit into the pan. You will fit about 8 rolled shells into the pan.

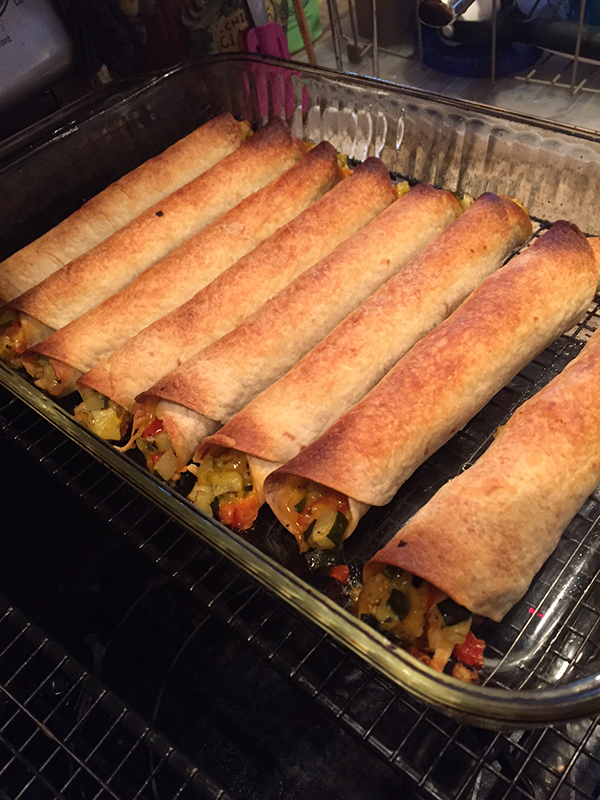
Lightly spray the top of the shells. Place the dish, uncovered, into the oven. Bake for 20-25 minutes, or until the shells start to brown and crisp. Remove from oven, let cool for a few minutes. Remove from baking dish and cut the baked taquitos in half. Serve and enjoy!

Share

Mini Giambotta Biscuits

January 8, 2015 Appetizer, Entrees, Menu No Comments

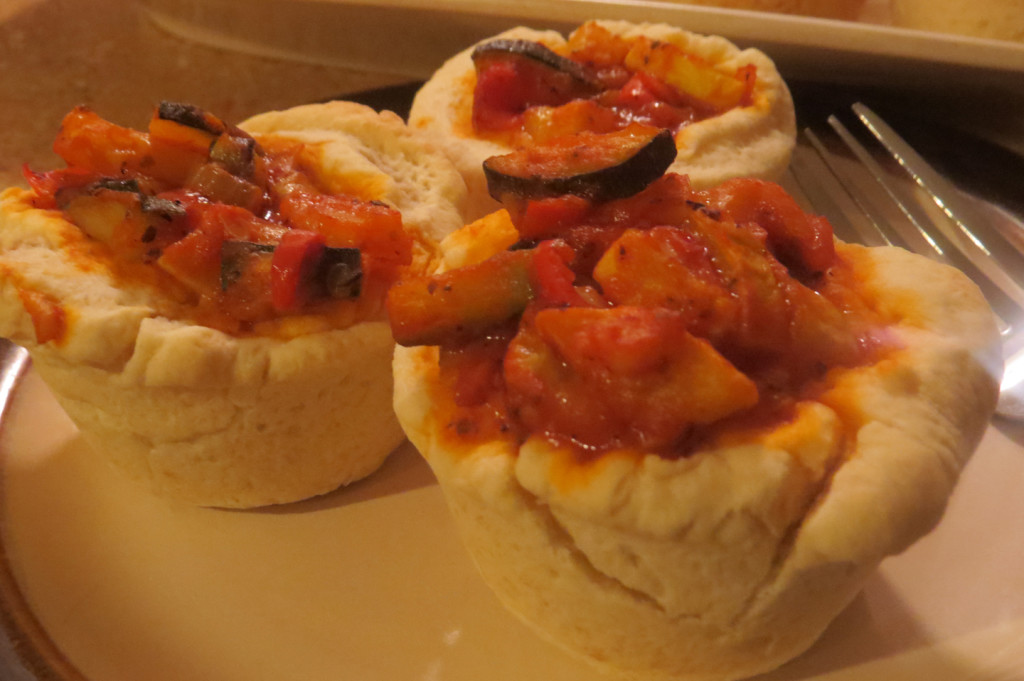
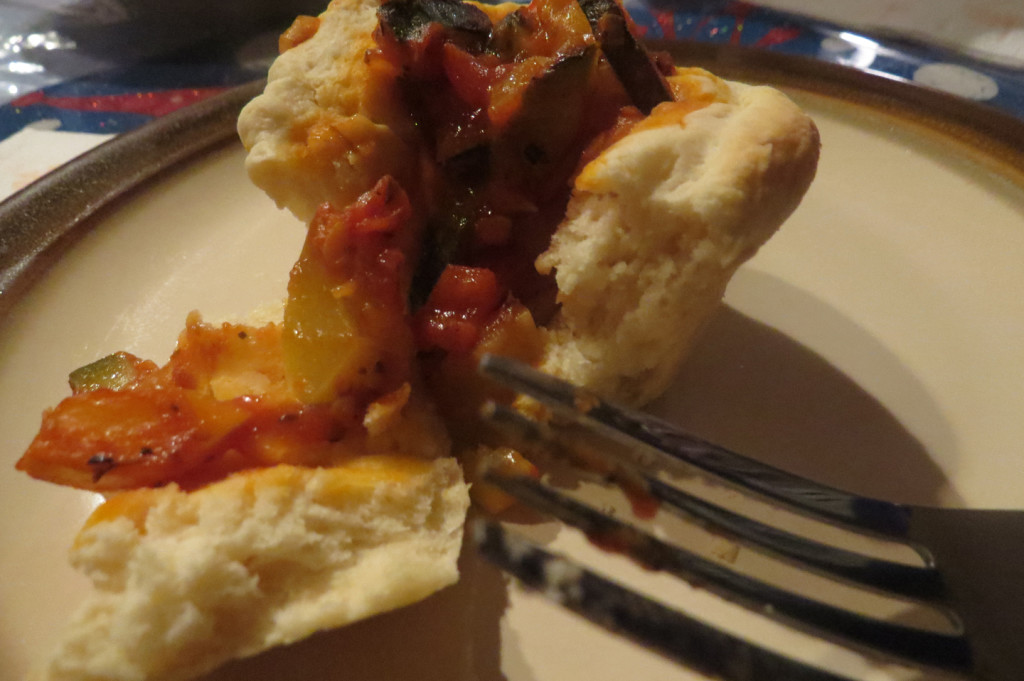
This dish was inspired by a recipe that I recently saw for a store-bought can of biscuit dough, placed in muffin pans and filled with chicken, veggies and creamy soup to make mini chicken pot pies. The personal-sized version of popular dishes are a trendy item these days, especially for dinner parties and group get togethers. This recipe caught my attention because not only am I a fan of the personal-sized portions, but I also enjoy a warm and hearty dish this time of year. Being that we’re just coming off of the holidays, I thought a vegetable pot pie would be tasty and healthy choice. I decided to make giambotta for the filling, which is an Italian vegetable stew. Bread is always a must-have for dipping when you have giambotta, so to use it as a biscuit filling was a no-brainer.

I also chose to make my own flaky biscuits for this dish. I found a very simple and quick recipe online that calls for just a few basic ingredients and about 10 minutes or so of prep time…no electric mixer necessary! Of course, canned biscuits will work, but if you have a few extra minutes, give the home made biscuits a try. It will make the dish seem that much more impressive.


Mini Giambotta Biscuits

For the Giambotta
2 tbspn olive oil
2 cloves garlic, minced
1/2 cup onion, finely chopped
1 red bell pepper, finely chopped
1 zucchini, cut into 1″ pieces
1 8oz can tomato sauce
salt and pepper
1/2 tspn Italian seasoning

Heat oil in large skillet over medium-high heat until hot. Add bell pepper, onion and garlic; cook and stir 2-3 minutes or until crisp-tender. Add the zucchini, stir together and cook for another 2-3 minutes.

Add the can of tomato sauce, season with salt, pepper and Italian seasoning  to taste.

Stir together, lower the heat to medium-low, and simmer for 10-15 minutes until sauce thickens up. Set aside.

For the Biscuits
courtesy of Taste of Home
2 cups all-purpose flour
4 tspn baking powder
3 tspn sugar
1/2 tspn salt
1/2 cup shortening
1 egg
2/3 cup 2% milk

In a small bowl, combine the flour, baking powder, sugar and salt. Cut in shortening until the mixture resembles coarse crumbs. Whisk egg and milk; stir into dry ingredients just until moistened. Turn onto a well-floured surface; knead 20 times. Roll to 1/2-in. thickness; cut with a floured 2-1/2-in. biscuit cutter. Lightly spray a muffin tray (12 muffins). Gently place each biscuit piece into the individual muffin cups (no paper liners needed!), and gently press the dough to fill out the bottom and sides of the cups. Fill up each cup with the giambotta, making sure none spills over the side.

Bake at 450° for 8-10 minutes or until golden brown. Serve warm.

IMG_4986

IMG_4993

Share

Root Vegetable Ratatouille

November 14, 2014 Appetizer, Entrees, Menu No Comments

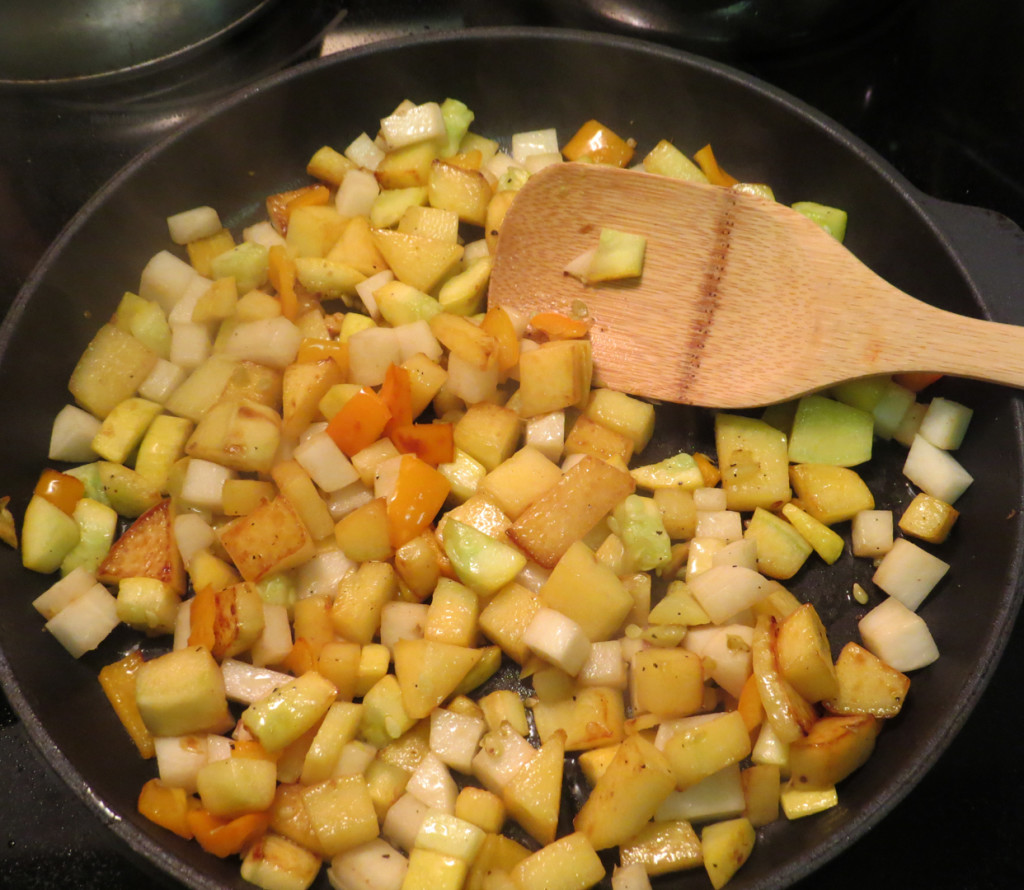
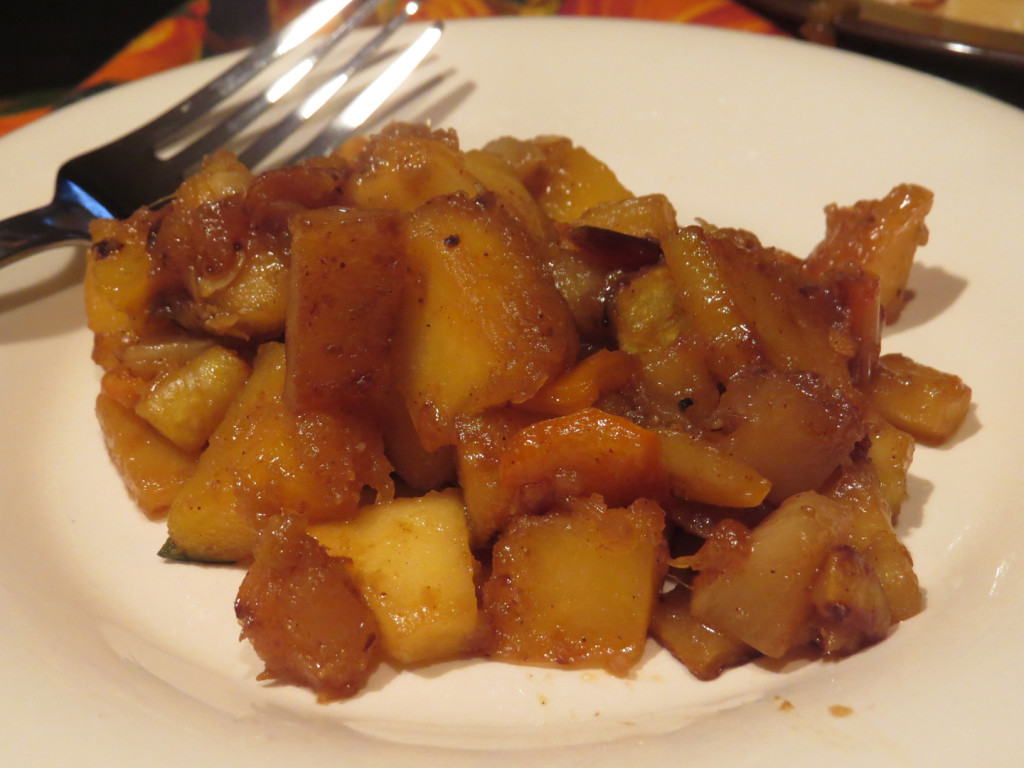
I always enjoy cooking with vegetables, and ratatouille is one of my favorite dishes. With Thanksgiving just around the corner, I came up with a dish that replaces most of the traditional ratatouille veggies (eggplant, tomatoes, summer squash and seasonings) with some of my favorite root vegetables (rutabaga, turnips, acorn squash, along with traditional yellow squash and bell pepper), autumn spices and a Golden Delicious apple for a bit of sweetness. I guess you can even call this dish “rootatouille!” All kidding aside, this is a great recipe to prepare along with your Thanksgiving dinner.

You will need to put in a little bit of effort ahead of time to peel and chop the vegetables. A few minutes in the microwave will help soften the acorn squash for easy cutting, and you’ll want to peel and slice the apple last minute to avoid it from browning. Once the prep work is done, all you’re looking at is 10-15 minutes of sautéing the veggies, and then the dish is ready to serve!


Root Vegetable Ratatouille

1 rutabaga, peeled and diced
1 turnip, peeled and diced
1 yellow squash, diced (you can use green zucchini squash if you prefer)
1 red bell pepper, diced
1 acorn squash (prep directions below)
1 Golden Delicious apple, peeled and diced (prep the apple just before you are ready to add to remaining ingredients to avoid browning)
2 tbspn olive oil
2 tbspn brown sugar
1/2 tspn cinnamon
1/4 tsp ginger
2 tbspn maple syrup (regular pancake syrup will also work)
salt and pepper to taste

Start by cooking the acorn squash whole in the microwave on high for 5 minutes. Carefully remove (it will be hot), let sit until cooled. Once cooled, cut in half, remove pulp and seeds. Remove skin, cut the squash into small chunks, set aside.

In a large skillet, heat olive oil over medium heat. Add the rutabaga, stir until evenly coated, cook for about 5 minutes, until it starts to soften and the pale color starts to turn into a golden brown. Next, add the turnip, pepper and yellow (or zucchini) squash. Stir together and cook for another 5 minutes, until all veggies start to soften. At this point, you’ll want to peel and dice the apple.

Next, add the apple and acorn squash to the mix, stir together. Add the brown sugar, cinnamon, ginger and syrup, mix together. Lower the heat, let simmer, stirring occasionally until all veggies are softened to your liking. If the mixture looks like it’s starting to dry up, you can add a bit of water or broth to loosen it up. Season to taste with salt and pepper.

Serve and enjoy!

veggies2

veggies3

Share

Recent Comments

Archives

powered by
Socialbar